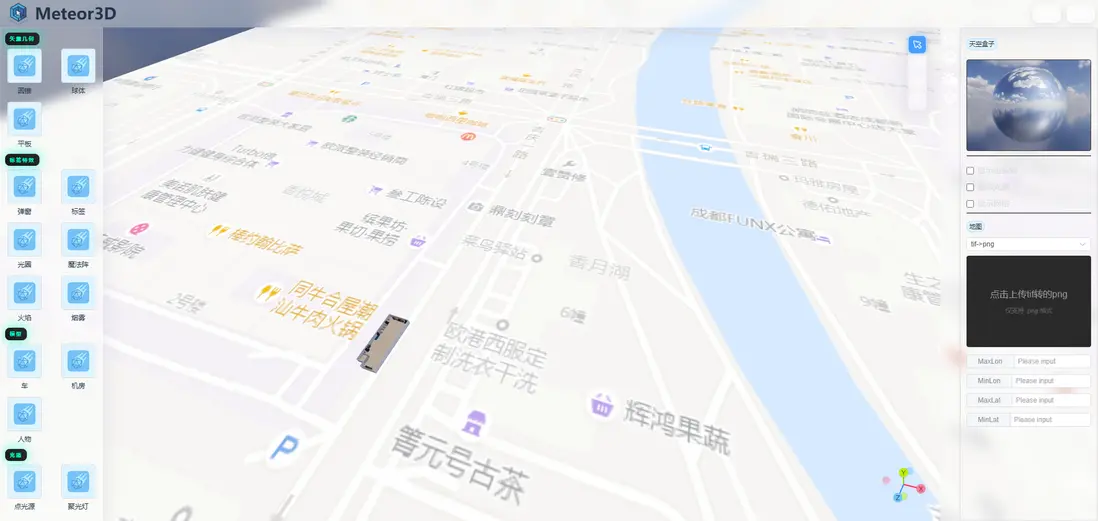
把 TIF 解析成可用紋理(如 PNG/JPEG 或直接用 TIF)。
把它當作材質貼到一個 PlaneGeometry 上。
按照它對應的座標範圍換算成 Three.js 世界座標。
把 Plane 放置在對應位置。
<!DOCTYPE html>
<html>
<head>
    <meta charset="UTF-8">
    <title>Three.js Scene</title>
    <style>
        body { margin: 0; }
        canvas { width: 100%; height: 100% }
    </style>
</head>
<body>
    <script type="importmap">
        {
            "imports": {
                "three": "./three172/build/three.module.js",
                "three/addons/": "./three172/examples/jsm/"
            }
        }
    </script>

    <script type="module">
        import * as THREE from 'three';
        import {OrbitControls} from 'three/addons/controls/OrbitControls.js'


        const geoBounds = {
  minLon: 104.055633544921875,
  maxLon: 104.069366455078125,
  minLat: 30.550435135095270,
  maxLat: 30.561078433806014,
};

const imgWidth = 2560;
const imgHeight = 2304;

// ---------------------------------
// 初始化場景、相機、渲染器
// ---------------------------------
const scene = new THREE.Scene();
scene.background = new THREE.Color(0xf0f0f0);

const camera = new THREE.PerspectiveCamera(60, window.innerWidth/window.innerHeight, 0.1, 500000);
camera.position.set(0, 0, 500); // 從側面看地圖
// camera.up.set(0,0,1); // 調整Z軸向上

const renderer = new THREE.WebGLRenderer({ antialias: true });
renderer.setSize(window.innerWidth, window.innerHeight);
document.body.appendChild(renderer.domElement);

const controls = new OrbitControls(camera, renderer.domElement);
controls.target.set(0,0,0);
controls.update();

// ---------------------------------
// 根據邊界計算地圖平面尺寸
// ---------------------------------
// 經緯度範圍(這裏只是用比例換算,不做墨卡託轉換)
const lonRange = geoBounds.maxLon - geoBounds.minLon;
const latRange = geoBounds.maxLat - geoBounds.minLat;

// 按圖片像素比例設置世界單位尺寸,比如按像素大小直接對應世界單位
// 也可以換成比例,比如1像素=1單位
const planeWidth = imgWidth;
const planeHeight = imgHeight;

const texture = new THREE.TextureLoader().load('./assets/55.png', () => {
  renderer.render(scene, camera);
});

// ---------------------------------
// 創建平面貼圖
// ---------------------------------
const planeGeo = new THREE.PlaneGeometry(planeWidth, planeHeight);
const planeMat = new THREE.MeshBasicMaterial({ map: texture, side: THREE.DoubleSide });
const plane = new THREE.Mesh(planeGeo, planeMat);
scene.add(plane);

// 平面居中放置
plane.rotation.x = -Math.PI / 2; // 讓平面平躺(XZ平面),也可根據需要旋轉
// 默認 plane.center 是 (0,0),所以不用平移
// 你也可以根據經緯度比例換算對應平移,比如:
// plane.position.set(...)


// ---------------------------------
// 座標轉換示例:
// lonLat 到平面座標
// ---------------------------------
function lonLatToPlane(lon, lat) {
  const x = ((lon - geoBounds.minLon) / lonRange - 0.5) * planeWidth;
  const y = ((lat - geoBounds.minLat) / latRange - 0.5) * planeHeight;
  return new THREE.Vector3(x, 0, -y); // Y軸朝上,所以取負
}

// 放個點看看效果
const point = new THREE.Mesh(
  new THREE.SphereGeometry(10),
  new THREE.MeshBasicMaterial({ color: 0xff0000 })
);
const pointPos = lonLatToPlane(104.0646589,30.5568166); // 示例座標
point.position.copy(pointPos);
scene.add(point);

// ---------------------------------
// 燈光
// ---------------------------------
const light = new THREE.HemisphereLight(0xffffff, 0x888888, 1);
scene.add(light);

// ---------------------------------
// 響應式
// ---------------------------------
window.addEventListener('resize', () => {
  camera.aspect = window.innerWidth/window.innerHeight;
  camera.updateProjectionMatrix();
  renderer.setSize(window.innerWidth, window.innerHeight);
});

// ---------------------------------
// 動畫
// ---------------------------------
function animate() {
  requestAnimationFrame(animate);
  renderer.render(scene, camera);
}
animate();


    </script>
</body>
</html>
推薦一個數字孿生的開源框架
https://github.com/nikonikoCW/Meteor3DEditor


