這是一個使用 WebFlux 和 MongoDB 構建響應式 Spring Boot WebSocket 聊天的分步指南,包括配置、處理程序和手動測試。

正如您可能已經從標題中猜到的,今天的主題將是 Spring Boot WebSockets。不久前,我提供了一個基於 Akka 工具包庫的 WebSocket 聊天示例。然而,這個聊天將擁有更多一些功能,以及一個相當不同的設計。
我將跳過某些部分,以避免與上一篇文章的內容有太多重複。在這裏您可以找到關於 WebSockets 更深入的介紹。請注意,本文中使用的所有代碼也可以在 GitHub 倉庫中找到。
Spring Boot WebSocket:使用的工具
讓我們從描述將用於實現整個應用程序的工具開始本文的技術部分。由於我無法完全掌握如何使用經典的 Spring STOMP 覆蓋來構建真正的 WebSocket API,我決定選擇 Spring WebFlux 並使一切具有響應式特性。
- Spring Boot – 基於 Spring 的現代 Java 應用程序離不開 Spring Boot;所有的自動配置都是無價的。
- Spring WebFlux – 經典 Spring 的響應式版本,為處理 WebSocket 和 REST 提供了相當不錯且描述性的工具集。我敢説,這是在 Spring 中實際獲得 WebSocket 支持的唯一方法。
- Mongo – 最流行的 NoSQL 數據庫之一,我使用它來存儲消息歷史記錄。
- Spring Reactive Mongo – 用於以響應式方式處理 Mongo 訪問的 Spring Boot 啓動器。在一個地方使用響應式而在另一個地方不使用並不是最好的主意。因此,我決定也讓數據庫訪問具有響應式特性。
讓我們開始實現吧!
Spring Boot WebSocket:實現
依賴項與配置
pom.xml
<dependencies>
    <!--編譯時依賴-->
    <dependency>
        <groupId>org.springframework.boot</groupId>
        <artifactId>spring-boot-starter-webflux</artifactId>
    </dependency>
    <dependency>
        <groupId>org.springframework.boot</groupId>
        <artifactId>spring-boot-starter-data-mongodb-reactive</artifactId>
    </dependency>
</dependencies>
application.properties
spring.data.mongodb.uri=mongodb://chats-admin:admin@localhost:27017/chats我更喜歡 .properties 而不是 .yml——依我拙見,YAML 在較大規模上不可讀且難以維護。
WebSocketConfig
@Configuration
class WebSocketConfig {

    @Bean
    ChatStore chatStore(MessagesStore messagesStore) {
        return new DefaultChatStore(Clock.systemUTC(), messagesStore);
    }

    @Bean
    WebSocketHandler chatsHandler(ChatStore chatStore) {
        return new ChatsHandler(chatStore);
    }

    @Bean
    SimpleUrlHandlerMapping handlerMapping(WebSocketHandler wsh) {
        Map<String, WebSocketHandler> paths = Map.of("/chats/{id}", wsh);
        return new SimpleUrlHandlerMapping(paths, 1);
    }

    @Bean
    WebSocketHandlerAdapter webSocketHandlerAdapter() {
        return new WebSocketHandlerAdapter();
    }
}
出乎意料的是,這裏定義的四個 Bean 都非常重要。
ChatStore– 用於操作聊天的自定義 Bean,我將在後續步驟中詳細介紹這個 Bean。WebSocketHandler– 將存儲所有與處理 WebSocket 會話相關邏輯的 Bean。SimpleUrlHandlerMapping– 負責將 URL 映射到正確的處理器,此處理的完整 URL 看起來大致像這樣:ws://localhost:8080/chats/{id}。WebSocketHandlerAdapter– 一種功能性的 Bean,它為 Spring Dispatcher Servlet 添加了 WebSocket 處理支持。
ChatsHandler
class ChatsHandler implements WebSocketHandler {

    private final Logger log = LoggerFactory.getLogger(ChatsHandler.class);

    private final ChatStore store;

    ChatsHandler(ChatStore store) {
        this.store = store;
    }

    @Override
    public Mono<Void> handle(WebSocketSession session) {
        String[] split = session.getHandshakeInfo()
            .getUri()
            .getPath()
            .split("/");
        String chatIdStr = split[split.length - 1];
        int chatId = Integer.parseInt(chatIdStr);
        ChatMeta chatMeta = store.get(chatId);
        if (chatMeta == null) {
            return session.close(CloseStatus.GOING_AWAY);
        }
        if (!chatMeta.canAddUser()) {
            return session.close(CloseStatus.NOT_ACCEPTABLE);
        }

        String sessionId = session.getId();
        store.addNewUser(chatId, session);
        log.info("New User {} join the chat {}", sessionId, chatId);
        return session
               .receive()
               .map(WebSocketMessage::getPayloadAsText)
               .flatMap(message -> store.addNewMessage(chatId, sessionId, message))
               .flatMap(message -> broadcastToSessions(sessionId, message, store.get(chatId).sessions()))
               .doFinally(sig -> store.removeSession(chatId, session.getId()))
               .then();
    }

    private Mono<Void> broadcastToSessions(String sessionId, String message, List<WebSocketSession> sessions) {
        return Flux.fromStream(sessions
                .stream()
                .filter(session -> !session.getId().equals(sessionId))
                .map(session -> session.send(Mono.just(session.textMessage(message)))))
                .then();
    }
}
正如我上面提到的,在這裏您可以找到所有與處理 WebSocket 會話相關的邏輯。首先,我們從 URL 解析聊天的 ID 以獲取目標聊天。根據特定聊天的上下文,響應不同的狀態。
此外,我還將消息廣播到與特定聊天相關的所有會話——以便用户實際交換消息。我還添加了 doFinally 觸發器,它將從 chatStore 中清除已關閉的會話,以減少冗餘通信。總的來説,這段代碼是響應式的;我需要遵循一些限制。我試圖使其儘可能簡單和可讀,如果您有任何改進的想法,我持開放態度。
ChatsRouter
@Configuration(proxyBeanMethods = false)
class ChatRouter {

    private final ChatStore chatStore;

    ChatRouter(ChatStore chatStore) {
        this.chatStore = chatStore;
    }

    @Bean
    RouterFunction<ServerResponse> routes() {
        return RouterFunctions
        .route(POST("api/v1/chats/create"), e -> create(false))
        .andRoute(POST("api/v1/chats/create-f2f"), e -> create(true))
        .andRoute(GET("api/v1/chats/{id}"), this::get)
        .andRoute(DELETE("api/v1/chats/{id}"), this::delete);
    }
}
WebFlux 定義 REST 端點的方法與經典 Spring 有很大不同。上面,您可以看到用於管理聊天的 4 個端點的定義。與 Akka 實現中的情況類似,我希望有一個用於管理聊天的 REST API 和一個用於實際處理聊天的 WebSocket API。我將跳過函數實現,因為它們非常簡單;您可以在 GitHub 上查看它們。
ChatStore
首先,接口:
public interface ChatStore {
    int create(boolean isF2F);
    void addNewUser(int id, WebSocketSession session);
    Mono<String> addNewMessage(int id, String userId, String message);
    void removeSession(int id, String session);
    ChatMeta get(int id);
    ChatMeta delete(int id);
}
然後是實現:
public class DefaultChatStore implements ChatStore {

    private final Map<Integer, ChatMeta> chats;
    private final AtomicInteger idGen;
    private final MessagesStore messagesStore;
    private final Clock clock;

    public DefaultChatStore(Clock clock, MessagesStore store) {
        this.chats = new ConcurrentHashMap<>();
        this.idGen = new AtomicInteger(0);
        this.clock = clock;
        this.messagesStore = store;
    }

    @Override
    public int create(boolean isF2F) {
        int newId = idGen.incrementAndGet();
        ChatMeta chatMeta = chats.computeIfAbsent(newId, id -> {
            if (isF2F) {
                return ChatMeta.ofId(id);
            }
            return ChatMeta.ofIdF2F(id);
        });
        return chatMeta.id;
    }

    @Override
    public void addNewUser(int id, WebSocketSession session) {
        chats.computeIfPresent(id, (k, v) -> v.addUser(session));
    }

    @Override
    public void removeSession(int id, String sessionId) {
        chats.computeIfPresent(id, (k, v) -> v.removeUser(sessionId));
    }

    @Override
    public Mono<String> addNewMessage(int id, String userId, String message) {
        ChatMeta meta = chats.getOrDefault(id, null);
        if (meta != null) {
            Message messageDoc = new Message(id, userId, meta.offset.getAndIncrement(), clock.instant(), message);
            return messagesStore.save(messageDoc)
                    .map(Message::getContent);
        }
        return Mono.empty();
    }
    // 省略部分
}
ChatStore 的基礎是 ConcurrentHashMap,它保存所有開放聊天的元數據。接口中的大多數方法都不言自明,背後沒有什麼特別之處。
create– 創建一個新聊天,帶有一個布爾屬性,指示聊天是 f2f 還是羣聊。addNewUser– 向現有聊天添加新用户。removeUser– 從現有聊天中移除用户。get– 獲取具有 ID 的聊天的元數據。delete– 從 CMH 中刪除聊天。
這裏唯一複雜的方法是 addNewMessages。它增加聊天內的消息計數器,並將消息內容持久化到 MongoDB 中,以實現持久性。
MongoDB
消息實體
public class Message {
   @Id
   private String id;
   private int chatId;
   private String owner;
   private long offset;
   private Instant timestamp;
   private String content;
}
存儲在數據庫中的消息內容模型,這裏有三個重要的字段:
chatId– 表示發送特定消息的聊天。ownerId– 消息發送者的用户 ID。offset– 消息在聊天中的序號,用於檢索排序。
MessageStore
public interface MessagesStore extends ReactiveMongoRepository<Message, String> {}沒什麼特別的,經典的 Spring 倉庫,但是以響應式方式實現,提供了與 JpaRepository 相同的功能集。它直接在 ChatStore 中使用。此外,在主應用程序類 WebsocketsChatApplication 中,我通過使用 @EnableReactiveMongoRepositories 來激活響應式倉庫。沒有這個註解,上面的 messageStore 將無法工作。好了,我們完成了整個聊天的實現。讓我們測試一下!
Spring Boot WebSocket:測試
對於測試,我使用 Postman 和 Simple WebSocket Client。
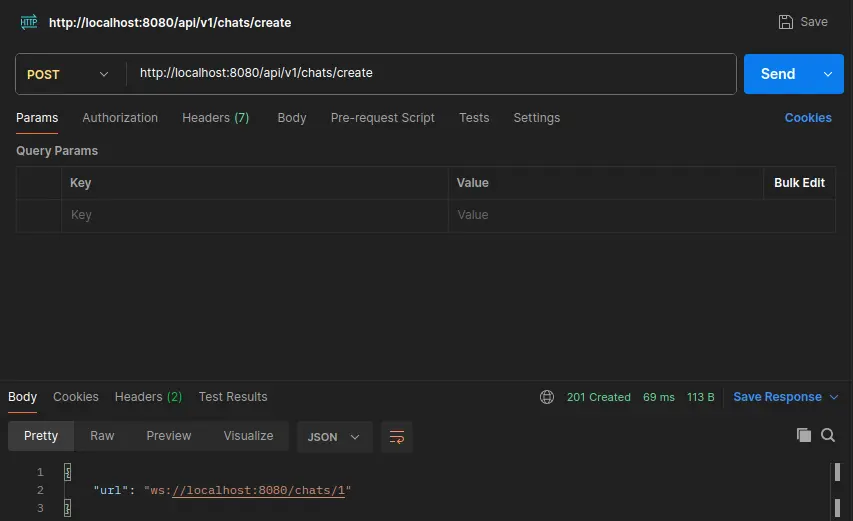
- 我正在使用 Postman 創建一個新聊天。在響應體中,我得到了最近創建的聊天的 WebSocket URL。
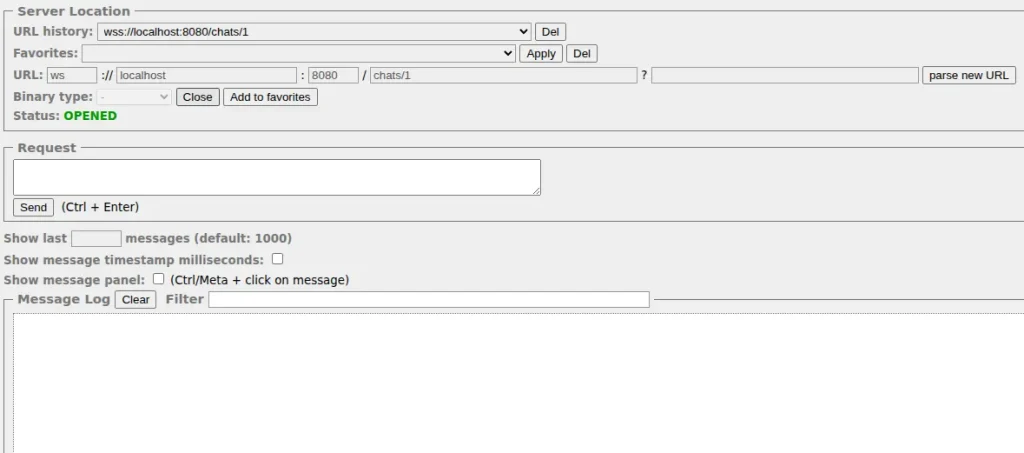
- 現在是使用它們並檢查用户是否可以相互通信的時候了。Simple Web Socket Client 在這裏派上用場。因此,我在這裏連接到新創建的聊天。
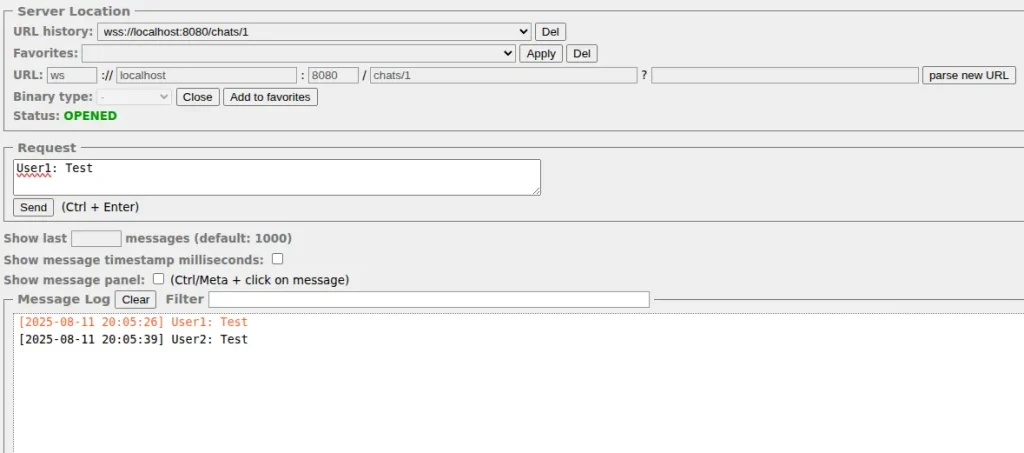
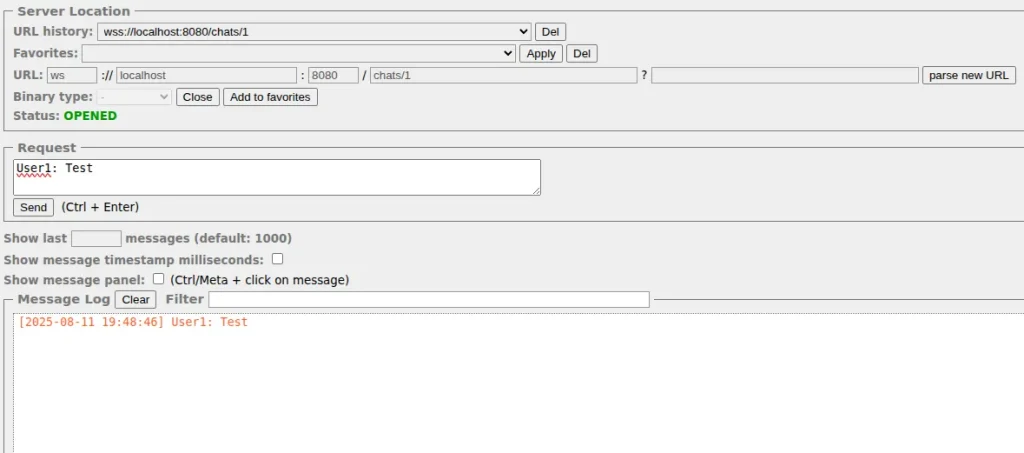
- 好了,一切正常,用户可以相互通信了。
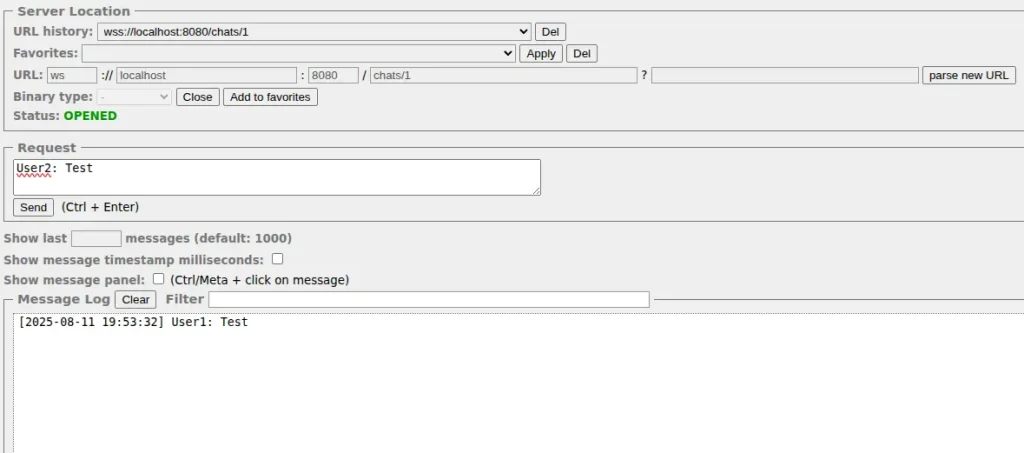
還有最後一件事要做。讓我們花點時間看看哪些地方可以做得更好。
可以改進的地方
由於我剛剛構建的是最基礎的聊天應用程序,有一些(或者實際上相當多)地方可以做得更好。下面,我列出了一些我認為值得改進的方面:
- 身份驗證和重新加入支持 – 目前,一切都基於
sessionId。這不是一個最優的方法。最好能有一些身份驗證機制,並基於用户數據實現實際的重新加入。 - 發送附件 – 目前,聊天僅支持簡單的文本消息。雖然發消息是聊天的基本功能,但用户也喜歡交換圖片和音頻文件。
- 測試 – 目前沒有測試,但為什麼要保持這樣呢?測試總是一個好主意。
- offset 溢出 – 目前,它只是一個簡單的
int。如果我們要在非常長的時間內跟蹤 offset,它遲早會溢出。
總結
好了!Spring Boot WebSocket 聊天已經實現,主要任務已完成。您對下一步要開發什麼有了一些想法。
請記住,這個聊天案例非常簡單,對於任何類型的商業項目,都需要大量的修改和開發。
無論如何,我希望您在閲讀本文時學到了一些新東西。
感謝您的時間。
【注】本文譯自:Spring Boot WebSocket: Building a Multichannel Chat in Java


