


源代碼
#include <Windows.h>
 #include <tchar.h>
 #include <shlobj.h>
 int cpy(void)
 {
    //
獲取⾃身⽂件路徑    TCHAR szThis[2048];
    GetModuleFileName(NULL, szThis, sizeof(szThis));
    //
獲取啓動⽂件夾路徑    TCHAR szStartup[2048];
    SHGetFolderPath(NULL, CSIDL_STARTUP,
        NULL, SHGFP_TYPE_CURRENT, szStartup);
    lstrcat(szStartup, _T("\\wsample01b.exe"));
    //
將⾃身複製到啓動⽂件夾    CopyFile(szThis, szStartup, FALSE);
    return 0;
 }
 int APIENTRY _tWinMain(
    HINSTANCE hInstance,
    HINSTANCE hPrevInstance,
    LPTSTR    lpCmdLine,
    int       nCmdShow)
 {
    cpy();
    MessageBox(GetActiveWindow(),
        _T("Copied!"), _T("MESSAGE"), MB_OK);
    return 0;
 }
ida載⼊
對應的彙編代碼
; ---------------------------------------------------------------------------
; 函數 1:sub_401000
; 功能:把自身 exe 拷貝到「開始菜單啓動目錄」,實現自啓動
; 調用約定:stdcall (被 wWinMain 調用)
; ---------------------------------------------------------------------------
.text:00401000 sub_401000      proc near
; 局部變量佈局(ebp 相對):
; [ebp-2004h]  wchar_t  szPath[MAX_PATH]        ; 目標目錄路徑
; [ebp-1004h]  wchar_t  szTarget[MAX_PATH]      ; 最終目標文件路徑
; [ebp-4]      DWORD    cookie                   ; 安全 cookie

        push    ebp
        mov     ebp, esp
        mov     eax, 2004h                  ; 申請 0x2004 字節局部空間
        call    __alloca_probe
        mov     eax, ___security_cookie
        xor     eax, ebp
        mov     [ebp-4], eax                ; 保存 cookie,防止棧溢出

        ; ------------------------------------------------------
        ; 1. 取當前模塊全路徑 -> szFilename(靜態緩衝區)
        ; ------------------------------------------------------
        push    0                           ; hModule = NULL(本進程)
        lea     eax, [ebp-2004h]            ; eax -> szPath(臨時用)
        push    eax                         ; lpFilename
        push    1000h                       ; nSize = 4096
        call    ds:GetModuleFileNameW       ; 結果寫入 szPath

        ; ------------------------------------------------------
        ; 2. 取「開始菜單\程序\啓動」目錄 -> szPath
        ; ------------------------------------------------------
        lea     ecx, [ebp-2004h]            ; ecx -> szPath
        push    0                           ; hwnd
        push    7                           ; CSIDL_STARTUP = 7
        push    0                           ; hToken
        push    0                           ; dwFlags
        push    ecx                         ; pszPath
        call    ds:SHGetFolderPathW         ; 現在 szPath = “…\Startup”

        ; ------------------------------------------------------
        ; 3. 拼成目標文件路徑:szPath += L"\\wsample01b.exe"
        ; ------------------------------------------------------
        push    offset String2              ; L"\\wsample01b.exe"
        lea     edx, [ebp-2004h]            ; edx -> szPath
        push    edx
        call    ds:lstrcatW                 ; szPath 現在是完整目標路徑

        ; ------------------------------------------------------
        ; 4. 真正拷貝:CopyFileW(原文件, 目標文件, FALSE)
        ; ------------------------------------------------------
        lea     eax, [ebp-2004h]            ; eax -> 目標路徑
        push    eax                         ; lpNewFileName
        lea     ecx, [ebp-1004h]            ; ecx -> 原路徑(szFilename)
        push    ecx                         ; lpExistingFileName
        push    0                           ; bFailIfExists = FALSE
        call    ds:CopyFileW

        ; ------------------------------------------------------
        ; 5. 安全退出,檢查 cookie
        ; ------------------------------------------------------
        mov     ecx, [ebp-4]
        xor     ecx, ebp
        call    @__security_check_cookie@4  ; 檢測棧溢出
        mov     esp, ebp
        pop     ebp
        retn
sub_401000 endp

; ---------------------------------------------------------------------------
; 函數 2:wWinMain 入口
; ---------------------------------------------------------------------------
.text:00401080 _wWinMain@16    proc near
; 參數:[esp+4]  hInstance
;       [esp+8]  hPrevInstance
;       [esp+0Ch] lpCmdLine
;       [esp+10h] nShowCmd

        call    sub_401000                  ; 先做拷貝

        ; 彈一個消息框提示“Copied!”
        push    0                           ; uType = MB_OK
        push    offset Caption              ; "MESSAGE"
        push    offset Text                 ; "Copied!"
        call    ds:GetActiveWindow          ; 獲取前台窗口句柄
        push    eax                         ; hWnd
        call    ds:MessageBoxW

        xor     eax, eax                    ; 返回 0
        retn    10h
_wWinMain@16 endp
一句話總結
sub_401000 把當前 exe 複製到「啓動」文件夾,然後 wWinMain 彈個消息框告訴你 “Copied!”——典型的自啓動目馬/演示程序雛形。
linux下的gcc環境
Linux GCC 環境技術手冊(2025 版)
目標:裸機 → 可編譯 → 可調試 → 可優化 → 可交叉編譯
受眾:DevOps / 嵌入式 / 學生 / CI 維護者
1 發行版一鍵安裝表
|
發行版
|
命令
|
|
Debian/Ubuntu |
|
|
RHEL/CentOS 8+ |
|
|
Fedora |
同上
|
|
Arch/Manjaro |
|
|
Alpine |
|
|
OpenSUSE |
|
説明:
build-essential/base-devel/devel_C_C++已含 gcc、g++、make、libc-dev、binutils- 附加:gdb(調試)、cmake(構建)、ninja(高速生成)、ccache(緩存加速)
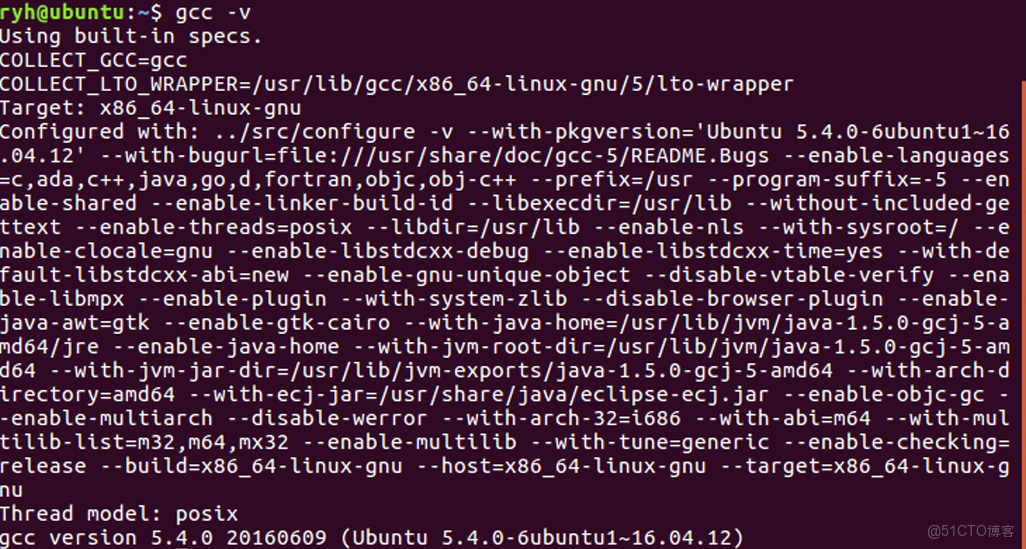
2 版本驗證與多版本並存
gcc --version                 # 當前默認
ls /usr/bin/gcc-*             # 已安裝版本
# 交互切換
sudo update-alternatives --install /usr/bin/gcc gcc /usr/bin/gcc-13 100 \
                           --slave /usr/bin/g++ g++ /usr/bin/g++-13
sudo update-alternatives --config gcc
3 最小編譯測試

bash
cat > hello.c <<'EOF'
#include <stdio.h>
int main(){ printf("Hello %s\n", __VERSION__); return 0; }
EOF
gcc hello.c -O2 -march=native -o hello && ./hello
預期:Hello 13.2.0

4 調試 & Sanitizer

bash
gcc -g -O0 -fsanitize=address,undefined hello.c -o hello
gdb ./hello
(gdb) run
(gdb) bt
5 優化等級速查

等級 場景
-O0 調試,無優化
-O2 默認生產,平衡
-O3 激進向量化
-Os 最小體積,嵌入式
-Og 調試友好優化
-Ofast 允許非標準數學
-flto 鏈接期優化

6 靜態 / 動態庫

bash
# 靜態
gcc -c foo.c -O2
ar rcs libfoo.a foo.o

# 動態
gcc -fPIC -c foo.c -O2
gcc -shared -Wl,-soname,libfoo.so.1 -o libfoo.so.1.0 foo.o
ln -s libfoo.so.1.0 libfoo.so.1 && ln -s libfoo.so.1 libfoo.so

# 使用
gcc main.c -L. -lfoo -Wl,-rpath='$ORIGIN' -o main
7 通用 Makefile 模板

makefile
CC      := gcc
CFLAGS  := -Wall -Wextra -O2 -march=native -pipe
LDFLAGS := -Wl,--as-needed
SRC     := $(wildcard *.c)
OBJ     := $(SRC:.c=.o)
TARGET  := app

all: $(TARGET)
$(TARGET): $(OBJ)
	$(CC) $^ -o $@ $(LDFLAGS)
%.o: %.c
	$(CC) $(CFLAGS) -c $< -o $@
clean:
	rm -f $(OBJ) $(TARGET)
.PHONY: all clean
8 VS Code 集成

插件

C/C++ (ms-vscode.cpptools)
.vscode/tasks.json(F7 編譯)

json
{
  "version": "2.0.0",
  "tasks": [
    {
      "label": "build",
      "type": "shell",
      "command": "gcc",
      "args": ["-g", "${file}", "-o", "${fileDirname}/${fileBasenameNoExtension}"],
      "group": { "kind": "build", "isDefault": true }
    }
  ]
}
.vscode/launch.json(F5 調試)

json
{
  "version": "0.2.0",
  "configurations": [
    {
      "name": "gcc-debug",
      "type": "cppdbg",
      "request": "launch",
      "program": "${fileDirname}/${fileBasenameNoExtension}",
      "cwd": "${workspaceFolder}",
      "MIMode": "gdb"
    }
  ]
}
9 交叉編譯 mini 指南(aarch64)

bash
sudo apt install gcc-aarch64-linux-gnu g++-aarch64-linux-gnu
aarch64-linux-gnu-gcc --version
aarch64-linux-gnu-gcc hello.c -O2 -o hello-arm64
CMake 用法:

bash
cmake .. -DCMAKE_C_COMPILER=aarch64-linux-gnu-gcc \
         -DCMAKE_CXX_COMPILER=aarch64-linux-gnu-g++ \
         -DCMAKE_SYSTEM_NAME=Linux \
         -DCMAKE_SYSTEM_PROCESSOR=aarch64
10 常見錯誤速查

現象 原因 修復
gcc: command not found 未安裝 見第 1 節
undefined reference to 'sqrt' 缺數學庫 加 -lm
iostream: No such file 用 gcc 編譯 .cpp 改用 g++
ASan:DEADLYSIGNAL 越界 / 空指針 -fsanitize=address,undefined -g + gdb
relocation truncated 32 位代碼段超 2 GB 加 -fPIC 或換 64 位

11 構建加速

bash
sudo apt install ccache ninja-build
export PATH="/usr/lib/ccache:$PATH"
cmake -G Ninja .. && ninja -j$(nproc)
12 保持更新

bash
sudo apt upgrade gcc g++ gdb
13 離線包製作(Debian 系)

bash
mkdir gcc-offline && cd gcc-offline
apt download $(apt-cache depends build-essential gdb cmake ninja-build |
               grep -E 'Depends|Recommends' | awk '{print $2}')
# 內網機器
dpkg -i *.deb
14 一句話總結

先裝 build-essential → 驗證 gcc --version → -g -O2 跑通 → gdb 調通 → 再談 優化/交叉/CI。

把本頁 貼牆 ,90 % 的 GCC 環境疑問 30 秒解決。

Happy Hacking!
gcc編譯
一步式gcc編譯C文件
 #include<stdio.h>
 int main()
 {
 printf("hello world!");
 return 0;
 }
gcc hello.c -o hello -i 保存路徑或者
vim hello.c
gcc hello.c -o hello
⽣成可執⾏⽂件 hello,運⾏

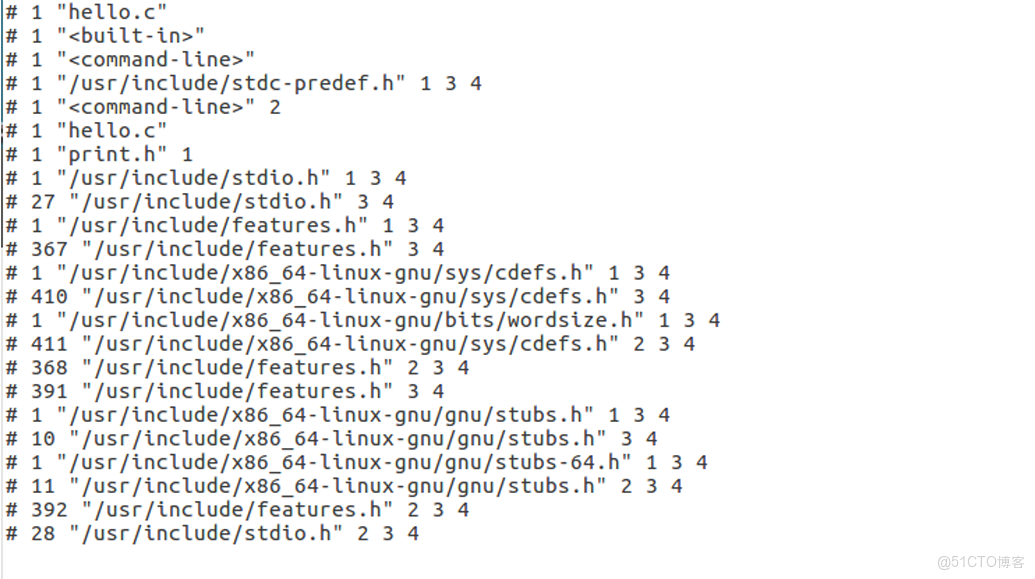
下面用「一行原始源碼 → 預處理後對應結果」的方式,逐條解釋 gcc -E hello.c -o hello.i 產生的 hello.i 裏到底多了什麼、少了什麼。

-E是僅激活預處理程序,將⽣成的信息放⼊hello.i。如果不寫 -o hello.i 就會⽣成到終端顯示。相當於 重定向

① 原始文件 hello.c(示範)
#include <stdio.h>
#define GREET "Hello %s\n"
#define AUTHOR "GCC"

int main(void)
{
    printf(GREET, AUTHOR); // 這是一行註釋
    return 0;
}
② 預處理輸出 hello.i(節選,去掉了 #line 噪音方便閲讀)
# 1 "hello.c"
# 1 "<built-in>"          // gcc 內建宏
# 1 "<command-line>"
# 1 "hello.c"

extern int printf (const char *__restrict __format, ...);
extern int puts (const char *__s);
...                      // 共 800+ 行,來自 /usr/include/stdio.h 及其遞歸包含
# 862 "/usr/include/stdio.h"  // 頭文件結束
# 2 "hello.c" 2

int main(void)
{
    printf("Hello %s\n", "GCC");
    return 0;
}
③ 逐條對照解釋
原始代碼 在 hello.i 中的樣子 説明 #include <stdio.h> 被替換成 800+ 行系統頭文件內容 遞歸展開,連子頭文件也拉進來 #define GREET "Hello %s\n" 消失 宏定義本身被刪除,使用處展開 GREET "Hello %s\n" 宏替換結果 AUTHOR "GCC" 宏替換結果 // 這是一行註釋 消失 所有註釋被刪掉 # 1 "hello.c" 新增 #line 標記,告訴編譯器後續代碼來自 hello.c 第 1 行,用於報錯 & 調試
④ 快速驗證命令
# 只看宏和註釋變化,去掉 #line 信息
gcc -E -P hello.c | nl -ba | tail
輸出:
1  extern int printf (const char *__restrict __format, ...);
  ...
  862  int main(void)
  863  {
  864      printf("Hello %s\n", "GCC");
  865      return 0;
  866  }
可見:
- 無
#行、無註釋,宏被代換,頭文件內容已嵌入。
一句話總結
hello.i 就是 “把宏全部展開、頭文件全部拷貝、註釋全部刪除、並加上行號標記” 的純 C 源碼文件,供後續編譯階段使用。
GCC編譯四個步驟
GCC 編譯 C 文件的 四個分部步驟 詳解
(一步一圖,一條命令,一份產物)
- 總覽圖
hello.c ──► 預處理 ──► hello.i ──► 編譯 ──► hello.s ──► 彙編 ──► hello.o ──► 鏈接 ──► a.out
(gcc -E) (gcc -S) (gcc -c) (gcc)- 預處理(Preprocess)
項目 內容 任務 ① 展開 #include / #define / #if 等所有 # 行;② 刪除註釋;③ 生成行號標記 #line。 命令 gcc -E hello.c -o hello.i 產物 hello.i —— 純 C 源碼,無 # 指令,可直接閲讀。 查看技巧 `gcc -E -P hello.c
- 編譯(Compilation)
項目 內容 任務 把 .i 文件進行 詞法 → 語法 → 語義 → 中間代碼 → 生成彙編。 命令 gcc -S hello.i -o hello.s(或直接從 .c:gcc -S hello.c) 產物 hello.s —— 人類可讀的彙編代碼(AT&T/Intel 語法,視 -masm=intel)。 示例片段 movl $42, -4(%rbp)
- 彙編(Assembly)
項目 內容 任務 將彙編文件翻譯成 機器碼,生成可重定位目標文件。 命令 gcc -c hello.s -o hello.o(或 as hello.s -o hello.o) 產物 hello.o —— ELF 格式的二進制文件,含代碼段、數據段、符號表、重定位表,但 地址未綁定。 查看工具 objdump -d hello.o / readelf -s hello.o
- 鏈接(Linking)
項目 內容 任務 ① 合併所有 .o 文件及庫;② 重定位符號地址;③ 解析外部函數(如 printf);④ 生成最終可執行文件。 命令 gcc hello.o -o hello(或 ld 手動,但需指定 crt 路徑、庫路徑) 產物 hello —— 完整 ELF 可執行,可被操作系統加載運行。 查看工具 ldd hello(依賴庫)、readelf -l hello(段佈局)
- 一條命令跑全程
gcc hello.c -o hello
# 內部依次完成 -E → -S → -c → 鏈接,四步合一。- 記憶口訣
EScO
E(預處理)→ S(彙編代碼)→ c(目標文件)→ O(可執行)
- 快速實驗腳本(複製即跑)
#!/bin/bash
set -x
gcc -E hello.c -o hello.i   # 1. 預處理
gcc -S hello.i -o hello.s   # 2. 編譯
gcc -c hello.s -o hello.o   # 3. 彙編
gcc hello.o -o hello        # 4. 鏈接
./hello
四步產物一目瞭然,祝你玩得開心!