
目錄
一、vagrant介紹
二、安裝用到的軟件
三、下載系統鏡像。
四、查詢、添加、刪除box
五、vagrant基本操作
一、vagrant介紹
是一款用於管理虛擬機的命令行使用軟件,用Ruby語言開發而成。換言説,可以省去你使用虛擬機創建操作系統的所有操作,比如創建虛擬機,掛在鏡像文件,一步步點擊安裝等等,使用vagrant,這些都不需要做了,簡簡單單兩行命令,快速創建屬於你個人的系統。
在開發方面,Vagrant 是一款用來構建虛擬開發環境的工具,非常適合 php/python/ruby/java 這類語言開發 web 應用。我們可以通過 Vagrant 封裝一個 Linux 的開發環境,分發給團隊成員。成員可以在自己喜歡的桌面系統(Mac/Windows/Linux)上開發程序,代碼卻能統一在封裝好的環境裏運行,非常霸氣。
二、安裝用到的軟件
1、安裝virtualBox (此處不再講解安裝)
(雖然 Vagrant 也支持 VMware,不過 VMware 是收費的,對應的 Vagrant 版本也是收費的)

2、安裝Vagrant
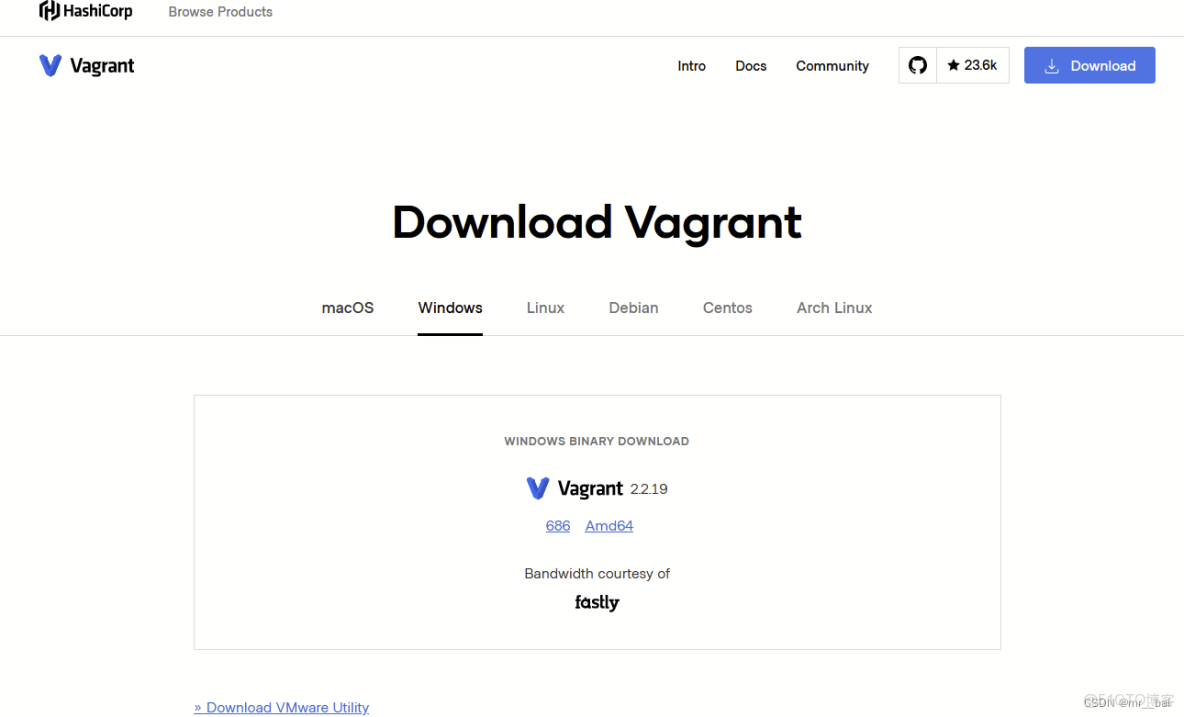
(1)進入官網https://www.vagrantup.com/downloads,選擇版本下載
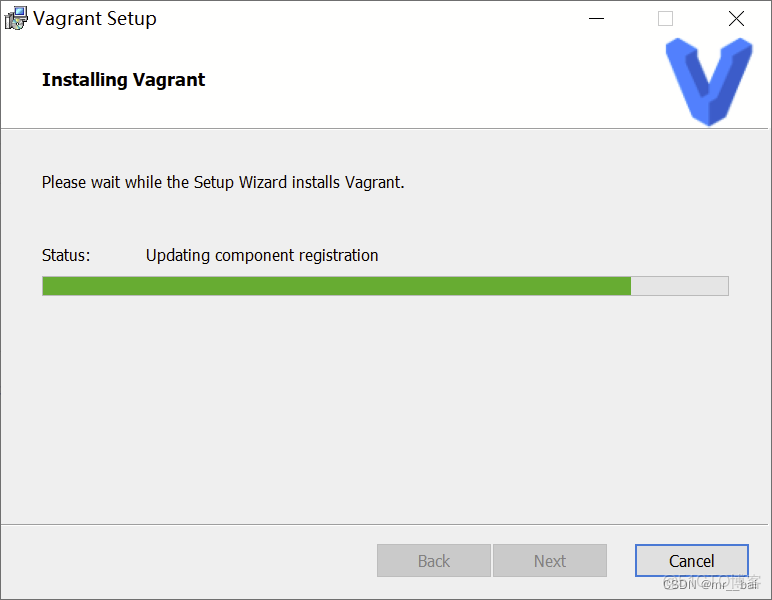
(2)傻瓜式安裝
(3)檢測是否安裝成功
命令行輸入vagrant,如下圖顯示,説明安裝成功。

三、下載系統鏡像。
在vagrant官網中,有一個findbox的按鈕,這個是vagrant的鏡像庫,裏邊列出了都要哪些鏡像可以用,並且提供了操作文檔。
也可通過下邊連接進入:https://app.vagrantup.com/boxes/search

但是這裏默認下載往往會比較慢,所以下面我會介紹如何在其它地方下載到基礎鏡像,然後按照自己的需要重置。如果網速較好,下載順利的朋友可以選擇性地跳過部分內容。
下面我給出最常用的兩個 Linux 操作系統鏡像的下載地址:
CentOS
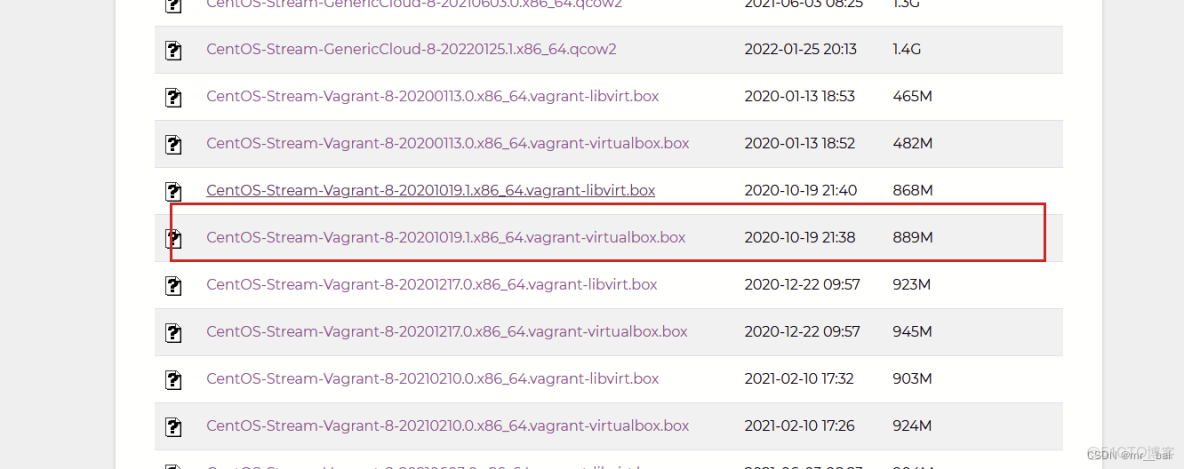
CentOS 的鏡像下載網站是: http://cloud.centos.org/centos/
在其中選擇自己想要下載的版本,列表中有一個 vagrant 目錄,裏面是專門為 vagrant 構建的鏡像。選擇其中的 .box 後綴的文件下載即可。這裏可以使用下載工具,以較快的速度下載下來。
Ubuntu
Ubuntu 的鏡像下載網站是: http://cloud-images.ubuntu.com/
同樣先選擇想要的版本,然後選擇針對 vagrant 的 .box 文件即可。
如果這裏官網的速度較慢,還可以從 清華大學的鏡像站 下載。
例如:
四、查詢、添加、刪除box
接下來我們需要將下載後的 .box 文件添加到 vagrant 中。Vagrant 沒有 GUI,只能從命令行訪問。
(1)查詢vagrant 已經管理的 Box 有哪些:
vagrant box list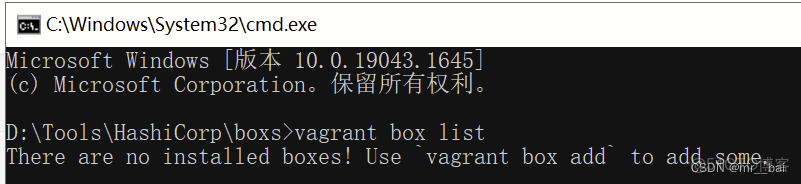
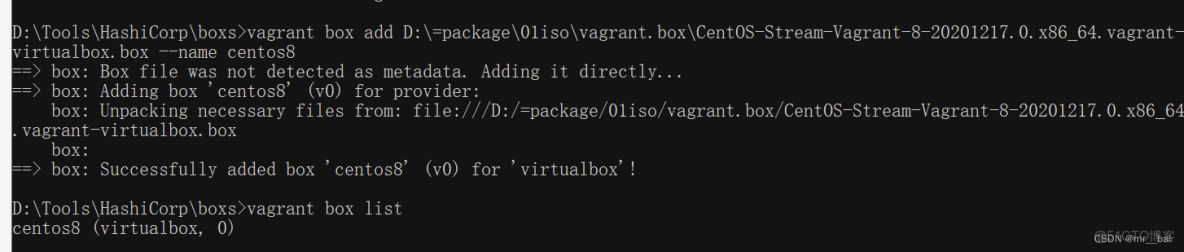
(2)添加box命令
vagrant box add box的文件路徑及文件名 --name centos8vagrant box add 將 box 添加到vagrant 中,
命令後面跟着的是box文件路徑
--name centos8 可以為這個 box 指定一個名字
安裝好以後如下圖,可以在用查詢命令查詢一下,可看到安裝好的box。
(3)刪除box命令
vagrant box remove NAME #根據名字刪除指定的box
五、vagrant基本操作
(1)新建虛擬機
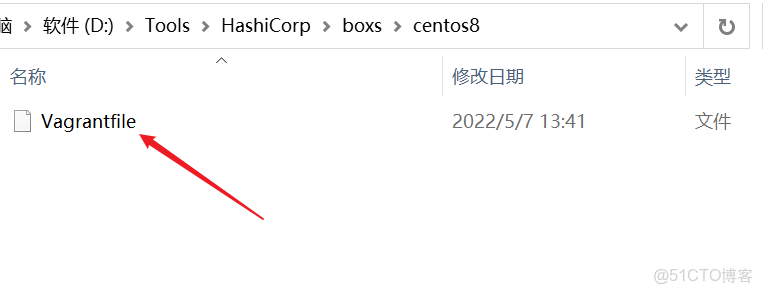
我們在創建虛擬機的時候,會生產一些文件,所以我們為每個虛擬機最好都創建一個獨立的文件夾。然後進入文件夾中。在文件夾路徑下初始化
vagrant init [boxname] #加上boxname 表示使用哪個box 創建虛擬機
初始化後,會在文件夾下生成一個配置文件
(2) 啓動虛擬機
所有的 vagrant 命令都需要在 Vagrantfile 所在的目錄下執行:
vagrant up
如果沒有報錯,説明啓動成功。(注意box的名字,寫錯了會報錯)
(3)查看虛擬機狀態
vagrant status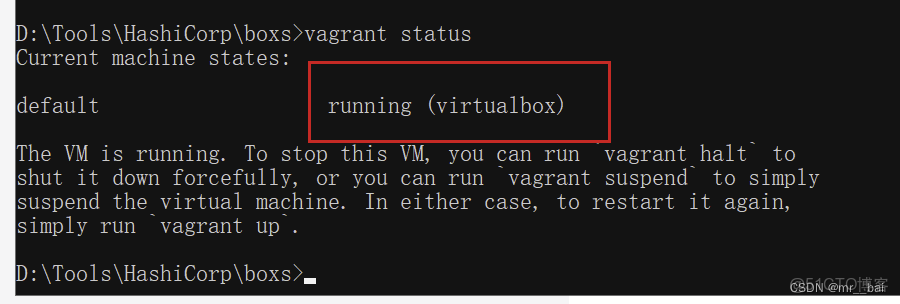
如果是running 就説明我們的虛擬機,啓動成功了
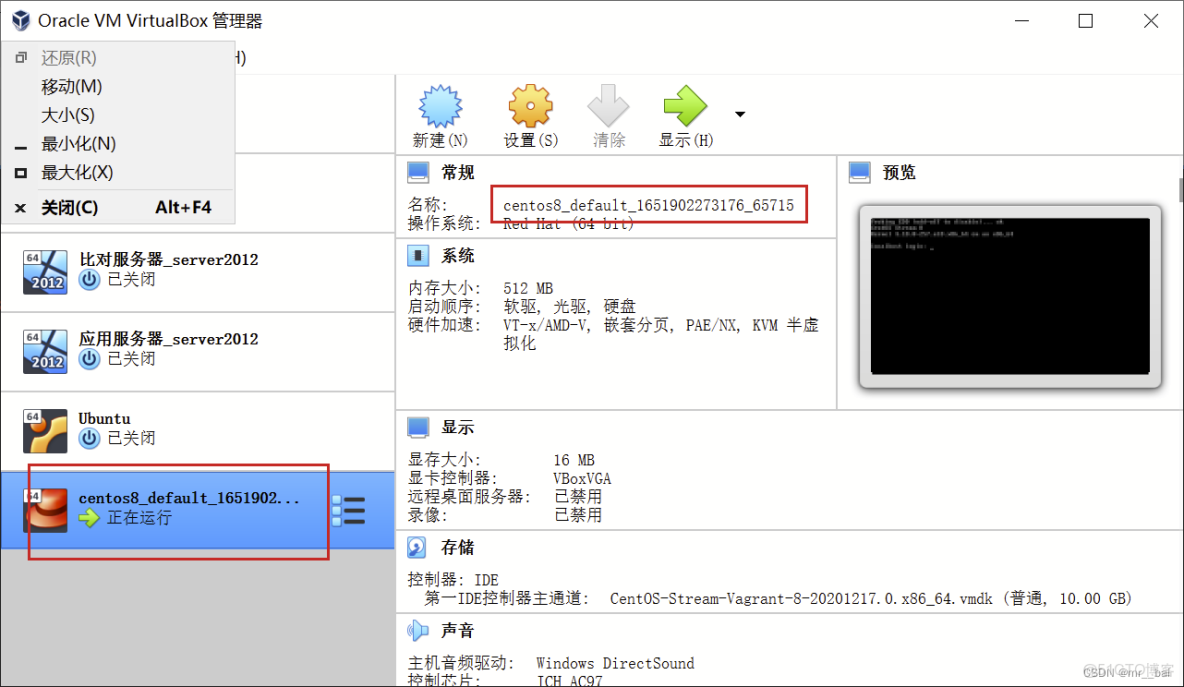
(4)鏈接虛擬機
如果啓動沒問題,此時在vbox的列表中自動生成一個虛擬機,這個虛擬機以文件夾名字命名,可以看到自動創建的虛機:
執行 vagrant ssh 就能以 vagrant 用户直接登入虛機中。
root 用户沒有默認密碼,也不能直接登錄。需要 root 權限的命令可以通過在命令前添加 sudo 來執行,也可以執行 sudo -i 直接切換到 root 用户。
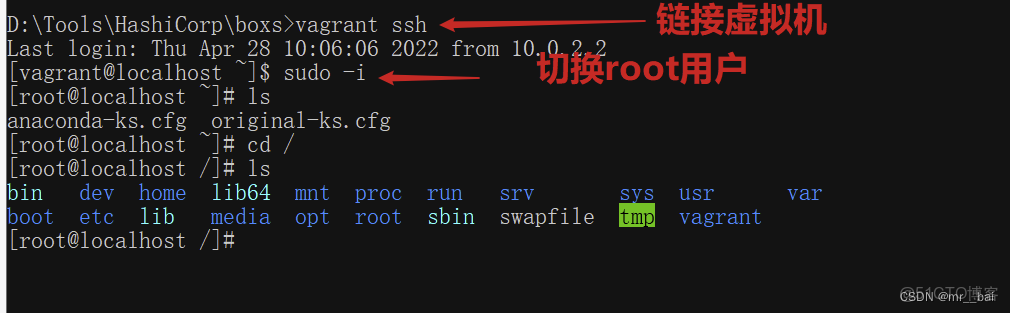
也可以在 VirtualBox 的終端上登錄系統,默認的登錄用户名和密碼都是 vagrant

(5)停止虛擬機
vagrant halt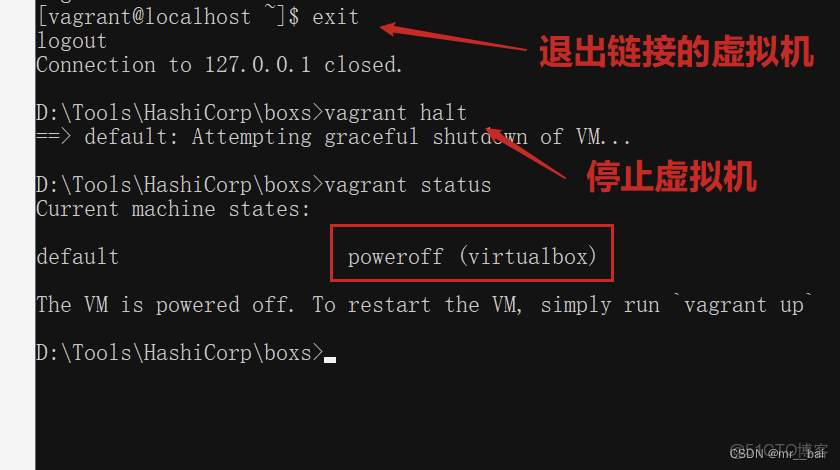
(6)暫停虛擬機
vagrant suspend(7)恢復虛擬機
vagrant resume注意: 不管虛機是關閉還是暫停狀態,甚至是 error 狀態,都可以執行 vagrant up 來讓虛機恢復運行
(8)刪除虛擬機
vagrant destroy六、Vagrantfilefile源文件
# -*- mode: ruby -*-
# vi: set ft=ruby :

# All Vagrant configuration is done below. The "2" in Vagrant.configure
# configures the configuration version (we support older styles for
# backwards compatibility). Please don't change it unless you know what
# you're doing.
Vagrant.configure("2") do |config|
  # The most common configuration options are documented and commented below.
  # For a complete reference, please see the online documentation at
  # https://docs.vagrantup.com.

  # Every Vagrant development environment requires a box. You can search for
  # boxes at https://vagrantcloud.com/search.
  config.vm.box = "centos8"

  # Disable automatic box update checking. If you disable this, then
  # boxes will only be checked for updates when the user runs
  # `vagrant box outdated`. This is not recommended.
  # config.vm.box_check_update = false

  # Create a forwarded port mapping which allows access to a specific port
  # within the machine from a port on the host machine. In the example below,
  # accessing "localhost:8080" will access port 80 on the guest machine.
  # NOTE: This will enable public access to the opened port
  # config.vm.network "forwarded_port", guest: 80, host: 8080

  # Create a forwarded port mapping which allows access to a specific port
  # within the machine from a port on the host machine and only allow access
  # via 127.0.0.1 to disable public access
  # config.vm.network "forwarded_port", guest: 80, host: 8080, host_ip: "127.0.0.1"

  # Create a private network, which allows host-only access to the machine
  # using a specific IP.
  # config.vm.network "private_network", ip: "192.168.33.10"

  # Create a public network, which generally matched to bridged network.
  # Bridged networks make the machine appear as another physical device on
  # your network.
  # config.vm.network "public_network"

  # Share an additional folder to the guest VM. The first argument is
  # the path on the host to the actual folder. The second argument is
  # the path on the guest to mount the folder. And the optional third
  # argument is a set of non-required options.
  # config.vm.synced_folder "../data", "/vagrant_data"

  # Provider-specific configuration so you can fine-tune various
  # backing providers for Vagrant. These expose provider-specific options.
  # Example for VirtualBox:
  #
  # config.vm.provider "virtualbox" do |vb|
  #   # Display the VirtualBox GUI when booting the machine
  #   vb.gui = true
  #
  #   # Customize the amount of memory on the VM:
  #   vb.memory = "1024"
  # end
  #
  # View the documentation for the provider you are using for more
  # information on available options.

  # Enable provisioning with a shell script. Additional provisioners such as
  # Ansible, Chef, Docker, Puppet and Salt are also available. Please see the
  # documentation for more information about their specific syntax and use.
  # config.vm.provision "shell", inline: <<-SHELL
  #   apt-get update
  #   apt-get install -y apache2
  # SHELL
end
這是一個 Ruby 語法的文件,因為 Vagrant 就是用 Ruby 編寫的。如果編輯器沒有語法高亮可以手動設置文件類型為 Ruby。
這個缺省文件內容幾乎都是註釋,提示有哪些配置項可以修改,我們不需要去學 Ruby 編程也可以照葫蘆畫瓢的完成基本的配置。
除了註釋,這個文件的實際生效內容只有3行。
Vagrant.configure("2") do |config|
  config.vm.box = "centos8"
end
這裏的 config.vm.box 對應的就是虛機的鏡像,也就是 box 文件,這是唯一必填的配置項。
特別提醒:Vagrantfile 文件名是固定的寫法,大小寫也要完全一樣,修改了就不認識了
七、自定義配置Vagrantfile
1、配置端口轉發
端口轉發(Port forward)又叫端口映射,就是把虛機的某個端口,映射到宿主機的端口上。這樣就能在宿主機上訪問到虛擬機中的服務。
例如啓動虛機時,默認的 22 (guest) => 2222 (host) (adapter 1) 就是把虛機的 SSH 服務端口(22)映射到宿主機的 2222 端口,這樣直接在宿主機通過 ssh 客户端問 127.0.0.1:2222 端口就等價於訪問虛擬機的 22 端口。
# Create a forwarded port mapping which allows access to a specific port
# within the machine from a port on the host machine. In the example below,
# accessing "localhost:8080" will access port 80 on the guest machine.
# NOTE: This will enable public access to the opened port
# config.vm.network "forwarded_port", guest: 80, host: 8080

# Create a forwarded port mapping which allows access to a specific port
# within the machine from a port on the host machine and only allow access
# via 127.0.0.1 to disable public access
# config.vm.network "forwarded_port", guest: 80, host: 8080, host_ip: "127.0.0.1"
實際上設置端口轉發這個功能並不實用,一個很明顯的問題就是如果啓動多個虛機,很容易就出現宿主機上端口衝突的問題。即使沒有端口衝突,使用起來也不方便,我個人不推薦使用的,可以把這部分配置直接刪掉。直接使用下面的私有網絡。
這個功能是虛擬機軟件提供的,可以在虛機的網卡設置中展開高級選項,找到相關的配置:
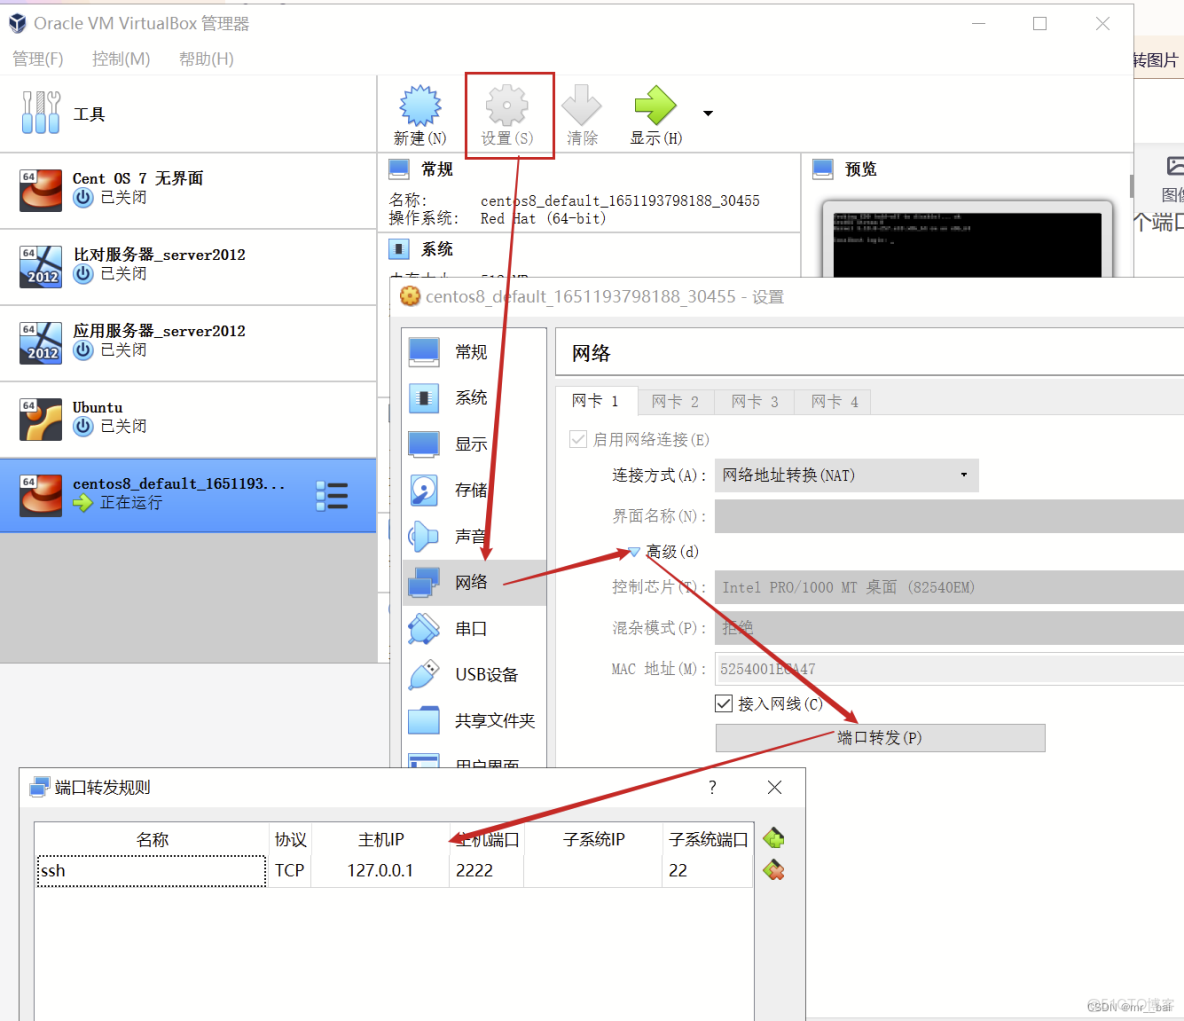
還有個地方需要注意,默認的 SSH 端口映射在這裏沒法直接修改。比如像我這樣,2222 端口出現莫名問題,如果想要把 22 端口轉發到其它端口如 22222,必須要先強制關閉掉默認的那條規則:
(因為不關閉的話,只寫第二行,會在原來的基礎上新加一個端口轉發規則,而不是替代原來的)
config.vm.network "forwarded_port", guest: 22, host: 2222, id: "ssh", disabled: "true"
  config.vm.network "forwarded_port", guest: 22, host: 22222
2、配置私有網絡
下面這段配置用來配置私有網絡,實際上對應的是 VirtualBox 的主機網絡,也就是 HostOnly 網絡
# Create a private network, which allows host-only access to the machine
# using a specific IP.
# config.vm.network "private_network", ip: "192.168.33.10"
最下面一行取消註釋,就可以為虛機設置指定的私有網絡地址:
config.vm.network "private_network", ip: "192.168.6.25"修改完成後,執行 vagrant reload 命令重建虛機,就能看到多出來的網卡了