

模板是 Walrus 的核心功能之一,模板創建完成後用户可以重複使用,並在使用過程中逐漸沉澱研發和運維團隊的最佳實踐,進一步簡化服務及資源的部署。用户可以使用 HCL 語言自定義創建模板,也可以一鍵複用 Terraform 社區中上萬個成熟的 Module。在本文中,我們將以阿里雲 EC2 為例,介紹如何創建 Walrus 阿里雲 EC2 模板並使用它在阿里雲上創建 ECS 實例服務。
前提條件
- 一個用於存儲模板的 GitHub 倉庫。
- 部署 Walrus(https://seal-io.github.io/docs/zh/deploy/standalone)。
在 GitHub 上創建倉庫
- 在 GitHub 上創建你自己的新倉庫,這裏我們使用倉庫 demo(https://github.com/walrus-catalog-demo/demo)
-
將倉庫克隆到你的本機。
git clone git@github.com:walrus-catalog-demo/demo.git
創建模板文件
-
進入克隆的倉庫目錄。
cd demo
在目錄中創建如下文件:
- demo
  - main.tf
  - outputs.tf
  - variables.tf
  - README.md
main.tf文件定義了要創建的資源,這裏我們為模板定義了一個阿里雲 ECS 實例的資源。
resource "alicloud_instance" "example" {
  instance_name        = "demo-instance"
  instance_type        = var.instance_type
  image_id             = var.image_id
  system_disk_category = var.system_disk_category
  system_disk_size     = var.system_disk_size
  internet_charge_type = var.internet_charge_type
  internet_max_bandwidth_out = var.internet_max_bandwidth_out

  vswitch_id = data.alicloud_vswitches.default.vswitches.0.id

  host_name = var.hostname
  key_name = "seal-demo"

  security_groups = [
    data.alicloud_security_groups.default.groups.0.id
  ]
}

data "alicloud_vpcs" "default" {
  name_regex = "default"
}

data "alicloud_vswitches" "default" {
  vpc_id = data.alicloud_vpcs.default.vpcs.0.id
}

data "alicloud_security_groups" "default" {
  name_regex = "default"
}

resource "null_resource" "health_check" {
  depends_on = [
    alicloud_instance.example,
  ]
}
variables.tf文件定義了模板中使用的變量,Walrus 將使用這些變量為用户生成模板填寫表單。
Walrus 通過 @label和 @group註釋來定義變量的標籤和組。可選的@options 註釋用於定義變量的下拉選項, 如果沒有定義 @options註釋,則該變量將在表單中顯示為文本框。關於模板變量註釋的更多詳細信息可以在此鏈接(https://seal-io.github.io/docs/zh/operation/template#variable...)查看。
在這個例子中,我們定義了兩個組: 基礎和高級,它們將在創建服務的模板表單中以兩個選項卡的形式顯示。
# @label "實例規格"
# @group "基礎"
variable "instance_type" {
  description = "The instance type of the ECS instance"
  default     = "ecs.s6-c1m2.small"
}

# @label "VM鏡像id"
# @group "基礎"
variable "image_id" {
  description = "The ID of the image used to launch the ECS instance"
  default     = "ubuntu_18_04_x64_20G_alibase_20230208.vhd"
}

# @label "系統磁盤類型"
# @group "基礎"
# @options ["ephemeral_ssd", "cloud_efficiency", "cloud_ssd", "cloud_essd", "cloud", "cloud_auto"]
variable "system_disk_category" {
  description = "The category of the system disk"
  default     = "cloud_efficiency"
}

# @label "系統盤大小"
# @group "基礎"
variable "system_disk_size" {
  description = "The size of the system disk, value range: [20, 500]"
  default     = 40
}

# @label "主機名"
# @group "基礎"
variable "hostname" {
  type        = string
  description = "The hostname of the ECS instance"
  default     = ""
}

# @label "網絡計費類型"
# @group "高級"
# @options ["PayByTraffic", "PayByBandwidth"]
variable "internet_charge_type" {
  description = "The billing method of the public network bandwidth"
  default     = "PayByTraffic"
}

# @label "最大出口帶寬(MB)"
# @group "高級"
variable "internet_max_bandwidth_out" {
  description = "The maximum outbound bandwidth of the public network"
  default     = 5
}
outputs.tf文件定義了模板的輸出,它們將在服務創建後作為服務的輸出參數查看,並且可以被其他服務引用。
output "public_ip" {
  value = alicloud_instance.example.public_ip
}

output "primary_ip_address" {
  value = alicloud_instance.example.primary_ip_address
}
README.md文件是模板的描述。在使用此模板創建服務時,我們可以在模板詳情頁面查看該模板的具體功能參數及定義。這裏我們可以使用工具 terraform-docs來生成模板的描述。
terraform-docs markdown . > README.md
生成的 README.md 文件如下:
## Requirements

No requirements.

## Providers

| Name | Version |
|------|---------|
| <a name="provider_alicloud"></a> [alicloud](#provider\_alicloud) | n/a |
| <a name="provider_null"></a> [null](#provider\_null) | n/a |

## Modules

No modules.

## Resources

| Name | Type |
|------|------|
| [alicloud_instance.example](https://registry.terraform.io/providers/hashicorp/alicloud/latest/docs/resources/instance) | resource |
| [null_resource.health_check](https://registry.terraform.io/providers/hashicorp/null/latest/docs/resources/resource) | resource |
| [alicloud_security_groups.default](https://registry.terraform.io/providers/hashicorp/alicloud/latest/docs/data-sources/security_groups) | data source |
| [alicloud_vpcs.default](https://registry.terraform.io/providers/hashicorp/alicloud/latest/docs/data-sources/vpcs) | data source |
| [alicloud_vswitches.default](https://registry.terraform.io/providers/hashicorp/alicloud/latest/docs/data-sources/vswitches) | data source |

## Inputs

| Name | Description | Type | Default | Required |
|------|-------------|------|---------|:--------:|
| <a name="input_hostname"></a> [hostname](#input\_hostname) | The hostname of the ECS instance | `string` | `""` | no |
| <a name="input_image_id"></a> [image\_id](#input\_image\_id) | The ID of the image used to launch the ECS instance | `string` | `"ubuntu_18_04_x64_20G_alibase_20230208.vhd"` | no |
| <a name="input_instance_type"></a> [instance\_type](#input\_instance\_type) | The instance type of the ECS instance | `string` | `"ecs.s6-c1m2.small"` | no |
| <a name="input_internet_charge_type"></a> [internet\_charge\_type](#input\_internet\_charge\_type) | The billing method of the public network bandwidth | `string` | `"PayByTraffic"` | no |
| <a name="input_internet_max_bandwidth_out"></a> [internet\_max\_bandwidth\_out](#input\_internet\_max\_bandwidth\_out) | The maximum outbound bandwidth of the public network | `number` | `5` | no |
| <a name="input_system_disk_category"></a> [system\_disk\_category](#input\_system\_disk\_category) | The category of the system disk | `string` | `"cloud_efficiency"` | no |
| <a name="input_system_disk_size"></a> [system\_disk\_size](#input\_system\_disk\_size) | The size of the system disk, value range: [20, 500] | `number` | `40` | no |

## Outputs

| Name | Description |
|------|-------------|
| <a name="output_primary_ip_address"></a> [primary\_ip\_address](#output\_primary\_ip\_address) | n/a |
| <a name="output_public_ip"></a> [public\_ip](#output\_public\_ip) | n/a |
提交模板版本
git add .
git commit -m "add template files"
git push -u origin main
為模板創建一個標籤作為版本。
git tag v0.0.1
git push --tags
在 Walrus 上創建模板
- 在瀏覽器中打開 Walrus 並登錄。
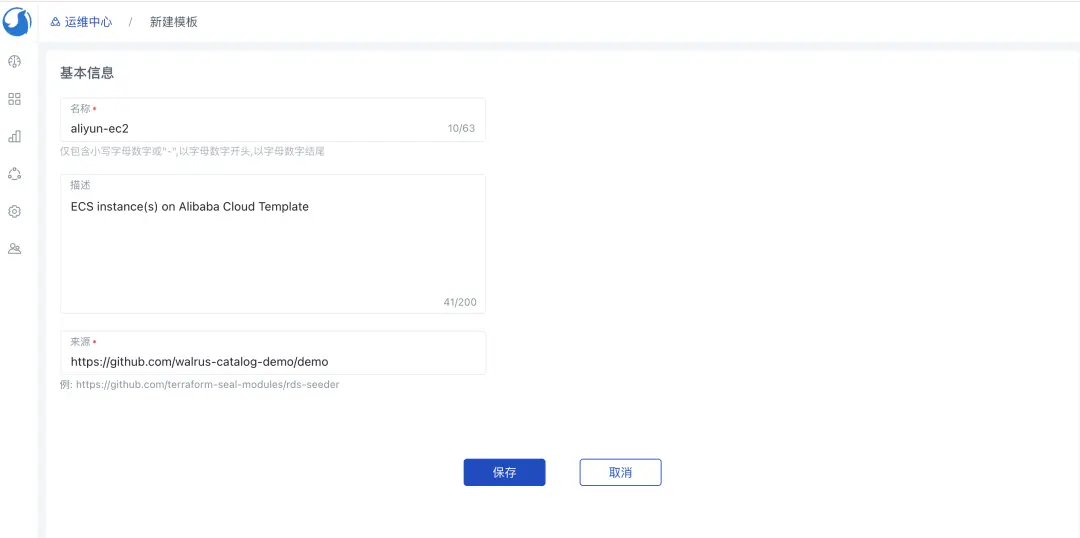
- 轉到
運維中心下的模板管理,使用我們剛剛創建的模板新建一個模板,這裏我們將模板命名為aliyun-ec2。
導入任務完成後,模板將顯示在模板列表中,我們可以看到模板版本為剛剛創建的版本 v0.0.1。

- 在
運維中心的連接器下添加阿里雲連接器。 - 配置阿里雲連接器到環境.
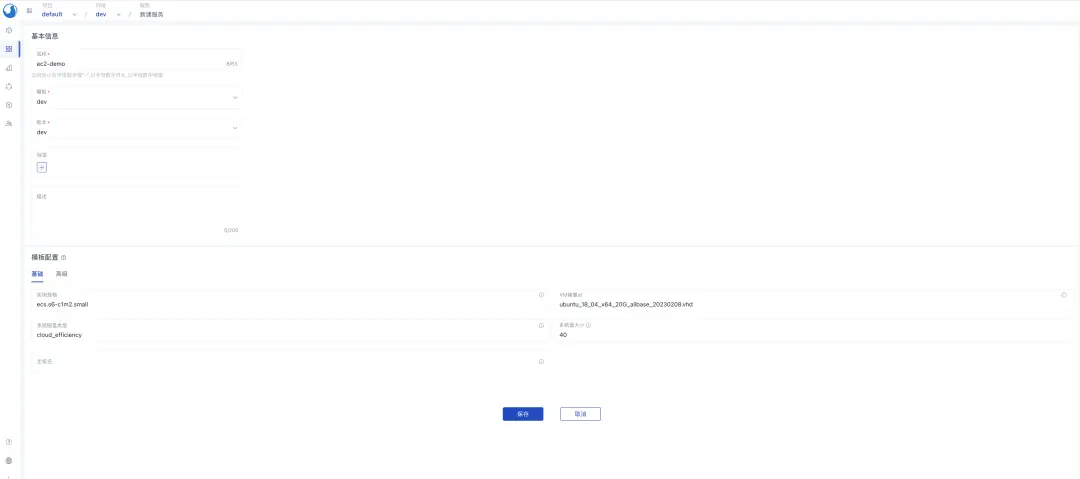
- 使用模板
aliyun-ec2創建一個服務, 表單組和標籤的渲染是根據上述模板中定義的變量註釋自動生成的。
服務創建後,我們可以看到服務的詳情和模板的輸出
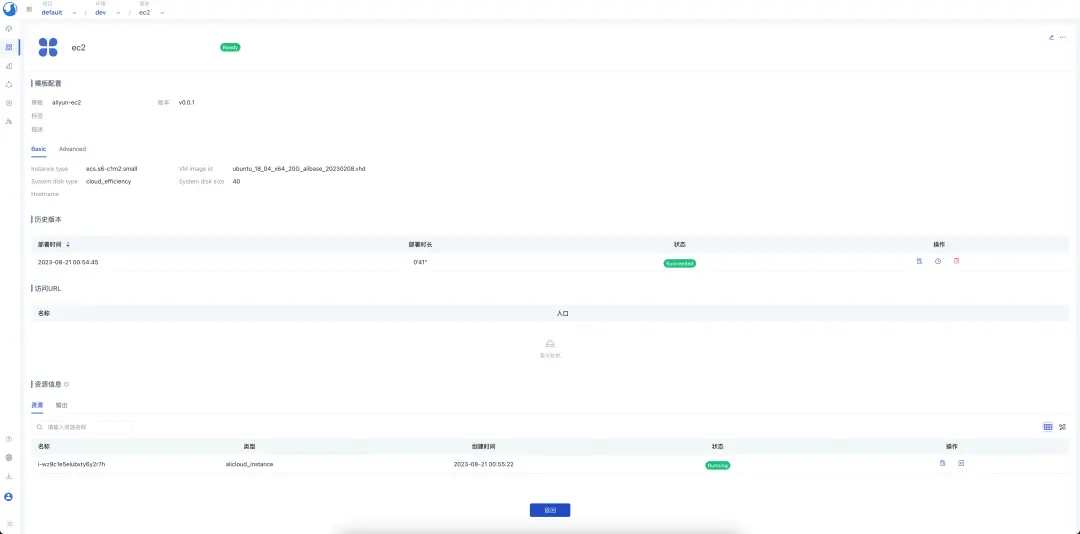
在阿里雲控制枱檢查 ECS 實例,我們可以看到 ECS 實例已成功創建。
