- React Hook 深入淺出
- CSS技巧與案例詳解
- vue2與vue3技巧合集
- VueUse源碼解讀
Google Cloud 設置
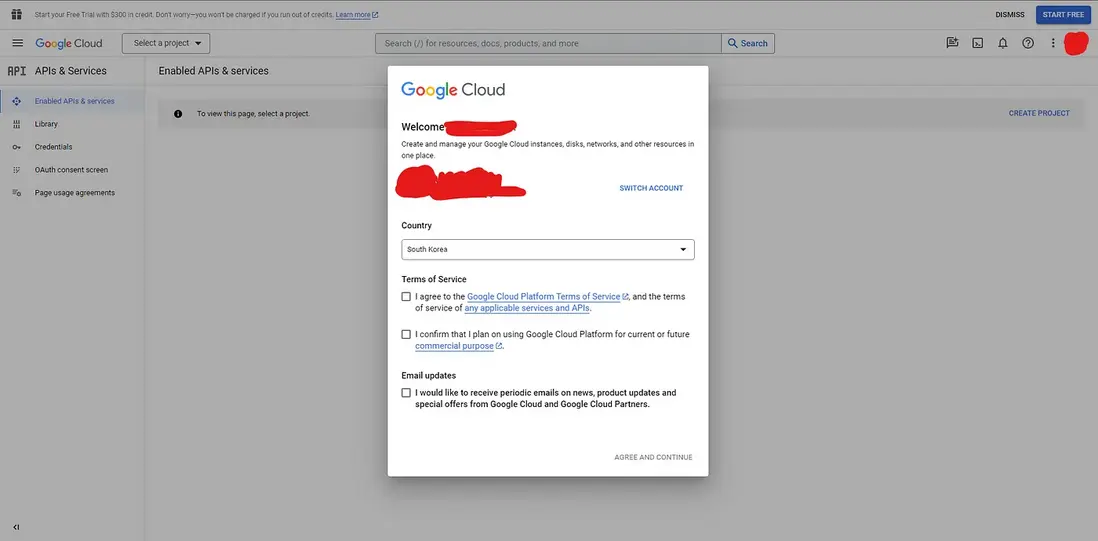
訪問 https://console.cloud.google.com/apis
如果你是第一次使用Google Cloud,請確保同意服務條款。
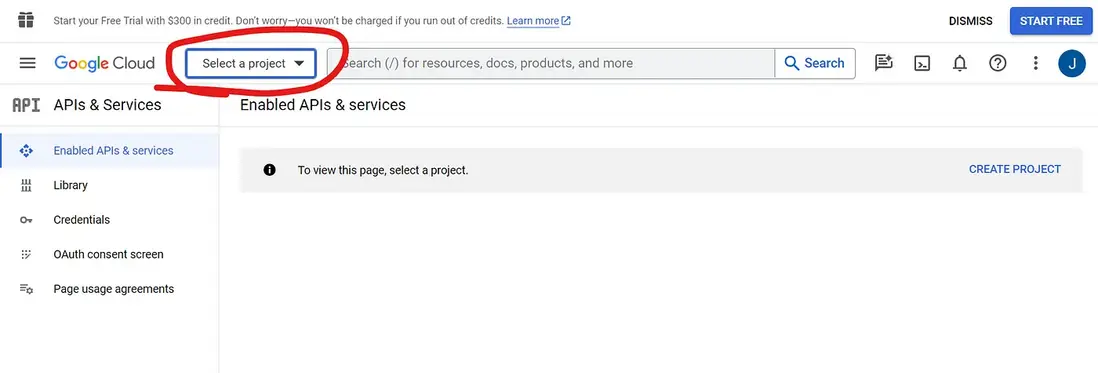
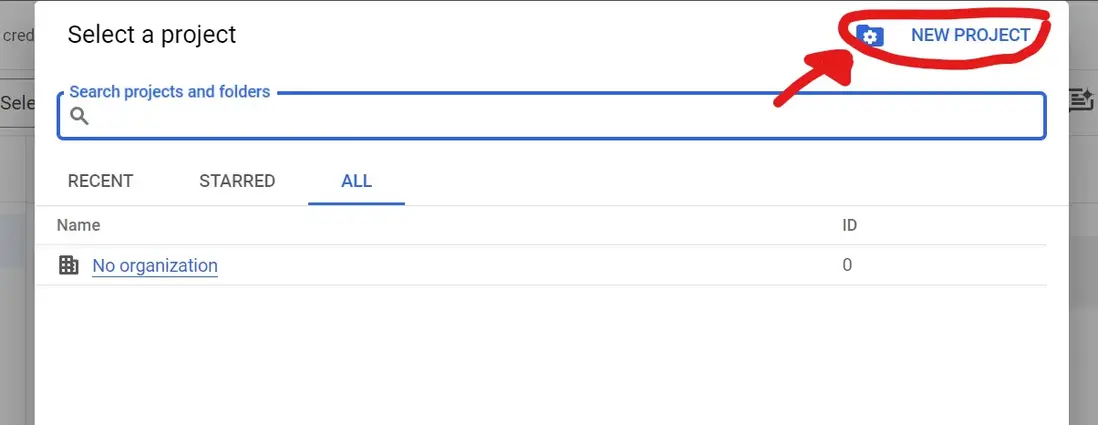
按照以下步驟繼續:
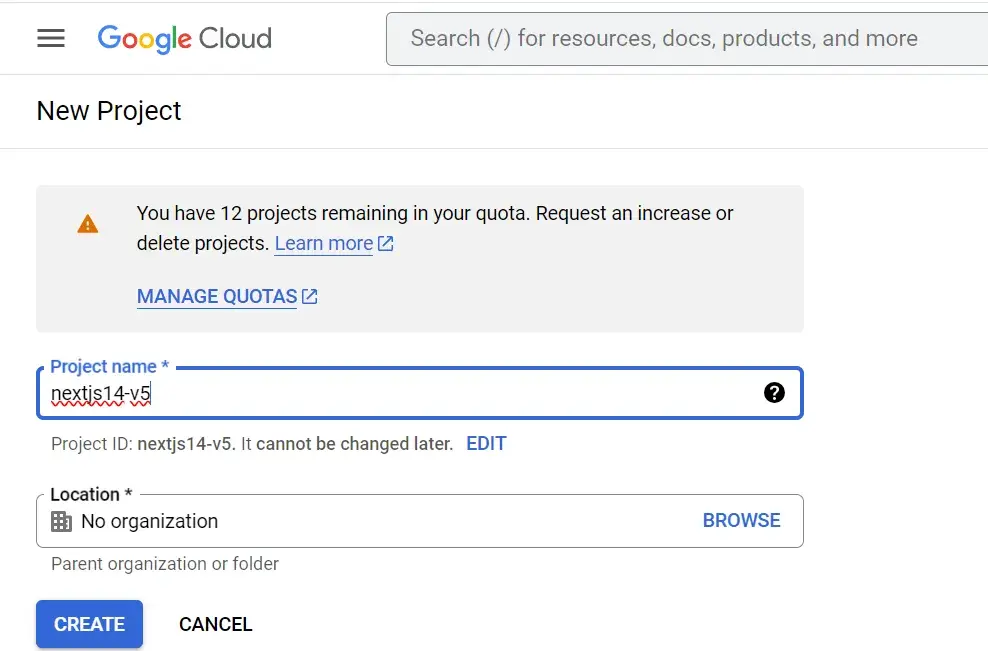
根據你的喜好編輯項目名稱,然後點擊"CREATE"
你將被重定向到這個界面
👉 OAuth 同意屏幕
讓我們首先配置OAuth同意屏幕
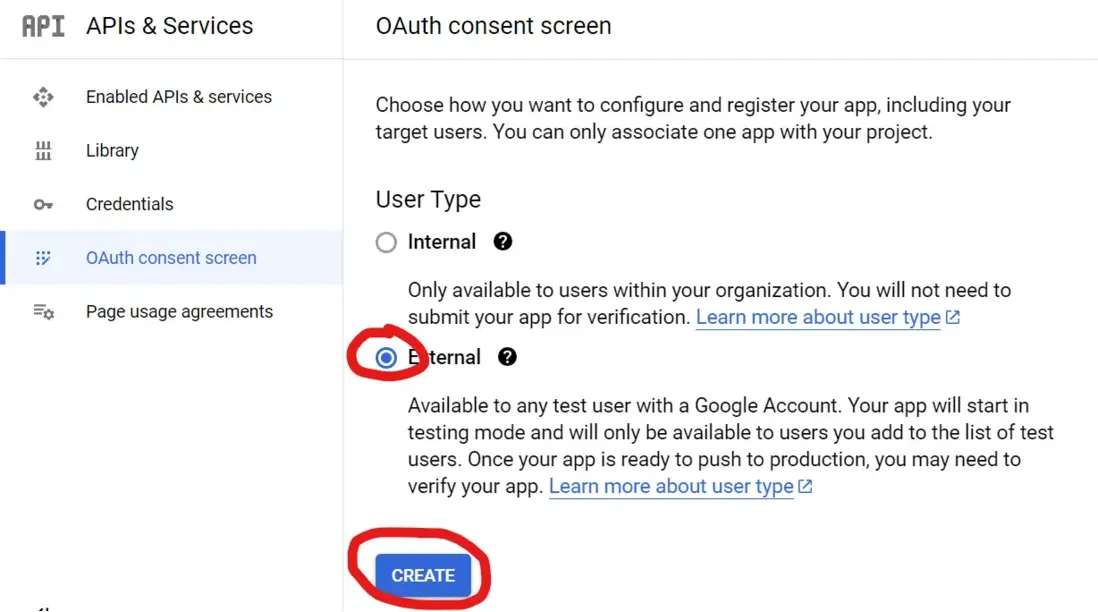
如果你的組織中有內部測試人員,選擇Internal用户類型。否則繼續選擇External用户
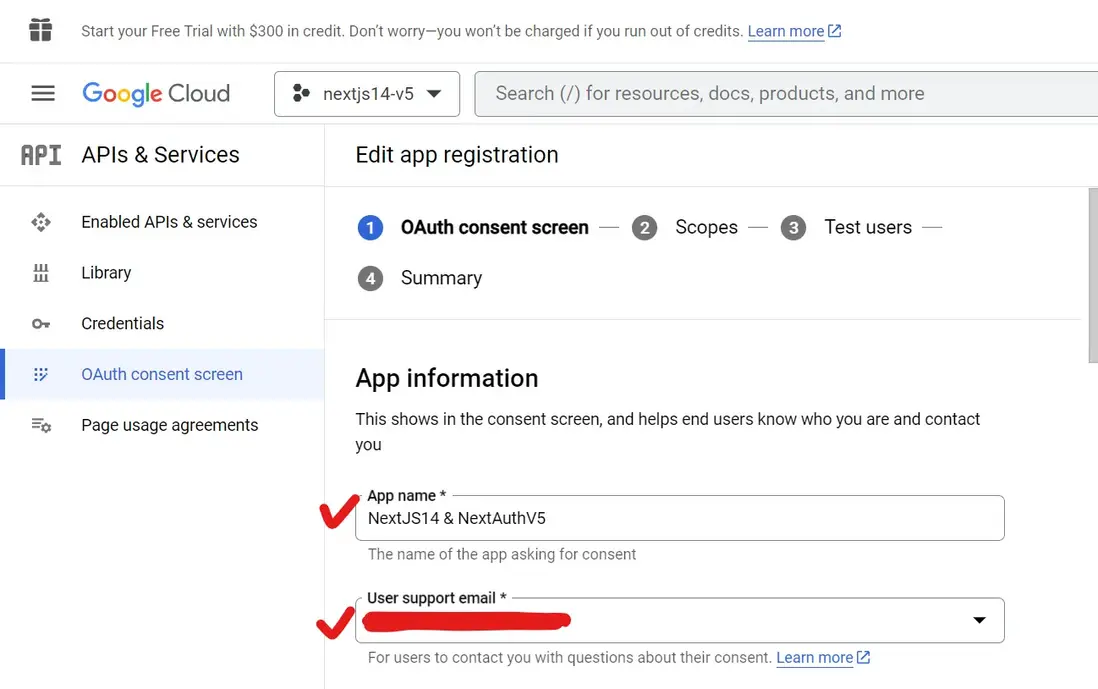
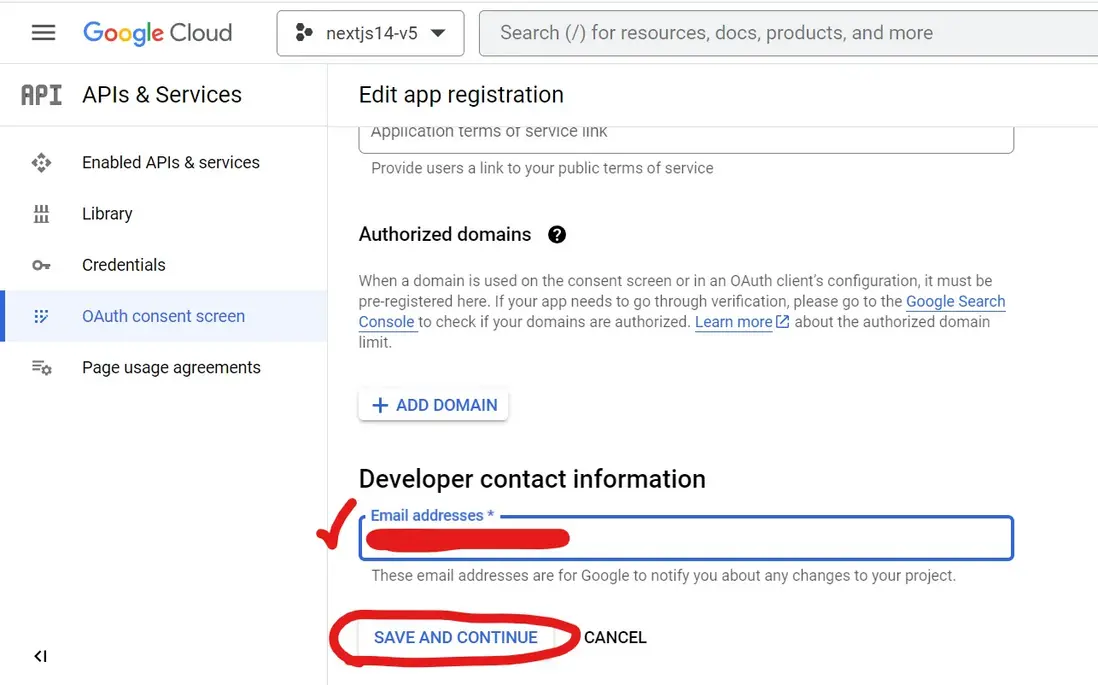
編輯應用名稱並選擇用户支持郵箱,然後向下滾動直到找到"Developer contact information"(開發者聯繫信息)
填寫電子郵件地址,然後點擊"SAVE AND CONTINUE"(保存並繼續)按鈕
依次點擊剩餘步驟(Scopes、Test Users、Summary)的"SAVE AND CONTINUE"按鈕
👉 憑據
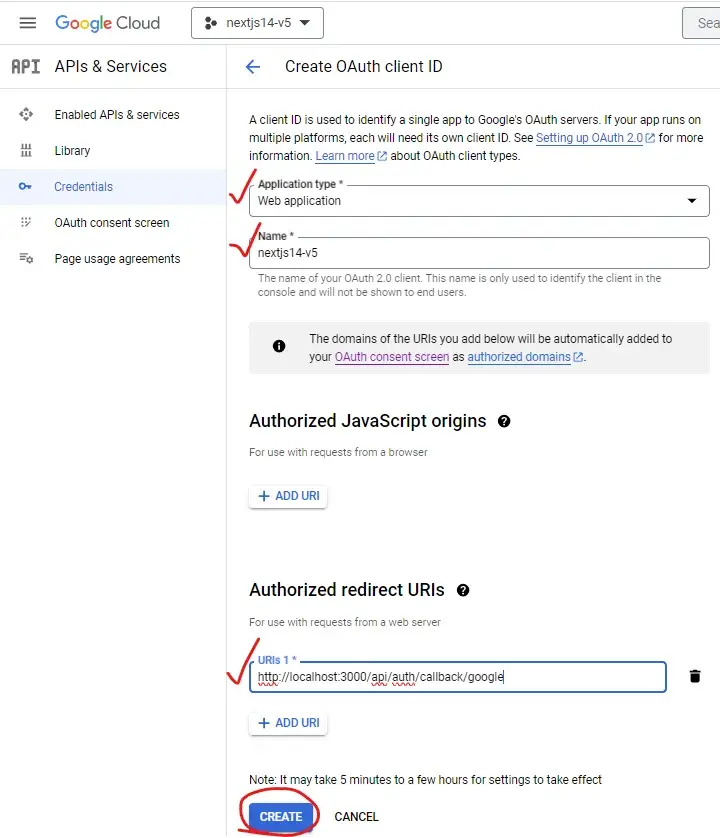
現在設置憑據
首先選擇應用類型為"Web"
然後填寫"Name"部分,並點擊Authorized redirect URIs下方的"ADD URI"按鈕。
在URIs部分填寫 http://localhost:3000/api/auth/callback/google ,然後點擊"CREATE"按鈕
🔴注意🔴
部署服務時,確保將URI修改為:
https://${部署域名URL}/api/auth/callback/google
以避免錯誤。
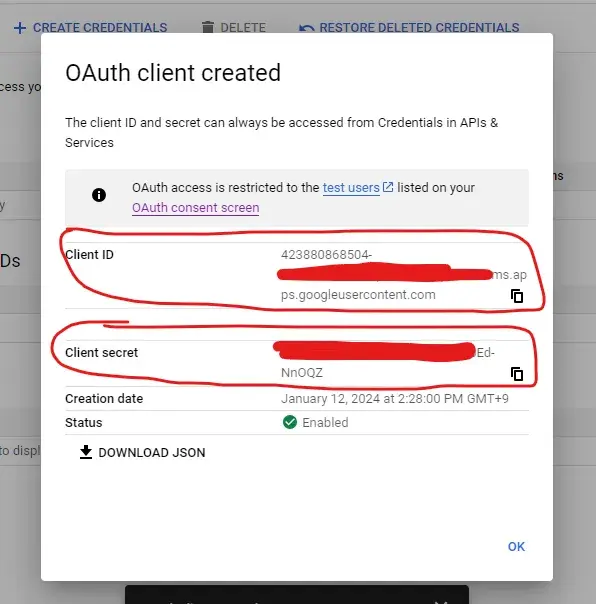
幾秒鐘後,你將收到OAuth客户端已創建的通知,並可以查看和複製"Client ID"和"Client Secret"
最後將"Client ID"和"Client Secret"添加到你的.env文件中
GOOGLE_CLIENT_ID = ${YOUR GOOGLE CLIENT ID}
GOOGLE_CLIENT_SECRET =${YOUR GOOGLE CLIENT SECRET}
代碼實現
首先,在src/auth.ts中添加Google provider
// src.auth.ts
import NextAuth from 'next-auth';
import { authConfig } from './auth.config';
import Credentials from 'next-auth/providers/credentials';
import { User } from '@/lib/definitions';
import google from 'next-auth/providers/google'; // 添加導入

export const { handlers: { GET, POST }, auth, signIn, signOut, update } = NextAuth({
  ...authConfig,
  providers: [
    // **************************************************************
    // 添加provider
    google({
      clientId: process.env.GOOGLE_CLIENT_ID ?? '',
      clientSecret: process.env.GOOGLE_CLIENT_SECRET ?? '',
    }),
    // **************************************************************
    Credentials({
      async authorize(credentials) {
        if (credentials.id && credentials.password) {
          // 在這裏添加你的後端代碼
          // let loginRes = await backendLogin(credentials.id, credentials.password)
          let loginRes = {
            success : true,
            data : {
              user: {
                ID: "john_doe",
                NAME: "John Doe",
                EMAIL: "email@email.email",
              },
            }
          }
          // 登錄失敗
          if (!loginRes.success) return null;
          // 登錄成功
          const user = {
            id: loginRes.data.user.ID ?? '',
            name: loginRes.data.user.NAME ?? '',
            email: loginRes.data.user.EMAIL ?? '',
          } as User;
          return user;
        }
        return null;
      },
    })
  ],
  callbacks: {
    async session({ session, token, user }) {
      session.user = token.user as User
      return session;
    },
    async jwt({ token, user, trigger, session }) {
      if (user) {
        token.user = user;
      }
      if (trigger === "update" && session) {
        token = {...token, user : session}
        return token;
      };
      return token;
    },
  },
});
在src/lib/actions.ts中創建一個在客户端調用的Google登錄方法
// src/lib/actions.ts
"use server"

import { signIn } from "../auth";
import { AuthError } from "next-auth";

...

export async function googleAuthenticate(
  prevState: string | undefined,
  formData: FormData,
) {
  try {
    await signIn('google');
  } catch (error) {
    if (error instanceof AuthError) {
      return 'google log in failed'
    }
    throw error;
  }
}
確保src/app/api/auth/[…nextauth]/route.ts文件存在
// src/app/api/auth/[...nextauth]/route.ts
export { GET, POST } from "@/auth"
export const runtime = "edge"
最後,在登錄頁面src/app/login/page.tsx中創建Google登錄按鈕
// src/app/login/page.tsx
"use client"

import { authenticate, googleAuthenticate } from "@/lib/actions" // 添加導入
import { useFormState } from "react-dom"

export default function Page() {
    const [errorMsg, dispatch] = useFormState(authenticate, undefined)
    const [errorMsgGoogle, dispatchGoogle] = useFormState(googleAuthenticate, undefined) //googleAuthenticate鈎子
    return (
      <div>
        <h1>Log in Page</h1>
        <form className="flex flex-col" action={dispatch}>
            <input className="bg-blue-300 text-black" name="id"></input>
            <input className="bg-yellow-300 text-black" name="password" type="password"></input>
            <button>
                Log In
            </button>
            <p>{errorMsg}</p>
        </form>
        {/* 添加Google登錄按鈕 */}
        <br />
        <form className="flex flex-col" action={dispatchGoogle}>
            <button>
                Google Sign In
            </button>
            <p>{errorMsgGoogle}</p>
        </form>
        {/* 添加Google登錄按鈕 */}
      </div>
    )
  }
現在使用npx next dev或npm run dev運行Next應用,訪問 http://localhost:3000/login 並點擊"Google Sign In"按鈕。你將被重定向到Google的OAuth同意屏幕。
成功登錄Google賬户後,你將被重定向回主頁,你的Google賬户詳細信息將打印在終端上!
源代碼和備註
https://github.com/youngjun625/nextauth14-nextauthv5?source=post_page-----3683d8fae69c--------------------------------
本文 GitHub https://github.com/qq449245884/xiaozhi 已收錄,有一線大廠面試完整考點、資料以及我的系列文章。


