


MacOS(Unix系統)炫酷完美終端配置
Linux酷炫終端_zsh+oh my zsh+powerlevel10k
1 下載安裝 iTerm2
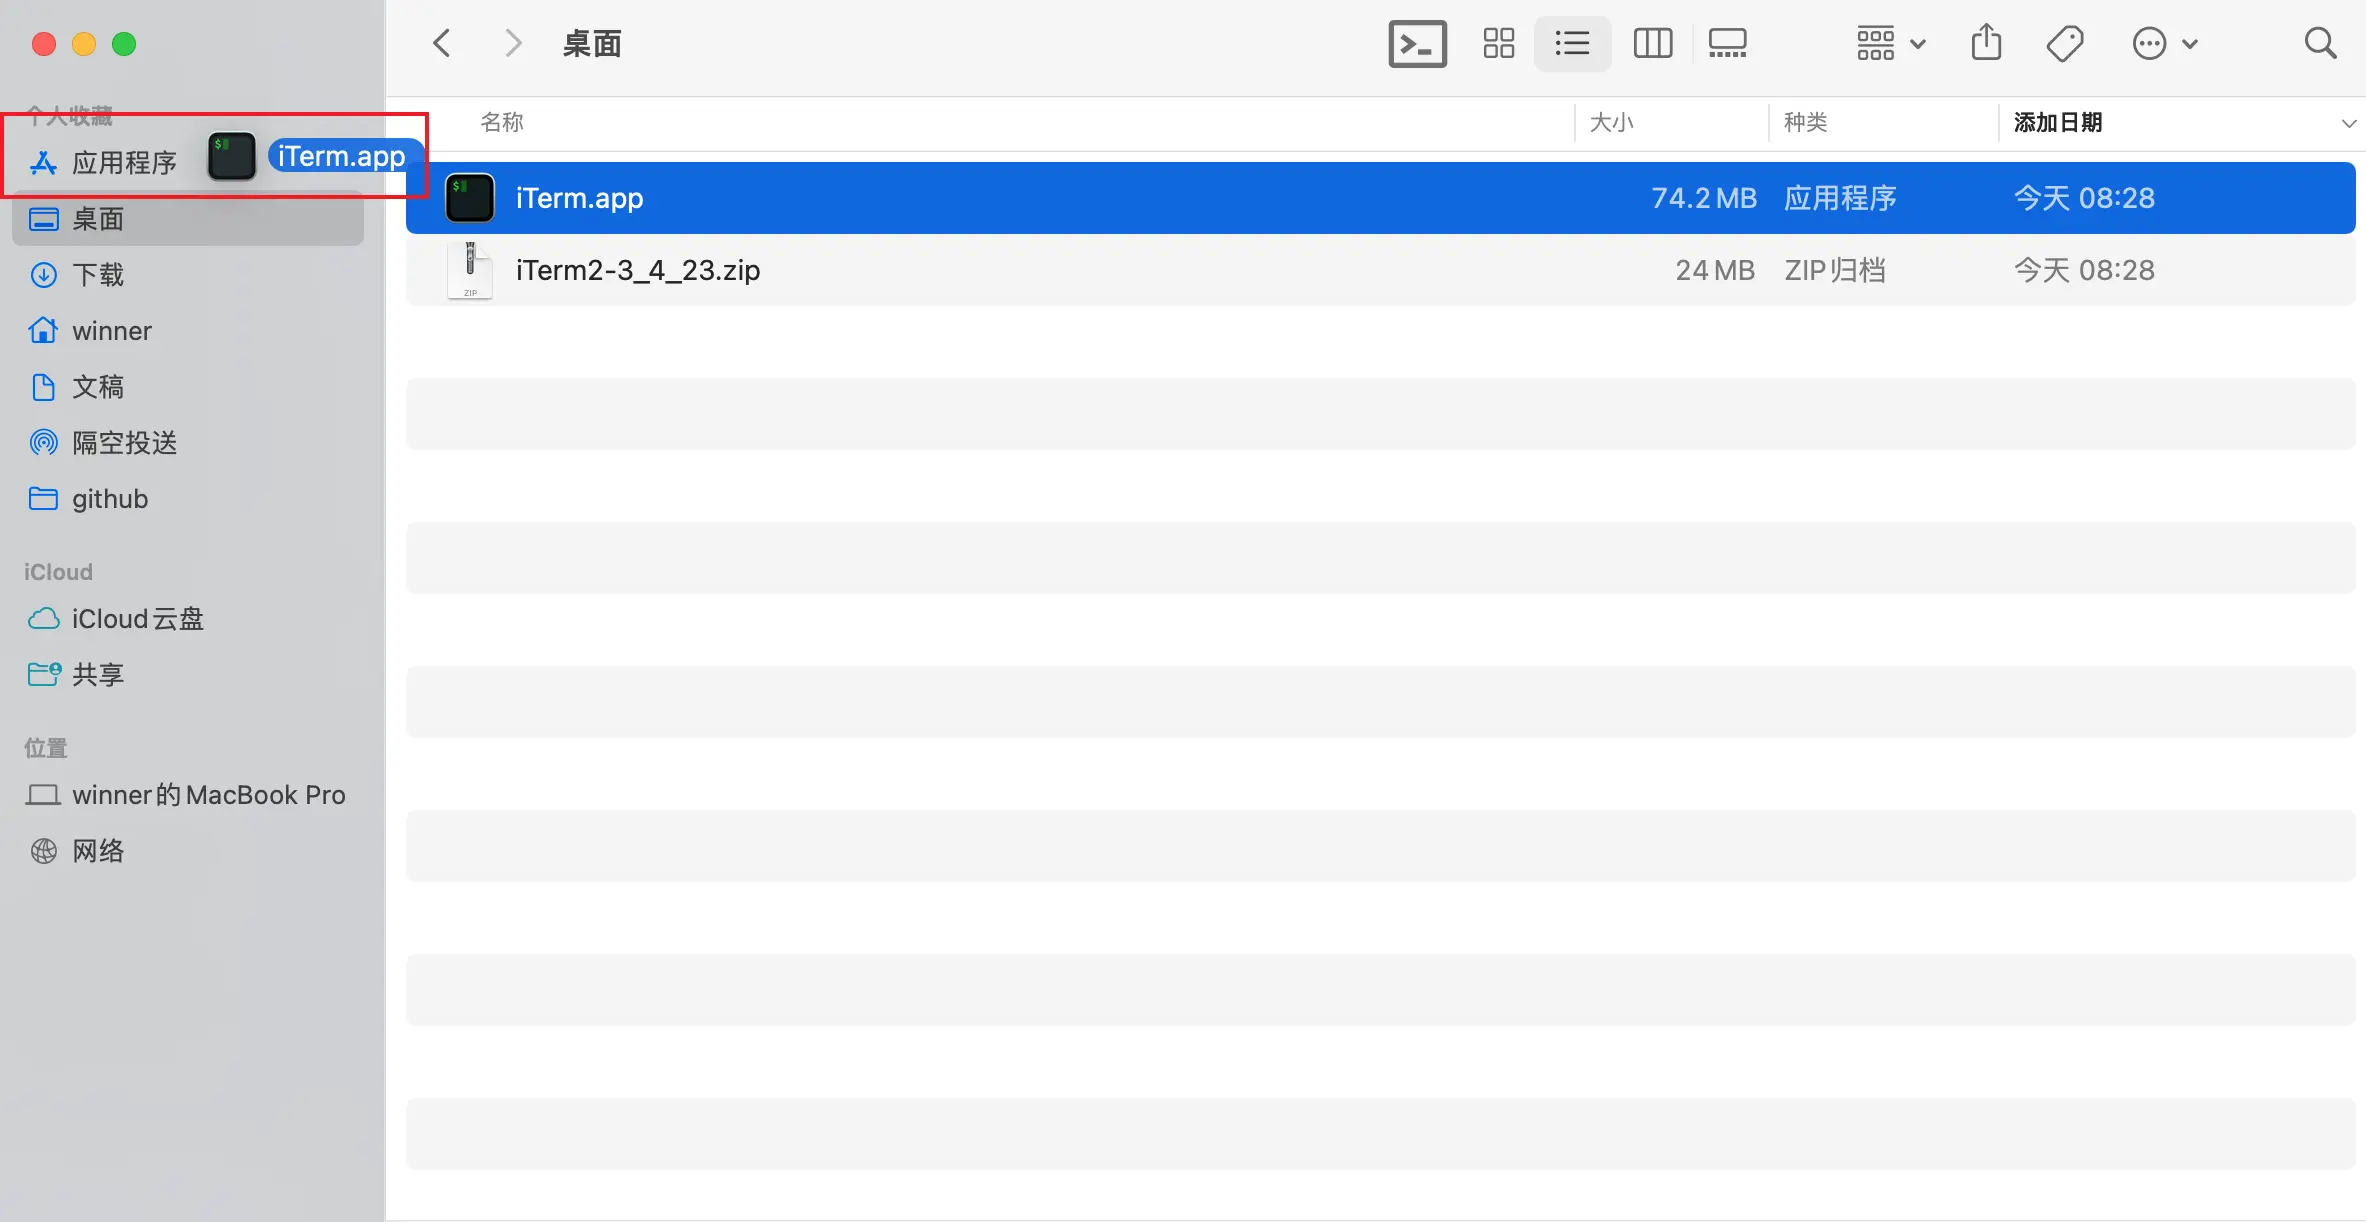
1.1 iTerm2,沒有上架到AppStore,只能通過下載zip包安裝,這是下載地址: https://iterm2.com/downloads.html ,壓縮包雙擊打開後,將解壓後的App拖動到【應用程序】文件夾就完成了。
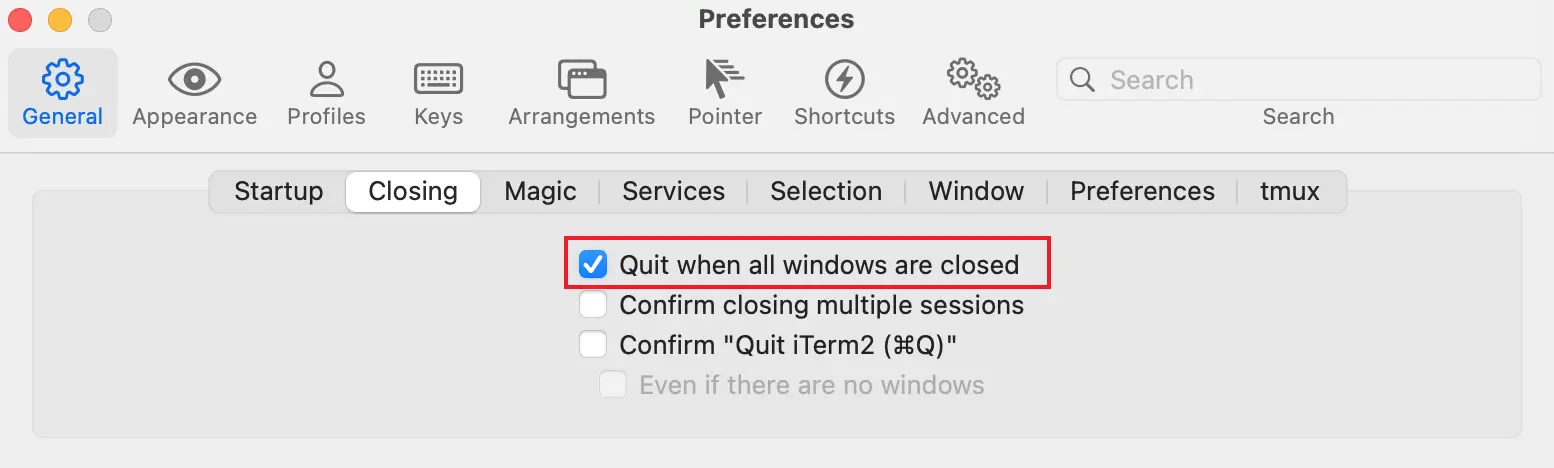
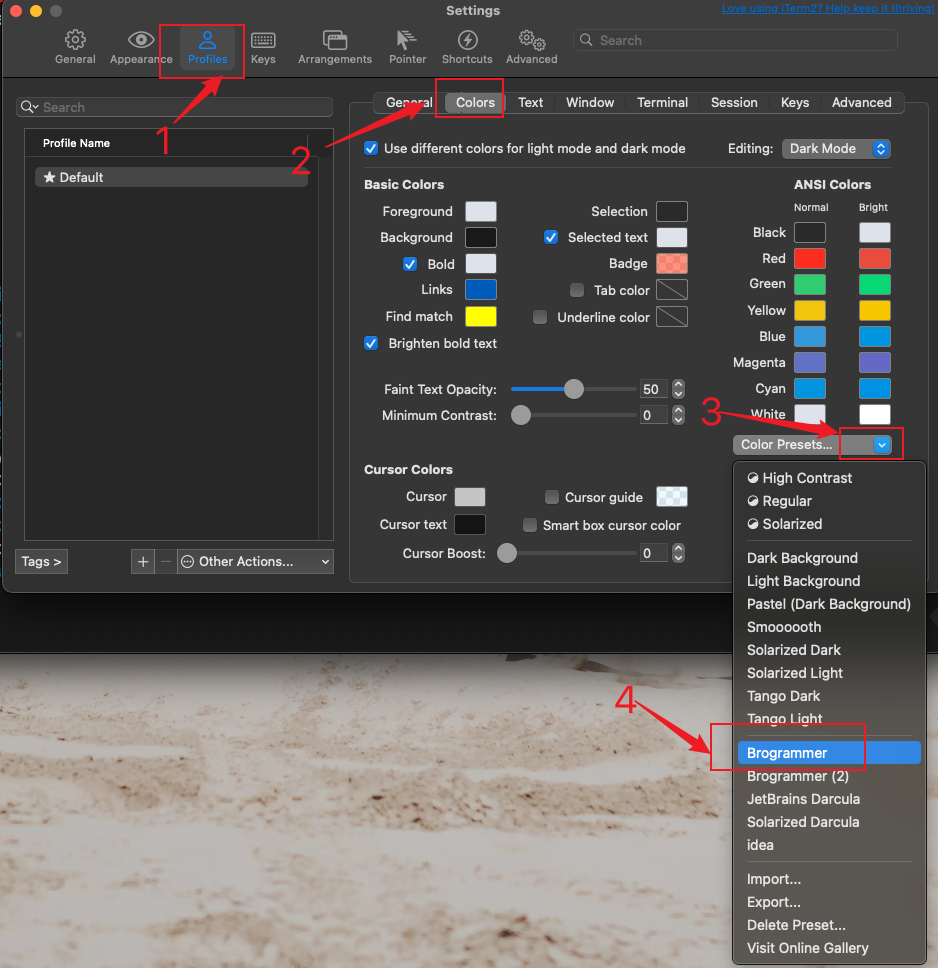
1.2 打開iTerm2 配置如下圖,iTerm2設置->Profiles->Colors->Color Presets…,在下拉菜單中選擇 Solarized Dark關閉所有窗口後,主動退出APP。
2 安裝配置 oh-my-zsh
2 .1 安裝 oh-my-zsh
2.1.1 安裝 oh-my-zsh 之前,需要確保本地已經安裝了 git。
(如果沒裝git,Mac用户請 :brew install git,Linux使用 sudo apt install git )
2.1.2 檢驗之前是否安裝oh-my-zsh, 如果原來安裝,則需要執行以下命令刪除:
# 執行 cd ~ 命令進入用户當前目錄刪除帶有oh-my-zsh的文件和目錄
cd ~
rm -rf .oh-my-zsh
rm -rf .zshrc.pre-oh-my-zsh
2.1.3 使用 curl 下載腳本並安裝:
chsh -s /bin/zsh
sh -c "$(curl -fsSL https://raw.github.com/ohmyzsh/ohmyzsh/master/tools/install.sh)"
# github加速配置
sh -c "$(curl -fsSL https://raw.githubusercontent.com/ohmyzsh/ohmyzsh/master/tools/install.sh)"
# 沒有梯子的使用國內鏡像源
sh -c "$(curl -fsSL https://gitee.com/shmhlsy/oh-my-zsh-install.sh/raw/master/install.sh)"
# 國外源
git clone https://github.com/zsh-users/zsh-syntax-highlighting.git ${ZSH_CUSTOM:-~/.oh-my-zsh/custom}/plugins/zsh-syntax-highlighting

git clone https://github.com/zsh-users/zsh-autosuggestions ${ZSH_CUSTOM:-~/.oh-my-zsh/custom}/plugins/zsh-autosuggestions

git clone https://github.com/zsh-users/zsh-completions ${ZSH_CUSTOM:=~/.oh-my-zsh/custom}/plugins/zsh-completions


# 國內源
git clone https://gitee.com/mo2/zsh-syntax-highlighting.git ${ZSH_CUSTOM:-~/.oh-my-zsh/custom}/plugins/zsh-syntax-highlighting

git clone https://gitee.com/twd2606/zsh-autosuggestions.git ${ZSH_CUSTOM:-~/.oh-my-zsh/custom}/plugins/zsh-autosuggestions

git clone https://gitee.com/wangnd/zsh-completions.git ${ZSH_CUSTOM:=~/.oh-my-zsh/custom}/plugins/zsh-completions
2.1.4 在安裝之前,如果你使用的shell不是zshell,可以使用下面的命令切換到zshell;需要輸入密碼驗證!
chsh -s /bin/zsh
2.1.5 或者使用 wget 下載腳本並安裝:
sh -c "$(wget https://raw.github.com/ohmyzsh/ohmyzsh/master/tools/install.sh -O -)"
2.2 配置 oh-my-zsh
2.2.1 oh-my-zsh 配置 powerlevel10k 主題樣式
除了內置主題外,還可以選擇其他開源的主題,強烈推薦嘗試一下 powerlevel10k 主題,一個頂十個,項目地址為:https://github.com/romkatv/powerlevel10k。下載安裝完成後,需要在~/.zshrc配置內容: ZSH_THEME="powerlevel10k/powerlevel10k",安裝一下命令步驟即可!把插件下載到本地的 ~/.oh-my-zsh/custom/themes 目錄:
# 1. 下載主題樣式
git clone --depth=1 https://github.com/romkatv/powerlevel10k.git ${ZSH_CUSTOM:-$HOME/.oh-my-zsh/custom}/themes/powerlevel10k

# 國內源
git clone --depth=1 https://gitcode.com/gh_mirrors/po/powerlevel10k.git ${ZSH_CUSTOM:-$HOME/.oh-my-zsh/custom}/themes/powerlevel10k


# 2. 使用 vim ~/.zshrc打開文件,在.zshrc文件內修改添加以下內容
ZSH_THEME="powerlevel10k/powerlevel10k"

# 3. 必須執行生效命令
source ~/.zshrc
2.2.2 配置自動補全插件 zsh-autosuggestions, plugins小括號內每種插件必須以空格間隔開
zsh-autosuggestions 根據歷史記錄和當前的輸入,顯示完整命令提示,按下Tab或者Ctrl+E都可以自動補全,這個真的很方便;把插件下載到本地的 ~/.oh-my-zsh/custom/plugins 目錄:
# 1. 下載自動補全插件
git clone https://github.com/zsh-users/zsh-autosuggestions ${ZSH_CUSTOM:-~/.oh-my-zsh/custom}/plugins/zsh-autosuggestions

# 2. 使用 vim ~/.zshrc打開文件,在.zshrc文件內修改添加以下內容, plugins小括號內每種插件必須以空格間隔開
plugins=(git zsh-autosuggestions)

# 3. 必須執行生效命令
source ~/.zshrc
2.2.3 配置自動補全插件 zsh-syntax-highlighting, plugins小括號內每種插件必須以空格間隔開
zsh-syntax-highlighting 是一個命令語法校驗插件,在輸入命令的過程中,若指令不合法,則指令顯示為紅色,若指令合法就會顯示為綠色。把插件下載到本地的 ~/.oh-my-zsh/custom/plugins 目錄:
# 1. 下載語法校驗和高亮提示插件
git clone https://github.com/zsh-users/zsh-syntax-highlighting.git ${ZSH_CUSTOM:-~/.oh-my-zsh/custom}/plugins/zsh-syntax-highlighting


# 2. 使用 vim ~/.zshrc打開文件,在.zshrc文件內修改添加以下內容, plugins小括號內每種插件必須以空格間隔開
plugins=(git zsh-autosuggestions zsh-syntax-highlighting)

# 3. 必須執行生效命令
source ~/.zshrc
2.3 plugins小括號內每種插件必須以空格間隔開
由於 oh-my-zsh 內置了 git(.zshrc本來就存在)、z和sudo 插件,所以只需要在 .zshrc 中,把 git、z和sudo 加入插件列表。
之後執行:source ~/.zshrc使插件生效,並啓動powerlevel10k的配置過程。如果對配置不滿意,還可以執行p10k configure重新配置。
plugins=(git zsh-syntax-highlighting sudo zsh-autosuggestions z)
lsd是一個rust寫的替代ls的命令,可以根據文件和目錄屬性,在前面顯示一個圖標。安裝方式如下:
brew install lsd


