


在本系列的第1課介紹過TBindSourceDB綁定到TFDMemTableo數據庫組件,也介紹了使用TPrototypeBindSource提供樣本數據源。接下來看一個新的BindSource組件TAdapterBindSource,如其名所暗示,它是一個橋接器綁定控件,主要用來將自定義的對象與數據源進行綁定。
TAdapterBindSource有一個Adapter屬性,它可以接收一個繼承自TBindSourceAdapter的組件。Delphi提供了TDataGeneratorAdapter組件,它可以完成類似TPrototypeBindSource組件所完成的工作:定義字段列表,關聯數據生成器。
好了,有深度的話不多説了,開始練習吧,打開Delphi 12.3。
1. 單擊主菜單中的 File > New > Multi-Device Application - Delphi > Blank Application ,創建一個新的多設備應用程序。
建議立即單擊工具欄上的Save All按鈕,將單元文件保存為uMainForm.pas,將項目保存為LiveBinding_BindToObject.dproj。
你的項目結構應該像這樣:
2. 從工具面板,拖如下的控件到主窗體。
- TAdapterBindSource —— 通過它來完成控件綁定操作。
- TDataGeneratorAdapter —— 通過它來產生設計時的測試數據。
- TBindNavigator —— 將為示例數據提供導航功能。
- TGrid —— 將顯示某些信息。
簡單佈局一下之後,界面顯示效果如下圖所示。

3. 創建一個新的Delphi單元,構建將要被綁定的數據對象。可以在Project Manager右擊項目名稱,選擇 Add > New > Unit 菜單項,新建一個單元文件,將該單元另存為“EmployeeAdaptee.pas”,然後將下面的代碼敲進去。
unit EmployeeAdaptee;

interface

type
  TEmployee = class(TObject)
  private
    FFirstName: String;         //員工姓
    FLastName: String;          //員工名
    FAge: Byte;                 //年齡
    FStartDate: TDate;          //入職日期
    FPosition: String;          //職位
    FManager: String;           //所屬經理
  public
    /// <code>
    /// 構造函數
    /// </code>
    constructor Create(const AFirstName, ALastName: String; const AAge: Byte;
                       const AStartDate: TDate; const APosition, AManager: String); overload;
    property FirstName: String read FFirstName write FFirstName;
    property LastName: String read FLastName write FLastName;
    property Age: Byte read FAge write FAge;
    property StartDate: TDate read FStartDate write FStartDate;
    property Position: String read FPosition write FPosition;
    property Manager: String read FManager write FManager;
  end;

implementation

{ TEmployee }

constructor TEmployee.Create(const AFirstName, ALastName: String; const AAge: Byte;
                             const AStartDate: TDate; const APosition, AManager: String);
begin
  inherited Create;

  FFirstName := AFirstName;
  FLastName := ALastName;
  FAge := AAge;
  FStartDate := AStartDate;
  FPosition := APosition;
  FManager := AManager;
end;
end.
4. 回到主窗體,按F12切換到代碼視圖,再按下Alt+F11快捷鍵,在彈出的窗口中選中EmployeeAdaptee.pas,指定將該單元添加到Interface區中。
如果現在切換到LiveBindings Designer設計器,在AdapterBindSource1項中是看不到有任何字段的,為了添加設計時的支持,接下來將AdapterBindSource1的Adapter指向DataGeneratorAdapter1。
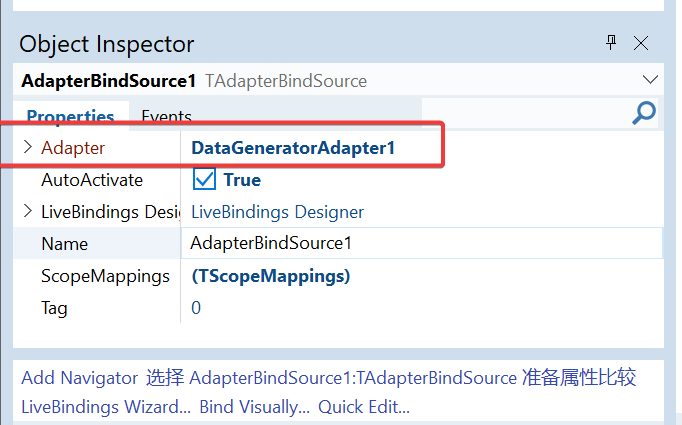
5. 選中AdapterBindSource1,指定其Adapter屬性為DataGeneratorAdapter1。
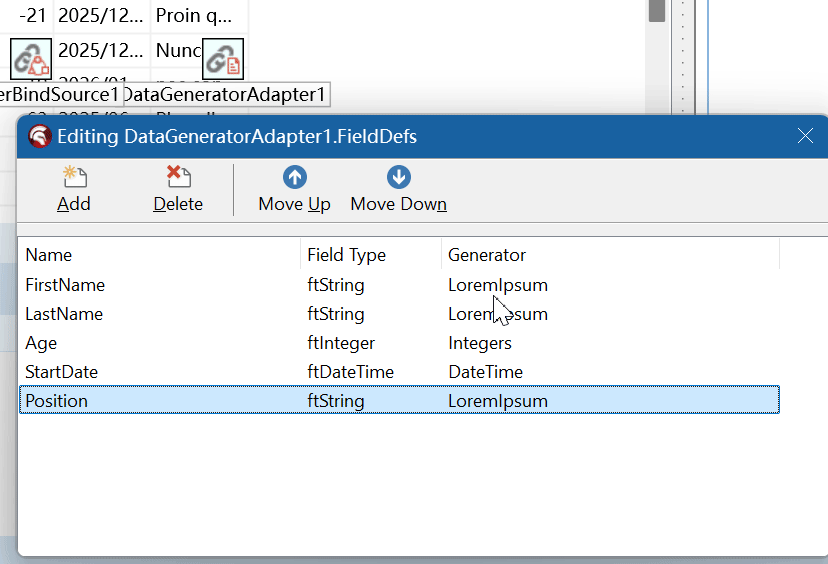
6. 右鍵單擊DataGeneratorAdapter1,從彈出的菜單中選擇“Fields Editor”菜單項,在彈出的對話框中,單擊“Add”按鈕,在彈出的對話框中可以看到有很多包含FieldData生成器的字段,也有很多是Generator為(none)類型的不包含生成器的字段。在名稱文本框中會自動生成Field開頭的字段,依次添加如下圖所示的字段:
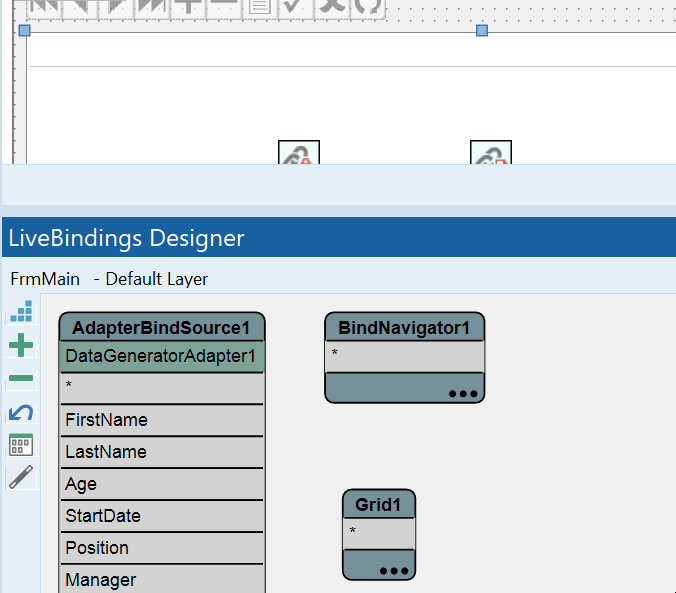
7. 現在,如果進入到LiveBindings Designer設計器,可以看到AdapterBindSource1實體中包含了多個字段,這個時候可以通過拖拉的方式來設置綁定。
由於在添加字段時,指定了具體的字段數據生成器,因此在綁定後,就可以在Grid上看到測試數據。
8. 接下來需要通過一個事件,來將僱員信息添加到數據綁定中去,請選中AdapterBindSource1組件,然後在屬性編輯器中,切換到Events選項卡,雙擊OnCreateAdapter事件,Delphi將生成骨架代碼,然後將如下的代碼添加進來。
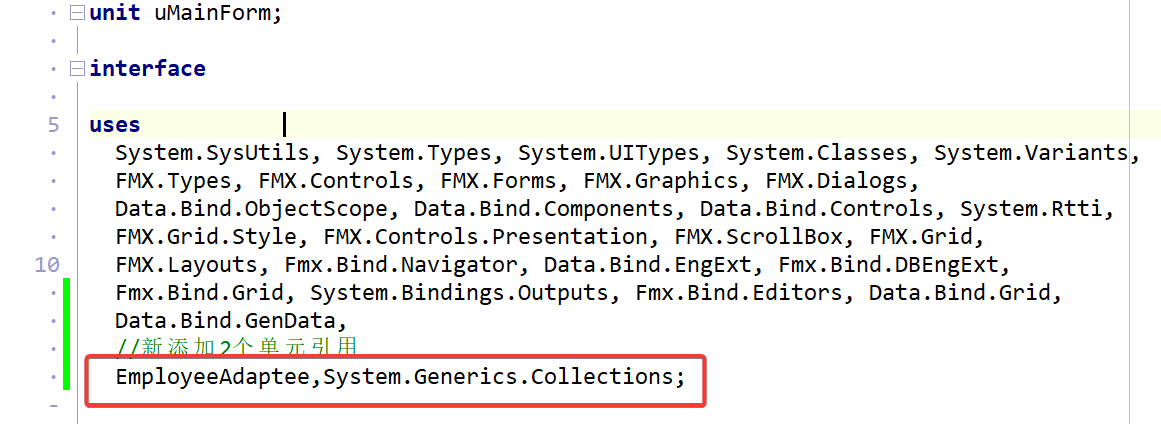
首先,在Interface的Uses區中添加如下的引用,在第4步已經添加了EmployeeAdaptee,接下來需要添加泛型集合類的引用。
接下來需要在private區添加一個集合變量。
type
  TFrmMain = class(TForm)
    AdapterBindSource1: TAdapterBindSource;
    DataGeneratorAdapter1: TDataGeneratorAdapter;
    BindNavigator1: TBindNavigator;
    Grid1: TGrid;
    BindingsList1: TBindingsList;
    LinkGridToDataSourceAdapterBindSource1: TLinkGridToDataSource;
  private
    { Private declarations }
    //定義一個集合類
    FMyEmployee: TObjectList<TEmployee>;
  public
    { Public declarations }
  end;
FMyEmployee將會作為對象數據綁定到TGrid上。
接下來添加OnCreateAdapter事件處理代碼:
procedure TFrmMain.AdapterBindSource1CreateAdapter(Sender: TObject;
var ABindSourceAdapter: TBindSourceAdapter);
begin
//創建員工集合
FMyEmployee := TObjectList<TEmployee>.Create(True);
//創建單個員工並添加到集合
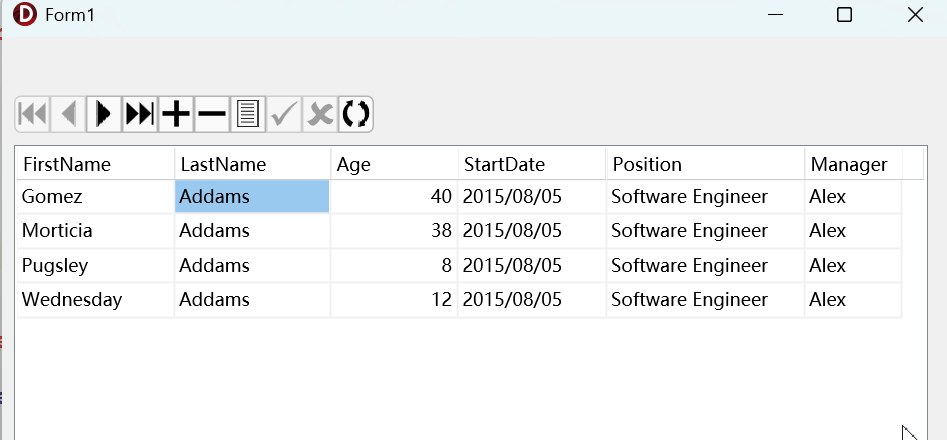
FMyEmployee.Add(TEmployee.Create('Gomez', 'Addams', 40,Now-365*10,'Software Engineer','Alex'));
FMyEmployee.Add(TEmployee.Create('Morticia', 'Addams', 38,Now-365*10,'Software Engineer','Alex'));
FMyEmployee.Add(TEmployee.Create('Pugsley', 'Addams', 8,Now-365*10,'Software Engineer','Alex'));
FMyEmployee.Add(TEmployee.Create('Wednesday', 'Addams', 12,Now-365*10,'Software Engineer','Alex'));
// 可以使用TObjectBindSourceAdapter指定單個對象,
// 示例使用TListBindSourceAdapter指定集合對象。
ABindSourceAdapter := TListBindSourceAdapter<TEmployee>.Create(Self, FMyEmployee, True);
end;
在OnCreateAdapter事件中,ABindSourceAdapter將被用來生成AdapterBindSource1所使用的真實的數據,示例使用TListBindSourceAdapter類創建了一個TObjectList
7. 現在就完成了所有的工作,萬事皆備,只欠一Run了,按下F9,或者是主菜單的“Run > Run”菜單項,可以看到,果然現在Grid顯示了在OnCreateAdapter事件中創建的員工列表。
好了,非常漂亮。
雖然本系列已經寫到第5課,但是離真實應用仍然還是有一定的距離,不要着急,只要跟着本系列一步一步的學,很快就能掌握到LiveBindings的精華。
