打造完美的 macOS 系統托盤
引言
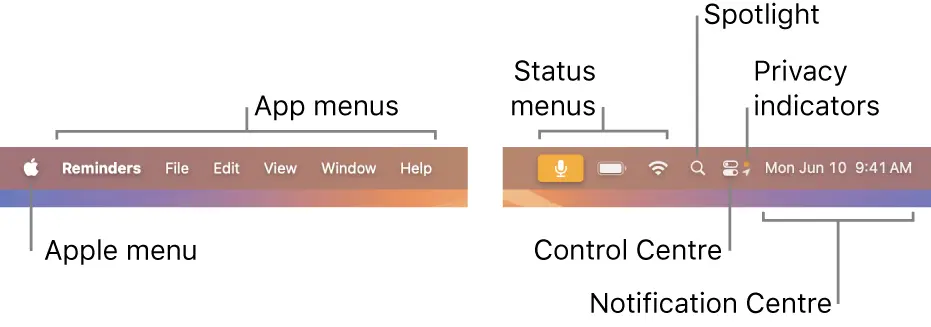
在現代桌面應用程序中,系統托盤已經成為不可或缺的一部分。它為用户提供了一種快捷、高效的方式來與應用程序進行交互,而無需打開主窗口。系統托盤的優勢主要體現在以下幾個方面:
- 便捷訪問:用户可以快速查看應用狀態、執行常用操作。
- 減少視覺干擾:不會佔用寶貴的屏幕空間。
- 後台運行:對於需要在後台持續運行的應用來説,系統托盤是理想的界面選擇。
本文將以 macOS 平台為例,詳細講解如何使用 Kotlin 和 Compose Multiplatform 框架創建一個功能完善、符合 macOS 設計規範的系統托盤應用。
基礎實現: 創建簡單的系統托盤
讓我們從最基礎的實現開始。使用 Compose Multiplatform 框架,只需幾行代碼就可以在 macOS 上創建一個簡單的系統托盤:
import androidx.compose.ui.res.painterResource
import androidx.compose.ui.window.Tray
import androidx.compose.ui.window.application
import androidx.compose.ui.window.rememberTrayState

fun main() = application {
    val trayState = rememberTrayState()
    val trayIcon = painterResource("crosspaste.tray.mac.png")

    Tray(
        state = trayState,
        icon = trayIcon,
        menu = {
            Item("Exit", onClick = ::exitApplication)
        }
    )
}
這段代碼創建了一個基本的系統托盤,包含一個圖標和一個簡單的退出菜單項。運行後,效果如下:
然而,這個基礎實現還存在一些問題:
- 圖標顯示: 托盤圖標顯示原本的顏色,而不是根據系統主題自動切換黑白顏色,這不符合 macOS 的設計規範
-
交互限制:
- 點擊托盤圖標只能彈出菜單,無法支持顯示自定義窗口
- 默認 API 不支持監聽各種點擊事件(如單擊、雙擊等)
- 框架未提供 API 獲取托盤圖標的準確位置,這限制了我們在圖標附近顯示自定義窗口的能力
接下來,我們將逐步解決這些問題,打造一個完美的 macOS 系統托盤應用。
解決方案
1. 適配 macOS 設計規範: 實現自動切換圖標顏色
macOS 的設計規範要求系統托盤圖標能夠根據系統主題自動切換顏色。要實現這一點,我們需要將圖標設置為"模板圖像"(Template Image)。在 Java/Kotlin 中,可以通過設置系統屬性來實現:
System.setProperty("apple.awt.enableTemplateImages", "true")https://docs.oracle.com/en/java/javase/17/docs/api/java.deskt...
When the apple.awt.enableTemplateImages property is set, all images associated with instances of this class are treated as template images by the native desktop system. This means all color information is discarded, and the image is adapted automatically to be visible when desktop theme and/or colors change. This property only affects MacOSX.
這個設置告訴系統將我們的圖標視為模板圖像。模板圖像的特點是:
- 所有的顏色信息都會被丟棄。
- 系統會自動根據當前主題調整圖像,使其在不同背景下保持可見。
雖然可以在代碼中直接設置這個屬性,但更好的做法是在構建配置中指定。這樣可以確保屬性在應用啓動時就被正確設置。在 Gradle 構建文件中,可以這樣配置:
compose.desktop {
    application {
        mainClass = "com.crosspaste.CrossPaste"
        nativeDistributions {
            targetFormats(TargetFormat.Dmg, TargetFormat.Msi, TargetFormat.Deb)
            macOS {
                jvmArgs("-Dapple.awt.enableTemplateImages=true")
            }
        }
    }
}
這個配置確保了在 macOS 平台上,應用啓動時會自動啓用模板圖像功能。
2. 增強交互能力: 自定義點擊事件和獲取圖標位置
2.1 支持自定義點擊事件
Compose Multiplatform 的默認 Tray 組件在 macOS 上只支持右鍵點擊事件。為了實現更豐富的交互,我們需要自定義 Tray 組件。
首先,讓我們看看 compose multiplatform 源碼 的源碼:
// @param onAction Action performed when user clicks on the tray icon (double click on Windows, right click on macOs)
@Composable
fun ApplicationScope.Tray(
    icon: Painter,
    state: TrayState = rememberTrayState(),
    tooltip: String? = null,
    onAction: () -> Unit = {},
    menu: @Composable MenuScope.() -> Unit = {}
)
為了支持更多的鼠標事件,我們可以創建一個自定義的 CrossPasteTray 組件。這個組件將允許我們添加自定義的 MouseListener:
fun CrossPasteTray(
    icon: Painter,
    state: CrossPasteTrayState = rememberTrayState(),
    tooltip: String? = null,
    onAction: (ActionEvent) -> Unit = {},
    mouseListener: MouseListener,
    menu: @Composable (MenuScope.() -> Unit) = {},
) {
   // ... 其他代碼 ...

    val tray =
        remember {
            TrayIcon(awtIcon).apply {
                isImageAutoSize = true

                addActionListener { e ->
                    currentOnAction(e)
                }
                // 添加鼠標監聽器
                addMouseListener(mouseListener)
            }
        }

    // ... 其他代碼 ...
}
這個自定義組件允許我們監聽各種鼠標事件,如單擊、雙擊、右鍵點擊等,大大增強了交互的靈活性。
另外源碼還有一缺陷
private val iconSize = when (DesktopPlatform.Current) {
    // https://doc.qt.io/qt-5/qtwidgets-desktop-systray-example.html (search 22x22)
    DesktopPlatform.Linux -> Size(22f, 22f)
    // https://doc.qt.io/qt-5/qtwidgets-desktop-systray-example.html (search 16x16)
    DesktopPlatform.Windows -> Size(16f, 16f)
    // https://medium.com/@acwrightdesign/creating-a-macos-menu-bar-application-using-swiftui-54572a5d5f87
    DesktopPlatform.MacOS -> Size(22f, 22f)
    DesktopPlatform.Unknown -> Size(32f, 32f)
}
macOS 的 iconSize 設置為 22x22, 如果提供的圖標分辨率很高,將會導致圖標鋸齒化,我們可以自定義 iconSize 來避免
2.2 獲取托盤圖標位置
要在托盤圖標附近顯示自定義窗口,我們需要知道圖標的準確位置。不幸的是,Compose Multiplatform 並沒有提供直接的 API 來獲取這個信息。但是,我們可以利用 macOS 的系統 API 來實現這個功能。
首先,我們需要添加 JNA (Java Native Access) 相關的依賴,以便調用 macOS 的系統 API:
jna = { module = "net.java.dev.jna:jna", version.ref = "jna" }
jna-platform = { module = "net.java.dev.jna:jna-platform", version.ref = "jna" }
然後,我們可以使用 Swift 編寫一個本地庫,利用 macOS 的 CGWindowListCopyWindowInfo API 來獲取托盤圖標的位置信息:
public struct WindowInfo {
   var x: Float
   var y: Float
   var width: Float
   var height: Float
   var displayID: UInt32
}

public struct WindowInfoArray {
    var count: Int32
    var windowInfos: UnsafeMutableRawPointer
}

@_cdecl("getTrayWindowInfos")
public func getTrayWindowInfos(pid: Int) -> UnsafeMutableRawPointer? {
    var trayWindows: [WindowInfo] = []
    let options: CGWindowListOption = [.optionOnScreenOnly, .excludeDesktopElements]
    if let windowInfo = CGWindowListCopyWindowInfo(options, kCGNullWindowID) as? [[String: Any]] {
       for info in windowInfo {
           if let bounds = info[kCGWindowBounds as String] as? [String: Any],
              let layer = info[kCGWindowLayer as String] as? Int,
              layer == 25,  // Menu bar/status item layer
              let ownerPID = info[kCGWindowOwnerPID as String] as? Int,
              ownerPID == pid,
              let x = bounds["X"] as? CGFloat,
              let y = bounds["Y"] as? CGFloat,
              let width = bounds["Width"] as? CGFloat,
              let height = bounds["Height"] as? CGFloat,
              width < 50 && height < 50 {
                  var displayID = CGMainDisplayID()  // Default to main display
                  for screen in NSScreen.screens {
                      if let screenNumber = screen.deviceDescription[NSDeviceDescriptionKey("NSScreenNumber")] as? NSNumber,
                         screen.frame.contains(CGPoint(x: x, y: y)) {
                          displayID = screenNumber.uint32Value
                          break
                      }
                  }
                  let windowInfo = WindowInfo(
                      x: Float(x),
                      y: Float(y),
                      width: Float(width),
                      height: Float(height),
                      displayID: displayID
                  )
                  trayWindows.append(windowInfo)
           }
       }
    }
    let arrayPtr = UnsafeMutablePointer<WindowInfoArray>.allocate(capacity: 1)
    // Allocate memory for the array of WindowInfo structs
    let count = trayWindows.count
    let bufferPtr = UnsafeMutableBufferPointer<WindowInfo>.allocate(capacity: count)

    // Copy the WindowInfo structs into the allocated memory
    for (index, window) in trayWindows.enumerated() {
        bufferPtr[index] = window
    }

    arrayPtr.pointee = WindowInfoArray(count: Int32(count), windowInfos: UnsafeMutableRawPointer(bufferPtr.baseAddress!))

    return UnsafeMutableRawPointer(arrayPtr)
}
這段 Swift 代碼做了以下幾件事:
- 定義了 WindowInfo 和 WindowInfoArray 結構體來存儲窗口信息。
- 使用 CGWindowListCopyWindowInfo 獲取所有窗口的信息。
- 篩選出屬於我們應用的托盤圖標窗口。
- 收集每個托盤圖標的位置、大小和所在顯示器的信息。
- 將收集到的信息打包成 C 可用的格式返回。
接下來,我們需要在 Kotlin 中使用 JNA 調用這個 Swift 函數。我們可以定義一個 MacosApi 接口來表示這個本地庫:
interface MacosApi : Library {
    fun getTrayWindowInfos(pid: Long): Pointer?

    companion object {
        val INSTANCE: MacosApi = Native.load("MacosApi", MacosApi::class.java)
    }
}
然後,我們需要定義與 Swift 結構體對應的 Kotlin 類:
@Structure.FieldOrder("x", "y", "width", "height", "displayID")
class WindowInfo : Structure, AutoCloseable {
    @JvmField var x: Float = 0f

    @JvmField var y: Float = 0f

    @JvmField var width: Float = 0f

    @JvmField var height: Float = 0f

    @JvmField var displayID: Int = 0

    constructor() : super()

    constructor(p: Pointer) : super(p) {
        read()
    }

    override fun close() {
        clear()
    }
}

@Structure.FieldOrder("count", "windowInfos")
class WindowInfoArray(p: Pointer) : Structure(p) {
    @JvmField var count: Int = 0

    @JvmField var windowInfos: Pointer? = null

    init {
        read()
    }
}
這裏使用 @Structure.FieldOrder 註解來確保字段順序與 Swift 結構體一致,這對於正確解析內存中的數據至關重要。
最後,為了防止內存泄漏,我們需要在使用完窗口信息後手動釋放內存:
fun List<WindowInfo>.useAll(block: (List<WindowInfo>) -> Unit) {
    try {
        block(this)
    } finally {
        this.forEach { it.close() }
    }
}
這個擴展函數允許我們安全地使用窗口信息,並在使用完畢後自動釋放資源。
結語
通過以上步驟,我們成功解決了初始實現中的主要問題:
- 使用模板圖像使托盤圖標能夠根據系統主題自動調整顏色。
- 自定義 Tray 組件,支持更多的鼠標事件。
- 利用 macOS 系統 API 獲取托盤圖標的準確位置。
這些改進使我們的系統托盤應用不僅符合 macOS 的設計規範,還具備了更強大的交互能力。現在,我們可以根據需要在托盤圖標附近顯示自定義窗口,實現更復雜的功能。
通過這些優化,我們的 macOS 系統托盤應用現在不僅功能強大,還能提供出色的用户體驗。希望這篇教程能夠幫助你在開發 macOS 桌面應用時,充分利用系統托盤的潛力。


