
前言:
本示例用於開發者在使用相機服務時,如果僅用於預覽流展示,通常使用XComponent組件實現,如果需要獲取每幀圖像做二次處理(例如獲取每幀圖像完成二維碼識別或人臉識別場景),可以通過ImageReceiver中imageArrival事件監聽預覽流每幀數據,解析圖像內容。
在解析圖像內容時,如果未考慮stride,直接通過使用width*height讀取圖像內容去解析圖像,會導致相機預覽異常,從而出現相機預覽花屏的現象。當預覽流圖像stride與width不一致時,需要對stride進行無效像素的去除處理。
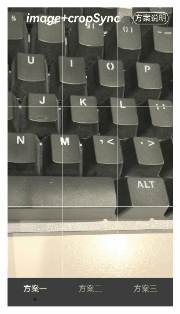
效果圖預覽
使用説明
- 本案例僅支持真機驗證,因在案例集合中導致權限彈窗reason只支持一種string。
- 點擊進入案例,授權給相機。
- 三個方案滑動頁面不會出現花屏。
- 點擊相機右上角方案説明,可出現相關方案的具體描述。
實現思路
本例涉及的關鍵特性和實現方案如下:
方案一
應用通過image.ImageReceiver註冊imageArrival圖像回調方法,獲取每幀圖像數據實例image.Image,應用通過定義一個width為1920*height為1080分辨率的預覽流直接創建pixelMap,此時獲取到的stride的值為1920。
onImageArrival(receiver: image.ImageReceiver): void {
  receiver.on('imageArrival', () => {
  receiver.readNextImage((err: BusinessError, nextImage: image.Image) => {
  if (err || nextImage === undefined) {
  logger.error(TAG, `requestPermissionsFromUser call Failed! error: ${err.code}`);
  return;
}
if (nextImage) {
  nextImage.getComponent(image.ComponentType.JPEG, async (_err, component: image.Component) => {
    let width = 1920; // width為應用創建預覽流分辨率對應的寬
    let height = 1080; // height為應用創建預覽流分辨率對應的高
    let stride = component.rowStride; // 通過component.rowStride獲取stride
    logger.info(TAG, `receiver getComponent width:${width} height:${height} stride:${stride}`);
    // stride和width相等,按寬讀取buffer不影響結果
    if (stride === width) {
      let pixelMap = await image.createPixelMap(component.byteBuffer, {
        size: { height: height, width: width },
        srcPixelFormat: image.PixelMapFormat.NV21,
      })
      AppStorage.setOrCreate('stridePixel', pixelMap);
    } else {
      ...
    }
    nextImage.release();
  })
}
});
})
}- 在初始相機模塊時,調用onImageArrival(),將未處理的width和height作為size,創建PixelMap,通過在Image中傳入被@StorageLink修飾的變量stridePixel進行數據刷新,圖片送顯。
Column() {
  Stack() {
    if (this.isShowStridePixel) {
      Image(this.stridePixel)
        .rotate({
          z: 0.5,
          angle: this.previewRotate
        })
        .zIndex(0)
    }
  }
  .width(px2vp(this.imageWidth))
  .height(px2vp(this.imageHeight))
}
.onVisibleAreaChange([0.0, 1.0], (isVisible: boolean, _currentRation: number) => {
  // 切換組件時清除不可見的頁面信息,重新進入組件時重新進入相機
  if (isVisible) {
    CameraServiceCrop.initCamera(this.cameraDeviceIndex);
  } else {
    CameraServiceCrop.releaseCamera();
  }
})
當stride和width相等時,按寬讀取buffer不影響結果。 當stride和width不等時,如果應用想使用byteBuffer預覽流數據創建pixelMap直接顯示,可以根據stride*height字節的大小先創建pixelMap,然後調用PixelMap的cropSync方法裁剪掉多餘的像素,從而正確處理stride,解決預覽流花屏問題。
onImageArrival(receiver: image.ImageReceiver): void {
  receiver.on('imageArrival', () => {
  receiver.readNextImage((err: BusinessError, nextImage: image.Image) => {
  if (err || nextImage === undefined) {
  logger.error(TAG, `requestPermissionsFromUser call Failed! error: ${err.code}`);
  return;
}
if (nextImage) {
  nextImage.getComponent(image.ComponentType.JPEG, async (_err, component: image.Component) => {
    let width = 1920; // width為應用創建預覽流分辨率對應的寬
    let height = 1080; // height為應用創建預覽流分辨率對應的高
    let stride = component.rowStride; // 通過component.rowStride獲取stride
    logger.info(TAG, `receiver getComponent width:${width} height:${height} stride:${stride}`);
    // stride和width相等,按寬讀取buffer不影響結果
    if (stride === width) {
      ...
    } else {
      let pixelMap = await image.createPixelMap(component.byteBuffer, {
        // 1.創建PixelMap時width傳stride。
        size: { height: height, width: stride },
        srcPixelFormat: 8,
      })
      // 2.然後調用PixelMap的cropSync方法裁剪掉多餘的像素。
      pixelMap.cropSync({
        size: { width: width, height: height },
        x: 0,
        y: 0
      }) // 根據輸入的尺寸裁剪圖片,從(0,0)開始,裁剪width*height字節的區域。
      let pixelBefore: PixelMap | undefined = AppStorage.get('stridePixel');
      await pixelBefore?.release();
      AppStorage.setOrCreate('stridePixel', pixelMap);
    }
    nextImage.release();
  })
}
});
})
}
方案二
方案二的創建pixelMap、圖片送顯和方案一的1、2步驟一樣,此處不再贅述。
當stride和width相等時,按寬讀取buffer不影響結果。 當stride和width不等時,將相機返回的預覽流數據即component.byteBuffer的數據去除stride,拷貝得到新的dstArr數據進行數據處理,將處理後的dstArr數組buffer,通過width和height直接創建pixelMap, 並存儲到全局變量stridePixel中,傳給Image送顯,解決預覽流花屏問題。
onImageArrival(receiver: image.ImageReceiver): void {
  receiver.on('imageArrival', () => {
  receiver.readNextImage((err: BusinessError, nextImage: image.Image) => {
  if (err || nextImage === undefined) {
  logger.error(TAG, `requestPermissionsFromUser call Failed! error: ${err.code}`);
  return;
}
if (nextImage) {
  nextImage.getComponent(image.ComponentType.JPEG,
    async (err, component: image.Component) => {
      let width = 1920; // width為應用創建預覽流分辨率對應的寬
      let height = 1080; // height為應用創建預覽流分辨率對應的高
      let stride = component.rowStride; // 通過component.rowStride獲取stride
      logger.info(TAG, `receiver getComponent width:${width} height:${height} stride:${stride}`);
      // 當圖片的width等於相機預覽流返回的行跨距stride,此時無需處理stride,通過width和height直接創建pixelMap,並存儲到全局變量stridePixel中,傳給Image送顯。
      if (stride === width) {
       ...
      } else {
        // 當圖片的width不等於相機預覽流返回的行跨距stride,此時將相機返回的預覽流數據component.byteBuffer去除掉stride,拷貝得到新的dstArr數據,數據處理後傳給其他不支持stride的接口處理。
        const dstBufferSize = width * height * 1.5; // 創建一個width * height * 1.5的dstBufferSize空間,此處為NV21數據格式。
        const dstArr = new Uint8Array(dstBufferSize); // 存放去掉stride後的buffer。
        // 讀取每行數據,相機支持的profile寬高均為偶數,不涉及取整問題。
        for (let j = 0; j < height * 1.5; j++) { // 循環dstArr的每一行數據。
          // 拷貝component.byteBuffer的每行數據前width個字節到dstArr中(去除無效像素,剛好每行得到一個width*height的八字節數組空間)。
          const srcBuf = new Uint8Array(component.byteBuffer, j * stride,
            width); // 將component.byteBuffer返回的buffer,每行遍歷,從首位開始,每行截取出width字節。
          dstArr.set(srcBuf, j * width); // 將width*height大小的數據存儲到dstArr中。
        }
        let pixelMap = await image.createPixelMap(dstArr.buffer, {
          // 將處理後的dstArr數組buffer,通過width和height直接創建pixelMap,並存儲到全局變量stridePixel中,傳給Image送顯。
          size: { height: height, width: width },
          srcPixelFormat: image.PixelMapFormat.NV21,
        })
        AppStorage.setOrCreate('stridePixel', pixelMap);
      }
      nextImage.release();
    })
}
});
})
}
方案三
- 使用XComponent渲染預覽對象輸出的圖像。
Stack() {
  XComponent({
    type: XComponentType.SURFACE,
    controller: this.xComponentCtl
  })
    .onLoad(async () => {
      logger.info('onLoad is called');
      this.xComponentSurfaceId = this.xComponentCtl.getXComponentSurfaceId(); // 獲取組件surfaceId
      // 初始化相機,組件實時渲染每幀預覽流數據
      CameraService.initCamera(this.cameraDeviceIndex, this.xComponentSurfaceId);
    })
    .zIndex(0)

  PublishView({ imageWidth: this.imageWidth, imageHeight: this.imageHeight })
    .zIndex(1)

}
.onVisibleAreaChange([0.0, 1.0], (isVisible: boolean, _currentRation: number) => {
  if (isVisible) {
    CameraService.initCamera(this.cameraDeviceIndex, this.xComponentSurfaceId);
  } else {
    CameraService.releaseCamera();
  }
})- 在初始相機模塊時,使用getXComponentSurfaceId獲取XComponent對應Surface的ID,調用createPreviewOutput創建預覽輸出對象,圖片送顯。
async initCamera(cameraDeviceIndex: number, xComponentSurfaceId: string): Promise<void> {
  logger.debug(TAG, `initCamera cameraDeviceIndex: ${cameraDeviceIndex}`);
  try {
    await this.releaseCamera();
    // 獲取相機管理器實例
    this.cameraManager = this.getCameraManagerFn();
    if (this.cameraManager === undefined) {
      logger.error(TAG, 'cameraManager is undefined');
      return;
    }
    this.cameras = this.getSupportedCamerasFn(this.cameraManager);
    this.curCameraDevice = this.cameras[cameraDeviceIndex];
    if (this.curCameraDevice === undefined) {
      logger.error(TAG, 'Failed to create the camera input.');
      return;
    }
    // 創建cameraInput輸出對象
    this.cameraInput = this.createCameraInputFn(this.cameraManager, this.curCameraDevice);
    if (this.cameraInput === undefined) {
      logger.error(TAG, 'Failed to create the camera input.');
      return;
    }
    // 打開相機
    let isOpenSuccess = await this.cameraInputOpenFn(this.cameraInput);
    if (!isOpenSuccess) {
      logger.error(TAG, 'Failed to open the camera.');
      return;
    }

    // 選擇具有不同的stride和width
    let previewProfile: camera.Profile = {
      format: camera.CameraFormat.CAMERA_FORMAT_YUV_420_SP,
      size: {
        width: Constants.X_COMPONENT_SURFACE_WIDTH,
        height: Constants.X_COMPONENT_SURFACE_HEIGHT
      }
    };
    let size: image.Size = {
      width: Constants.X_COMPONENT_SURFACE_WIDTH,
      height: Constants.X_COMPONENT_SURFACE_HEIGHT
    }
    this.receiver = image.createImageReceiver(size, image.ImageFormat.JPEG, 8);
    this.previewOutput = this.createPreviewOutputFn(this.cameraManager, previewProfile, xComponentSurfaceId);
    if (this.previewOutput === undefined) {
      logger.error(TAG, 'Failed to create the preview stream.');
      return;
    }
    // 會話流
    await this.sessionFlowFn(this.cameraManager, this.cameraInput, this.previewOutput);
  } catch (error) {
    logger.error(TAG, `initCamera fail: ${JSON.stringify(error)}`);
  }
}
注意
本示例未設置成全屏狀態,開發者可通過設置寬或高為100%,再根據當前設備的像素比設置aspectRatio(寬/高),例如Mate60可設置為aspectRatio(9/16)。
Stack() {
  if (this.isShowStridePixel) {
    Image(this.stridePixel)
      .rotate({
        z: 0.5,
        angle: this.previewRotate
      })
      .zIndex(0)
  }
}
.width('100%')
.aspectRatio(9/16)