
背景介紹
隨着大型語言模型 (LLM) 在企業應用程序中的大量使用,在本地運行模型對於數據隱私、成本控制和減少延遲變得至關重要。Ollama 簡化了本地運行 LLM,而 Kubernetes 則提供生產部署所需的編排。接下來我們看一下如何將大型語言模型部署在 Kubernetes 平台上。
部署
1 創建 ollama 命名空間
ollama-namespace.yaml
apiVersion: v1
kind: Namespace
metadata:
  name: ollama
部署
kubectl apply -f ollama-namespace.yaml2 準備存儲 storageClass
Ollama 和 OpenUI 在部署時都需要掛載存儲,我們部署 openebs 提供一個簡單的存儲。
# 添加 Helm 倉庫
helm repo add openebs-localpv https://openebs.github.io/dynamic-localpv-provisioner
helm repo update
# 安裝 openebs-localpv
helm upgrade --install openebs-localpv openebs-localpv/localpv-provisioner --namespace openebs --create-namespace  \
 --set hostpathClass.basePath="/data/openebs/local" \
 --set global.imageRegistry="ccr.ccs.tencentyun.com"  \
 --set  localpv.image.repository="chijinjing/provisioner-localpv" \
 --set  helperPod.image.repository="chijinjing/linux-utils"


# 將 openebs-hostpath 變成默認存儲類
# kubectl patch storageclass openebs-hostpath  -p '{"metadata": {"annotations":{"storageclass.kubernetes.io/is-default-class":"true"}}}'
# kubectl  get sc
NAME                         PROVISIONER        RECLAIMPOLICY   VOLUMEBINDINGMODE      ALLOWVOLUMEEXPANSION   AGE
openebs-hostpath (default)   openebs.io/local   Delete          WaitForFirstConsumer   false                  35h
3 部署 Ollama
ollama-statefulset.yaml
apiVersion: apps/v1
kind: StatefulSet
metadata:
  name: ollama
  namespace: ollama
spec:
  serviceName: "ollama"
  replicas: 1
  selector:
    matchLabels:
      app: ollama
  template:
    metadata:
      labels:
        app: ollama
    spec:
      containers:
      - name: ollama
        image: ollama/ollama:latest
        ports:
        - containerPort: 11434
        resources:
          requests:
            cpu: "2000m"
            memory: "2Gi"
          limits:
            cpu: "4000m"
            memory: "4Gi"
            nvidia.com/gpu: "0"
        volumeMounts:
        - name: ollama-volume
          mountPath: /root/.ollama
        tty: true
  volumeClaimTemplates:
  - metadata:
      name: ollama-volume
    spec:
      accessModes: [ "ReadWriteOnce" ]
      resources:
        requests:
          storage: 30Gi
ollama-service.yaml
apiVersion: v1
kind: Service
metadata:
  name: ollama-service
  namespace: ollama
spec:
  selector:
    app: ollama
  ports:
  - protocol: TCP
    port: 11434
    targetPort: 11434
部署
kubectl apply -f ollama-statefulset.yaml
kubectl apply -f ollama-service.yaml
Ollama with GPU
如果你的 Kubernetes 集羣有 GPU,可以使用如下的 YAML 來部署 Ollama。
apiVersion: apps/v1
kind: StatefulSet
metadata:
  name: ollama
  namespace: ollama
spec:
  serviceName: "ollama"
  replicas: 1
  selector:
    matchLabels:
      app: ollama
  template:
    metadata:
      labels:
        app: ollama
    spec:
      containers:
      - name: ollama
        image: ollama/ollama:latest
        ports:
        - containerPort: 11434
        resources:
          requests:
            nvidia.com/gpu: 1   # 請求 1 塊 GPU
            memory: "2Gi"
            cpu: "2000m"
          limits:
            nvidia.com/gpu: 1
            memory: "4Gi"
            cpu: "4000m"
        volumeMounts:
        - name: ollama-volume
          mountPath: /root/.ollama
        tty: true
      nodeSelector:
        gputype: nvidia-tesla-t4    # 調度到有 GPU 的節點
  volumeClaimTemplates:
  - metadata:
      name: ollama-volume
    spec:
      accessModes: [ "ReadWriteOnce" ]
      resources:
        requests:
          storage: 30Gi
Nvidia 是比較常用的 GPU,Kubernetes 也支持其它的廠商的GPU:
- AMD GPU:
amd.com/gpu- Intel GPU:
gpu.intel.com
4 部署 Open-WebUI
webui-deployment.yaml
apiVersion: apps/v1
kind: Deployment
metadata:
  name: open-webui-deployment
  namespace: ollama
spec:
  replicas: 1
  selector:
    matchLabels:
      app: open-webui
  template:
    metadata:
      labels:
        app: open-webui
    spec:
      containers:
      - name: open-webui
        image: ghcr.io/open-webui/open-webui:main
        ports:
        - containerPort: 8080
        resources:
          requests:
            cpu: "500m"
            memory: "500Mi"
          limits:
            cpu: "1000m"
            memory: "1Gi"
        env:
        - name: OLLAMA_BASE_URL
          value: "http://ollama-service.ollama.svc.cluster.local:11434" # ollama svc 域名
        tty: true
        volumeMounts:
        - name: webui-volume
          mountPath: /app/backend/data
      volumes:
      - name: webui-volume
        persistentVolumeClaim:
          claimName: open-webui-pvc
webui-pvc.yaml
apiVersion: v1
kind: PersistentVolumeClaim
metadata:
  labels:
    app: open-webui
  name: open-webui-pvc
  namespace: ollama
spec:
  accessModes: ["ReadWriteOnce"]
  resources:
    requests:
      storage: 2Gi
webui-service.yaml
apiVersion: v1
kind: Service
metadata:
  name: open-webui-service
  namespace: ollama
spec:
  type: NodePort  # 如果部署在雲上建議使用 LoadBalancer
  selector:
    app: open-webui
  ports:
    - protocol: TCP
      port: 8080
      targetPort: 8080
      nodePort: 30080
部署
kubectl apply -f webui-deployment.yaml
kubectl apply -f webui-pvc.yaml
kubectl apply -f webui-service.yaml
5 驗證
檢查 Ollama 和 Open-WebUI已經啓動成功, 接下來就可以通過瀏覽器訪問 Open-WebUI 提供的 WEB 界面了。
# kubectl get pods -n ollama
NAME                                     READY   STATUS    RESTARTS       AGE
ollama-0                                 1/1     Running   0              140m
open-webui-deployment-74bcd4c578-bn8lh   1/1     Running   1 (133m ago)   135m
# kubectl get svc  -n ollama
NAME                 TYPE        CLUSTER-IP    EXTERNAL-IP   PORT(S)          AGE
ollama-service       ClusterIP   10.96.0.85    <none>        11434/TCP        140m
open-webui-service   NodePort    10.96.0.181   <none>        8080:30080/TCP   133m
我們使用 NodePort 的方式來臨時訪問, 生產環境建議給 Open-WebUI 創建 Ingress。
webui-ingress.yaml
apiVersion: networking.k8s.io/v1
kind: Ingress
metadata:
  name: open-webui-ingress
  namespace: open-webui
  annotations:
    nginx.ingress.kubernetes.io/rewrite-target: /
spec:
  ingressClassName: nginx
  rules:
  - host: open-webui.chijinjing.cn
    http:
      paths:
      - path: /
        pathType: Prefix
        backend:
          service:
            name: open-webui-service
            port:
              number: 8080
6 下載大語言模型
登錄 Open-WebUI 界面可以看到 還沒選擇模型,
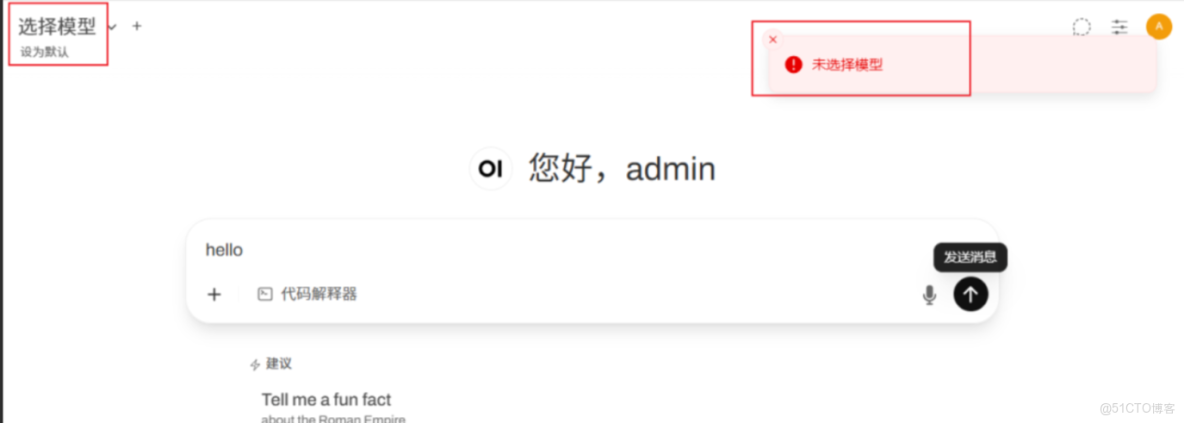
點擊右上角用户圖標,選擇 "管理員面板",選擇"設置",顯示下圖,選擇左側的“模型”,可以在這裏下載你想要使用的模型了,下載之前先查詢一下 Ollama 支持哪些模型(https://ollama.com/library)。
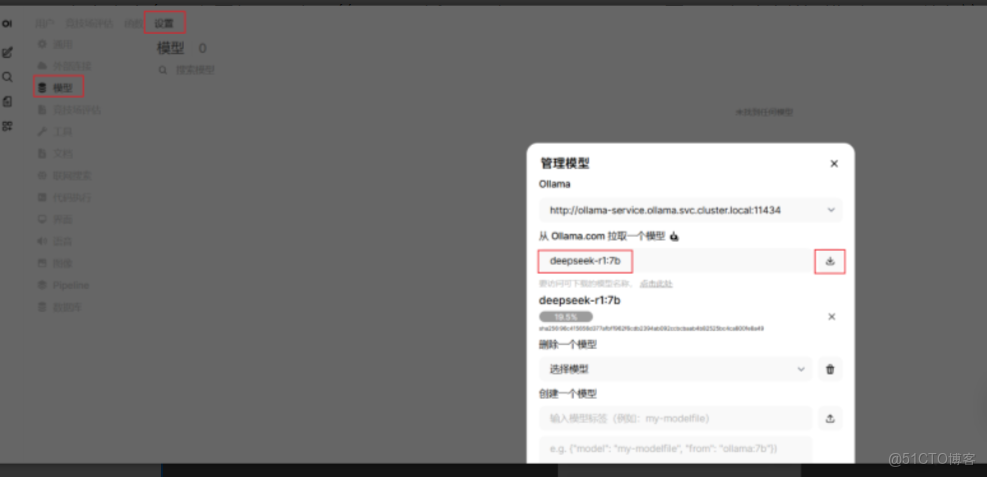
如果嫌界面操作麻煩,也可以直接登錄到 Ollama Pod 中下載需要的模型。
# kubectl -n ollama  exec -it ollama-0  -- sh
ollama run deepseek-r1:7b
模型安裝後我們就可以讓 AI 回答問題了,確實是國人開發的,思考的很全面,也很有禮貌。
總結
本文演示瞭如何在 Kubernetes 上本地化部署大型語言模型(LLM),通過組合使用 Ollama 運行模型和Open-WebUI 提供界面,確保了數據隱私、低延遲和應用的高可用 。