
前言
作為一名大學生,最近在做 Python Web 開發時發現了一個“寶藏”框架——FastAPI。 以前學 Django 光配置就頭大,學 Flask 又不知道怎麼寫規範。直到遇到了 FastAPI,我才體會到什麼叫“寫代碼像呼吸一樣自然”。 這篇文章不講複雜的原理,只講最基礎、最實用的操作,帶你從 0 到 1 跑通第一個 API 接口!
一、FastAPI 是什麼
在 Python 的世界裏,做網站後台(Web 開發)主要有三巨頭:
1. Django:老大哥,功能全但笨重,像一輛重型卡車。 2. Flask:二哥,輕便靈活但插件多,像一輛自行組裝的賽車。 3. FastAPI:新晉頂流,快、自動生成文檔、代碼這種查錯,像一輛自動駕駛的特斯拉。
為什麼新手首選 FastAPI?不寫文檔:代碼寫完,接口文檔自動生成(Swagger UI)。少寫 Bug:利用 Python 的類型提示,參數傳錯了直接報錯,不會等到運行一半才崩潰。 簡單:Hello World 只需要 5 行代碼。
二、環境搭建(避坑指南)
1. 安裝
很多新手第一步就倒在了環境上,跟着我做,保證沒問題。
FastAPI 依賴 Python 3.8 及更⾼版本,需要Python3.8以上的解釋器,第一步是下載FastAPI模塊(如果已經下載可以忽略)
pip install fastapi -i https://mirrors.aliyun.com/pypi/simple/-i https://mirrors.aliyun.com/pypi/simple/ 是使用了國內的鏡像,加快下載
第二步是需要⼀個 ASGI 服務器,⽣產環境可以使⽤ Uvicorn 或者 Hypercorn
pip install "uvicorn[standard]" -i https://mirrors.aliyun.com/pypi/simple/2.運行與啓動
新建一個 `main.py` 文件,寫入最簡單的代碼:
from fastapi import FastAPI
import uvicorn

# 1. 創建應用實例
app = FastAPI()

# 2. 定義路由
@app.get("/")
def root():
    return {"message": "Hello World"}

# 3. 啓動入口(也可以在命令行運行)
if __name__ == "__main__":
    uvicorn.run(app="main:app", host="127.0.0.1", port=8000)
這裏的 "main:app" 意思是:運行 main.py 文件裏的 app 對象
啓動服務的方式有2個:
第一個是在代碼上面寫入if __name__ == "__main__":
uvicorn.run(app="main:app", host="127.0.0.1", port=8000)語句直接運行啓動
第二個是點開終端

然後輸入下面的代碼啓動服務
uvicorn main:app個人推薦第一個^_^
啓動後訪問 `http://127.0.0.1:8000`,你會看到返回的JSON數據:
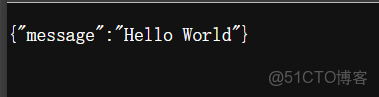
恭喜你!你的第一個 Web 接口已經跑通了!🎉
三、FastAPI的核心魔法:自動文檔
這是 FastAPI 最讓隔壁 Java 同學羨慕哭的功能。因為你不需要寫任何一行文檔代碼,FastAPI 已經幫你寫好了。 打開瀏覽器,訪問:http://127.0.0.1:8000/docs

你會看到一個狂拽酷炫的 Swagger UI界面。
這是 FastAPI 根據你的代碼自動生成的接口文檔。
以前:寫完接口 -> 打開 Postman -> 填 URL -> 填參數 -> 發送 -> 報錯 -> 改代碼...
現在:直接在網頁上點 `Try it out`,填參數,執行
四、怎麼接收數據?(核心基礎)
做後端最主要的工作就是:接收前端的數據 -> 處理數據 -> 返回結果。 FastAPI 接收數據主要有兩種方式,新手必須掌握。
1. 路徑參數 (Path Parameters)
場景:你要查詢 ID 為 5 的學生信息,網址通常是 `http://.../student/5`。 代碼這樣寫:
from fastapi import FastAPI
import uvicorn
app = FastAPI()

@app.get("/student/{student_id}")  # 注意花括號 {}
def get_student(student_id: int):  # 注意這裏寫了 : int
    return {
        "學生ID": student_id,
        "類型": str(type(student_id))
    }

if __name__=="__main__":
    uvicorn.run(app="main:app",host="127.0.0.1",port=8088)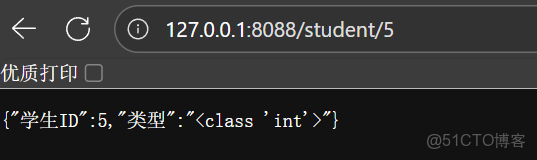
新手看細節: 我在函數參數裏寫了 `student_id: int`。 如果你訪問 `/student/5`,FastAPI 會自動把 `5` 轉換成整數,如果你訪問 `/student/abc`,FastAPI 會直接給你報錯,提示你“我們要的是整數,你給的是字符串”。 這就是類型檢查的強大之處!
2. 查詢參數 (Query Parameters)
場景:類似百度的搜索,網址是 `http://.../search?keyword=python&page=1`。 在 FastAPI 裏,只要函數參數裏寫的變量,沒在路徑裏出現,就是查詢參數。
from fastapi import FastAPI
import uvicorn
app = FastAPI()


@app.get("/search")
def search_data(keyword: str, page: int = 1): # page=1 是默認值
    return {
        "你搜的詞": keyword,
        "當前頁碼": page
    }
if __name__=="__main__":
    uvicorn.run(app="main:app",host="127.0.0.1",port=8088)
訪問 /search?keyword=apple 返回 `keyword=apple`, `page=1` (默認值)。
訪問 /search?keyword=apple&page=5 返回 `keyword=apple`, `page=5`。
五、最強功能:Pydantic 數據模型
如果你要做註冊功能,前端會發來一堆數據(用户名、密碼、年齡...)。 如果參數太多,一個一個寫在函數裏太亂了。FastAPI 引入了Pydantic來定義數據的“形狀”。 這是重點中的重點,一定要看懂!
from fastapi import FastAPI
import uvicorn
from pydantic import BaseModel  # 1. 導入 BaseModel
app = FastAPI()

# 2. 定義一個類,繼承 BaseModel
# 這就像是制定一個“表格”,前端傳來的數據必須符合這個表格
class UserInfo(BaseModel):
    username: str
    password: str
    age: int = 18  # 默認18,如果沒傳就是18
    is_student: bool = True  # 是否是學生

# 3. 在接口中使用這個模型
@app.post("/register")
def register(user: UserInfo):  # 核心:參數類型指定為 UserInfo
    # FastAPI 會自動把前端傳來的 JSON 塞進 user 變量裏
    # 我們可以直接用 user.username 取值
    if user.age < 18:
        return {"message": "未成年人禁止註冊", "code": 400}

    return {
        "message": "註冊成功",
        "用户": user.username,
        "身份": "學生" if user.is_student else "社會人"
    }

if __name__=="__main__":
    uvicorn.run(app="main:app",host="127.0.0.1",port=8088)
怎麼測試這個 POST 接口?
1. 打開 `/docs` 文檔頁面。 2. 找到 `/register` 接口。 3. 點擊 `Try it out`。 4. 在 Request body 裏修改 JSON 數據。 5. 點擊 `Execute`。
你完全不用寫解析 JSON 的代碼,FastAPI 全部幫你做好了!
六、總結與建議
對於新手來説,掌握以上內容,你已經算是一個合格的 FastAPI 入門者了。
回顧一下今天學到的: 1. 安裝:pip install fastapi。 2. 啓動:uvicorn是啓動引擎。 3. 文檔:`/docs` 自動生成文檔,是測試神器。 4. 參數:利用 Python 的類型提示(`int`, `str`)來約束參數。 5. 模型:用 `BaseModel` 來處理複雜的 POST 數據(如註冊登錄)。
FastAPI 就像一把趁手的兵器,不僅讓你寫代碼變快,更讓你寫出規範、健壯的代碼。