
一,我的訂單獲取數據進行展示
在center訂單中心組建中,創建兩個子路由組件,myorder組件, 我的訂單, grouporder組件, 團購組件
<dd>
              <router-link to="/center/myorder">我的訂單</router-link>
            </dd>
            <dd>
              <router-link to="/center/grouporder">團購訂單</router-link>
            </dd>
</div>
<!-- 右側內容 -->
<router-view></router-view>
</div>配置路由
{
    path:'/center',
    component:Center,
    children:[
      {
        path:'myorder',
        component:Myorder
      },
      {
        path:'grouporder',
        component:Grouporder
      },
      {
        path:'',
        redirect:'myorder'
      }
    ]

  },
點擊路由連接router-link,自帶的類,配置顏色
//左邊
      .order-left {
        float: left;
        width: 16.67%;

        .router-link-active {
          color: hotpink;
          /* background-color: hotpink; */
        }
1.封裝請求獲取我的訂單分頁信息
//請求獲取我的訂單分頁信息   /api/order/auth/{page}/{limit}   get

export const reqMyOrder = (page,limit) => Ajax.get(`/order/auth/${page}/${limit}`)
2.myorder組件獲取數據進行展示,需要傳入page和limit參數,可在data中初始化,因為myorder中有分頁器,需要用到該參數
data() {
    return {
      page: 1,
      limit: 5,

      myOrderInfo: {},
    };
  },
  mounted() {
    this.getMyOrder();
  },
  methods: {
    //這個MyOrder組件是一個路由組件
    //路由組件點擊切換才會創建組件對象,父組件傳遞才有可能
    //可以選擇路由傳參,但是非常複雜並且不適合(數據有可能很複雜)
    //所以請求數據只能在子路由組件
    async getMyOrder(page = 1) {
      this.page = page;
      const result = await this.$API.reqMyOrder(this.page, this.limit);
      if (result.code === 200) {
        this.myOrderInfo = result.data;
      }
    },
3.返回的響應數據
{
    "code": 200,
    "message": "成功",
    "data": {
        "records": [
            {
                "id": 70,
                "consignee": "admin",
                "consigneeTel": "15011111111",
                "totalAmount": 29495,
                "orderStatus": "UNPAID",
                "userId": 2,
                "paymentWay": "ONLINE",
                "deliveryAddress": "北京市昌平區2",
                "orderComment": "",
                "outTradeNo": "ATGUIGU1584247289311481",
                "tradeBody": "Apple iPhone 11 (A2223) 128GB手機 雙卡雙待 A",
                "createTime": "2020-03-15 12:41:29",
                "expireTime": "2020-03-16 12:41:29",
                "processStatus": "UNPAID",
                "trackingNo": null,
                "parentOrderId": null,
                "imgUrl": null,
                "orderDetailList": [
                    {
                        "id": 81,
                        "orderId": 70,
                        "skuId": 2,
                        "skuName": "Apple iPhone 11 (A2223) 64GB 紅色",
                        "imgUrl": "http://192.168.200.128:8080/xxx.jpg",
                        "orderPrice": 5499,
                        "skuNum": 1,
                        "hasStock": null
                    },
                    …
                ],
                "orderStatusName": "未支付",
                "wareId": null
            },
            …
        ],
        "total": 41,
        "size": 2,
        "current": 1,
        "pages": 21
    },
    "ok": true
}
4.在html中填充數據
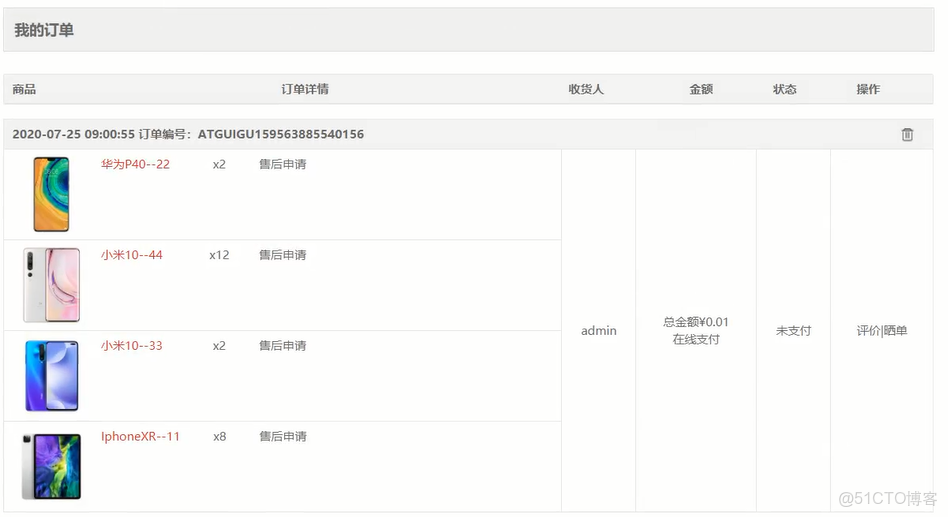
<tr v-for="(goods, index) in order.orderDetailList" :key="goods.id">
              <td width="60%">
                <div class="typographic">
                  <!-- hasStock:null
                    id:4252
                    imgUrl:"http://182.92.128.115:8080/group1/M00/00/0D/rBFUDF7G-ZKADQhWAAJsvyuFaiE144.jpg"
                    orderId:1939
                    orderPrice:4500
                    skuId:118
                    skuName:"華為P40--22"
                    skuNum:2
                  -->
                  <img :src="goods.imgUrl" style="width:80px;height:80px" />
                  <a href="#" class="block-text">{{goods.skuName}}</a>
                  <span>x{{goods.skuNum}}</span>
                  <a href="#" class="service">售後申請</a>
                </div>
              </td>
              <!--template是一個內置的標籤,這個標籤不會影響樣式,相當於一個包裹器和div類似,但是div影響樣式  -->
              <template v-if="index === 0">
                <td
                  :rowspan="order.orderDetailList.length"
                  width="8%"
                  class="center"
                >{{order.consignee}}</td>
                <td :rowspan="order.orderDetailList.length" width="13%" class="center">
                  <ul class="unstyled">
                    <li>總金額¥{{order.totalAmount}}</li>
                    <li>{{ order.paymentWay === "ONLINE" ? '在線支付': '貨到付款'}}</li>
                  </ul>
                </td>
                <td :rowspan="order.orderDetailList.length" width="8%" class="center">
                  <a href="#" class="btn">{{order.orderStatus === "UNPAID"?"未支付":"已完成"}}</a>
                </td>
                <td :rowspan="order.orderDetailList.length" width="13%" class="center">
                  <ul class="unstyled">
                    <li>
                      <a href="mycomment.html" target="_blank">評價|曬單</a>
                    </li>
                  </ul>
                </td>
              </template>
            </tr>
注;1.此時需要對單元格進行合併,首先,只對第一行數據展示,然後對td單元格標籤中的 :rowspan屬性進行行數佔據,可計算order.orderDetailList.length長度

將單元格合併後
二,使用element-ui的分頁器
1.在html中使用分頁器paginaton
在入口文件main.js中導入分液器pagainaton
import { MessageBox, Message, Pagination } from 'element-ui';
Vue.use(Pagination)
<!--  @size-change="changeSize" 修改每頁的數量回調函數 選擇了新條數,就會觸發這個事件,把選擇的條數傳給這個事件 -->
      <!-- @current-change="getMyOrder" 修改當前頁  點擊了哪一頁,就會觸發這個事件 把點擊的頁碼傳給這個事件 -->
      <el-pagination
        background
        :current-page="page"

        :page-size="limit"
        layout=" prev, pager, next, jumper,->,total"
        :total="myOrderInfo.total"

        :pager-count="5"
        @current-change="getMyOrder($event)"
       @size-change="changeSize"

      ></el-pagination>
2.@current-change="getMyOrder" 和 @size-change="changeSize" 兩個事件函數
methods: {
    //這個MyOrder組件是一個路由組件
    //路由組件點擊切換才會創建組件對象,父組件傳遞才有可能
    //可以選擇路由傳參,但是非常複雜並且不適合(數據有可能很複雜)
    //所以請求數據只能在子路由組件
    async getMyOrder(page = 1) {  //默認當前頁為第一頁
      this.page = page;   //修改當前頁
      const result = await this.$API.reqMyOrder(this.page, this.limit);
      if (result.code === 200) {
        this.myOrderInfo = result.data;
      }
    },

  //改變當前頁的條數
    changeSize(size){
      this.limit = size
      this.getMyOrder()
    },
注,對分頁器的屬性詳解
<el-pagination
    //當前頁的顏色
    background
    //修改每頁的條數回調函數 選擇了新條數,就會觸發這個事件,把選擇的條數傳給這個事件
      @size-change="handleSizeChange"
    //修改當前頁  點擊了哪一頁,就會觸發這個事件 把點擊的頁碼傳給這個事件
      @current-change="handleCurrentChange"
    //當前頁
      :current-page="currentPage4" 首尾項
    //連續頁碼數,包括首
    :pager-count="5"
      :page-sizes="[100, 200, 300, 400]"
    //每頁顯示條目個數
      :page-size="100"
    //total放在最後面
      layout=" prev, pager, next, jumper,->,total"
    //總條目數
      :total="400">
    </el-pagination>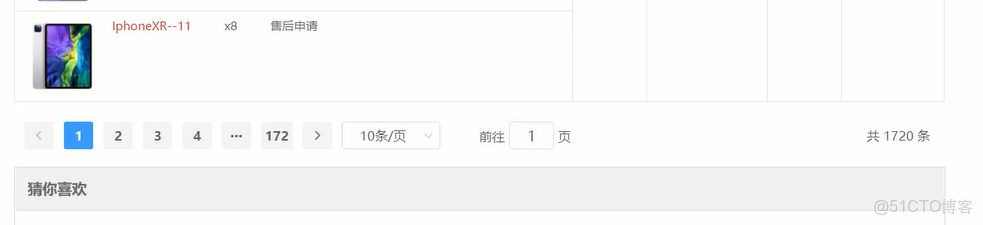
三,全局前置路由守衞的使用
1.在router-index.js,
2.引入vuex
import store from '@/store'
import routes from '@/router/routes'
const router = new VueRouter({
  routes,
  scrollBehavior (to, from, savedPosition) {
    return { x: 0, y: 0 }
  }
})

//添加全局前置路由導航守衞
// 必須登錄後才能訪問的多個界面使用全局守衞(交易相關、支付相關、用户中心相關)
// 自動跳轉前面想而沒到的頁面

router.beforeEach((to, from, next) => {
  //to:代表路由對象,目標(想去哪)
  //from: 代表路由對象,起始(從哪來)
  //netx:是一個函數,選擇放行或者不放行的意思還可以去重定向到一個新的地方
  //next()就是放行
  //next(false)不放行
  //next(路徑)重定向

  let targerPath = to.path
  if(targerPath.startsWith('/pay') || targerPath.startsWith('/trade') || targerPath.startsWith('/center')){
    //看看用户是否登錄了
    if(store.state.user.userInfo.name){
      next()
    }else{
      //在登錄的路徑後面添加上之前想要去的路徑
      //配合登錄邏輯可以讓我們去到之前想去而沒有去的地方
      next('/login?redirect='+targerPath)
    }
  }else{
    next()
  }

})

export default router
注; 1.如果用户需要去交易頁面,訂單頁面,需要判斷一下
2.判斷用户是否登錄了,從vuex中的user.js找到用户名信息,判斷是否登錄了
3.
如果用户沒有登錄,點擊我的訂單,跳轉到登錄頁面,然後登錄後,應該直接跳轉到我的訂單頁面
此時需要配置一個重定向的路徑,在登錄路徑後添加一個query參數(去哪裏的路徑)
此時在登錄組件需要判斷一下是否有query參數,有的話,去需要去的路徑,沒有的話,去home路徑
//點擊登錄按鈕,發送請求
  methods: {
    async login() {
      let { mobile, password } = this;
      if (mobile && password) {
        let userInfo = { mobile, password };
        try {
          await this.$store.dispatch("userLogin", userInfo);
          let redirectPath = this.$route.query.redirect;
          //如果存在需要去的路徑
          if (redirectPath) {
            //代表是從導航守衞進來的登錄邏輯
            this.$router.push(redirectPath);
          } else {
            //代表不是從導航守衞來的登錄邏輯
            this.$router.push("/home");
          }
        } catch (error) {
          alert(error.message);
        }
      }
    },
  },
四,路由獨享的守衞
1.
有個bug, 如果用户登錄了,進入登錄頁面輸入http://localhost:8080/#/login, 還是會跳轉到登錄頁面,應該到home頁面
此時需要設置路由獨享守衞,沒有登錄時,放行,有登錄時,跳轉到home頁面
2.引入vuex, import store from '@/store'
在路由對象中 router--routers.js, 設置login路由對象中設置路由獨享守衞
{
    path:'/login',
    component:Login,
    // 用來判定底部是否隱藏
    meta:{
      isHide:true
    },
    //路由獨享守衞
    beforeEnter: (to, from, next) => {
      //to:代表路由對象,目標(想去哪),此時代表login路由對象
      if(!store.state.user.userInfo.name){
        //沒登錄,放行
        next()
      }else{
        //登錄了,跳轉到home頁面
        next('/home')
      }
    }
  },
組件內的守衞,一般不用,一般用路由獨享守衞
和路由獨享守衞的第二種方法,組件內的守衞,在login組件中設置
引入vuex
import store from '@/store'
beforeRouteEnter(to, from, next) {
    // 在渲染該組件的對應路由被 confirm 前調用
    // 不!能!獲取組件實例 `this`
    // 因為當守衞執行前,組件實例還沒被創建
    // 如果內部需要用到this,那麼就得用下面的那個寫法
    if (!store.state.user.userInfo.name) {
      //沒有登錄,放行
      next();
    } else {
      //登錄了,跳轉到home頁面
      next("/home");
    }
  },

  // beforeRouteEnter(to, from, next) {
  //   next((vm) => {
  //     // 通過 `vm` 訪問組件實例 vm就是你之前想要的this
  //   });
  // },
六,只有攜帶了skuNum和sessionStorage內部有skuInfo數據 才能看到添加購物車成功的界面,路由獨享守衞
{
    path:'/addCartSuccess',
    component:AddCartSuccess,
    name:"addcartsuccess",
    //只有攜帶了skuNum和sessionStorage內部有skuInfo數據  才能看到添加購物車成功的界面
    beforeEnter: (to, from, next) => {
      let skuNum= to.query.skuNum
      let skuInfo = JSON.parse(sessionStorage.getItem('SKUINFO'))
      //判斷
      if(skuNum && skuInfo){
        //攜帶了skuNum 和skuInfo,放行
        next()

      }else{
        next('/')

      }
    }
  },
只有從購物車界面/shopcart才能跳轉到交易頁面(創建訂單)/trade
{
    path:'/trade',
    component:Trade,
    beforeEnter: (to, from, next) => {
      if(from.path === '/shopcart'){
        next()
      }else{
        next('/')
      }
    }
  },
只有從交易頁面(創建訂單)頁面/trade才能跳轉到支付頁面/pay
{
    path:'/pay',
    component:Pay,
    beforeEnter: (to, from, next) => {
      if(from.path === '/trade'){
        next()
      }else{
        next('/')
      }
    }
  },
只有從支付頁面/pay才能跳轉到支付成功頁面/paysuccess
{
    path:'/paysuccess',
    component:PaySuccess,
    beforeEnter: (to, from, next) => {
      if(from.path === '/pay'){
        next()
      }else{
        next('/')
      }
    }
  },
七,圖片懶加載
1. 圖片懶加載特點説明
(1)    還沒有加載得到目標圖片時, 先顯示loading圖片
(2)    在<img>進入可視範圍才加載請求目標圖片

2. 下載依賴
npm install vue-lazyload

3. 引入並配置loading圖片
import VueLazyload from 'vue-lazyload'
import loading from '@/assets/images/loading.gif'
// 在圖片界面沒有進入到可視範圍前不加載, 在沒有得到圖片前先顯示loading圖片
Vue.use(VueLazyload, { // 內部自定義了一個指令lazy
  loading,  // 指定未加載得到圖片之前的loading圖片
})

4. 對異步獲取的圖片實現懶加載
<img v-lazy="goods.defaultImg" />
1.在入口文件main.js中配置
// 引入圖片懶加載插件
import VueLazyload from 'vue-lazyload'
import loading from '@/assets/images/loading.gif'
Vue.use(VueLazyload, { // 內部自定義了一個指令lazy
  loading,  // 指定未加載得到圖片之前的loading圖片
})
2.在search組件的img標籤中實行v-lazy指令
<router-link :to="`/detail/${goods.id}`" target="_blank">
                        <img v-lazy="goods.defaultImg" />
                      </router-link>
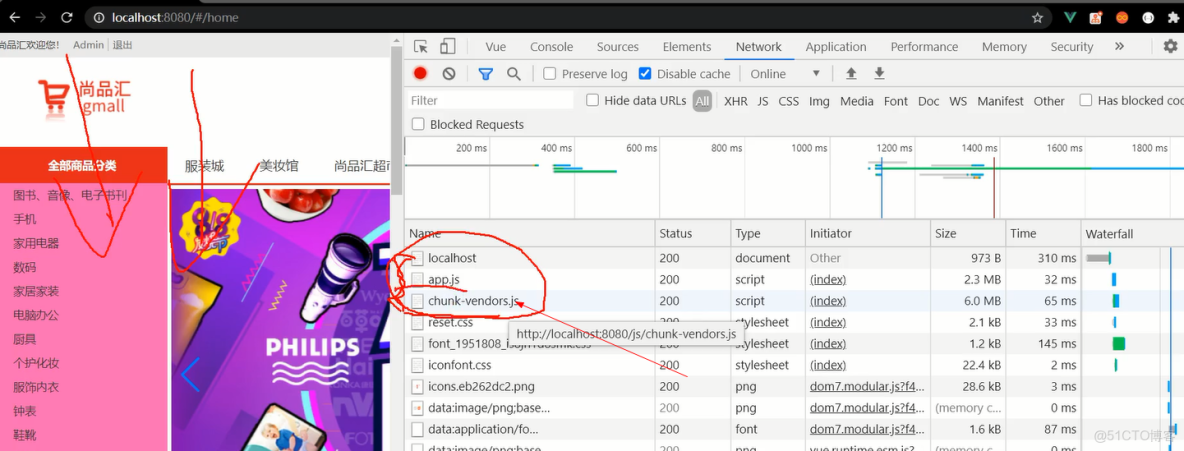
八,路由懶加載
路由懶加載
    調用import函數把一次性打包的所有路由組件分開去打包
    然後訪問哪一個再去加載哪一個

    (1)    當打包構建應用時,JS包會變得非常大,影響頁面加載。如果我們能把不同路由對應的組件分割成不同的代碼塊,
        然後當路由被訪問的時候才加載對應組件,這樣就更加高效了
    (2)    本質就是Vue 的異步組件在路由組件上的應用
    (3)    需要使用動態import語法, 也就是import()函數
    (4)    import('模塊路徑'): webpack會對被引入的模塊單獨打包
    (5)     當第一次訪問某個路徑對應的組件時,此時才會調用import函數去加載對應的js打包文件
1. 理解
(1)    當打包構建應用時,JS包會變得非常大,影響頁面加載。如果我們能把不同路由對應的組件分割成不同的代碼塊,然後當路由被訪問的時候才加載對應組件,這樣就更加高效了
(2)    本質就是Vue 的異步組件在路由組件上的應用
(3)    需要使用動態import語法, 也就是import()函數
2. 編碼
// import Home from '@/pages/Home'
// import Search from '@/pages/Search'
// import Detail from '@/pages/Detail'

/*
1. import('模塊路徑'): webpack會對被引入的模塊單獨打包
2. 路由函數只在第一次請求時才執行, 也就是第一次請求訪問對應路由路徑時才會請求後台加載對應的js打包文件
*/
const Home = () => import('@/pages/Home')
const Search = () => import('@/pages/Search')
const Detail = () => import('@/pages/Detail')
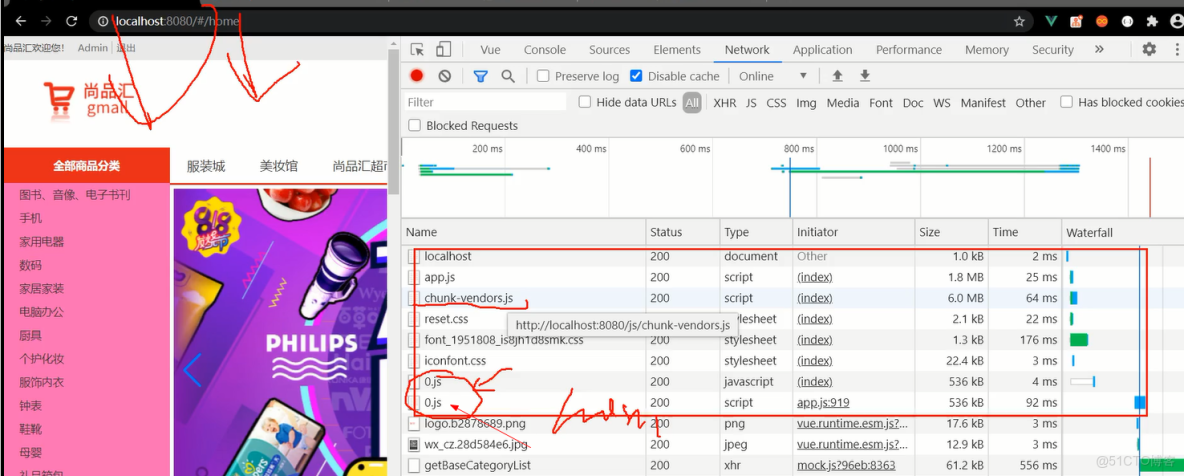
沒有使用路由懶加載時,是整體的組件打包
使用路由懶加載後,加載一個路由組件,打包一個路由組件, 0.js,是組件打包的文件,路由的懶加載組件按照順序加載組件
vee-validate表單驗證
注;
required: true,是必須的驗證,
name="phone" 是每項的輸入框的名稱標識,
invalid類,非法的類名,不匹配這個驗證規則,提示報錯
class="error-msg" 報錯的類,局部驗證
協議選項需要打鈎,需要自定義一個規則agree
# 1. 説明

    vee-validate是專門用來做表單驗證的vue插件
    我們當前用的是2.x的版本, 最新的3.x版本使用比較麻煩
    github地址: https://github.com/logaretm/vee-validate
    內置校驗規則: https://github.com/logaretm/vee-validate/tree/v2/src/rules
    中文messages: https://github.com/logaretm/vee-validate/blob/v2/locale/zh_CN.js

# 2. 使用

## 1). 引入

    下載: npm install -S vee-validate@2.2.15
    引入插件:
        import Vue from 'vue'
        import VeeValidate from 'vee-validate'

        Vue.use(VeeValidate)

## 2). 基本使用

     <input v-model="mobile" name="phone" v-validate="{required: true,regex: /^1\d{10}$/}"
          :class="{invalid: errors.has('phone')}">
     <span class="error-msg">{{ errors.first('phone') }}</span>

     const success = await this.$validator.validateAll() // 對所有表單項進行驗證

     問題: 提示文本默認都是英文的

## 3). 提示文本信息本地化

    import VeeValidate from 'vee-validate'
    import zh_CN from 'vee-validate/dist/locale/zh_CN' // 引入中文message

    VeeValidate.Validator.localize('zh_CN', {
      messages: {
        ...zh_CN.messages,
        is: (field) => `${field}必須與密碼相同`  // 修改內置規則的message
      },
      attributes: { // 給校驗的field屬性名映射中文名稱
        phone: '手機號',
        code: '驗證碼',
      }
    })

    完整中文message源碼: https://github.com/logaretm/vee-validate/blob/v2/locale/zh_CN.js

## 4). 自定義驗證規則

    VeeValidate.Validator.extend('agree', {
      validate: value => {
        return value
      },
      getMessage: field => field + '必須同意'
    })
1.在src新建一個文件,validate.js,
import Vue from 'vue'
import VeeValidate from 'vee-validate'
import zh_CN from 'vee-validate/dist/locale/zh_CN' // 引入中文message

Vue.use(VeeValidate)


VeeValidate.Validator.localize('zh_CN', {
  messages: {
    ...zh_CN.messages,
    is: (field) => `${field}必須與密碼相同`  // 修改內置規則的message
  },
  attributes: { // 給校驗的field屬性名映射中文名稱
    phone: '手機號',
    code: '驗證碼',
    password:'密碼',
    password2:'確認密碼',
    isCheck:'協議'
  }
})


VeeValidate.Validator.extend('agree', {
  validate: value => {
    return value
  },
  getMessage: field => field + '必須同意'
})
在入口文件main.js引入該模塊
// 引入表單驗證插件
import "../validate";
在Register註冊組件中,使用規則
<div class="content">
        <label>手機號:</label>
        <input
          placeholder="請輸入你的手機號"
          v-model="mobile"
          name="phone"
          v-validate="{ required: true, regex: /^1\d{10}$/ }"
          :class="{ invalid: errors.has('phone') }"
        />
        <span class="error-msg">{{ errors.first("phone") }}</span>
        <!-- <input type="text" placeholder="請輸入你的手機號" v-model="mobile" />
        <span class="error-msg">錯誤提示信息</span> -->
      </div>
<div class="content">
<label>驗證碼:</label>
<input
placeholder="請輸入驗證碼"
v-model="code"
name="code"
v-validate="{ required: true, regex: /^\d{4}$/ }"
:class="{ invalid: errors.has('code') }"
/>
<img
ref="code"
src="/api/user/passport/code"
@click="changecode"
alt="code"
/>
<span class="error-msg">{{ errors.first("code") }}</span>
<!-- <input type="text" placeholder="請輸入驗證碼" v-model="code" />
<img
ref="code"
src="/api/user/passport/code"
@click="changecode"
alt="code"
/>
<span class="error-msg">錯誤提示信息</span> -->
</div><div class="content">
<label>登錄密碼:</label>
<input
type="text"
placeholder="請輸入你的登錄密碼"
v-model="password"
name="password"
v-validate="{ required: true, regex: /^1\d{10}$/ }"
:class="{ invalid: errors.has('password') }"
/>
<span class="error-msg">{{ errors.first("password") }}</span>
<!-- <input
type="text"
placeholder="請輸入你的登錄密碼"
v-model="password"
/>
<span class="error-msg">錯誤提示信息</span> -->
</div>
確認密碼要和密碼一致
<div class="content">
        <label>確認密碼:</label>
        <input
          placeholder="請輸入確認密碼"
          v-model="password2"
          name="password2"
          v-validate="{ required: true, is: (password) }"
          :class="{ invalid: errors.has('password2') }"
        />
        <span class="error-msg">{{ errors.first("password2") }}</span>

        <!-- <input type="text" placeholder="請輸入確認密碼" v-model="password2" />
        <span class="error-msg">錯誤提示信息</span>   v-model="isCheck"   type="checkbox"-->
      </div>
<div class="controls">
<input
type="checkbox"
v-model="isCheck"
name="isCheck"
//自定義的agree規則
v-validate="{ agree: true }"
:class="{ invalid: errors.has('isCheck') }"
/>
<span>同意協議並註冊《尚品彙用户協議》</span>
<span class="error-msg">{{ errors.first("isCheck") }}</span>
<!-- <input name="m1" type="checkbox" />
<span>同意協議並註冊《尚品彙用户協議》</span>
<span class="error-msg">錯誤提示信息</span> -->
</div>
,此時,點擊註冊按鈕,需要統一驗證
//點擊完成註冊,發送請求
    async wczc() {
      const success = await this.$validator.validateAll(); // 對所有表單項進行驗證
      if (success) {
        let { mobile, password, code, password2 } = this;
        try {
          // if (mobile && code && password && password === password2) {
          let userInfo = {
            mobile,
            password,
            code,
          };

          await this.$store.dispatch("getreqRegister", userInfo);
          alert("註冊成功,跳轉到登錄");
          this.$router.push("/login");
          // }
        } catch (error) {
          alert(error);
        }
      }
    },