
HarmonyOS Grid 網格元素拖拽交換實現
官方文檔永遠是你的好夥伴,請收藏!
華為開發者聯盟 - Grid 組件參考文檔 華為開發者聯盟 - GridItem 組件參考文檔
關於本文
本文主要介紹在 HarmonyOS 中如何實現 Grid 網格元素的拖拽交換功能,包含相同大小和不同大小網格元素的實現方法
- 本文並不能代替官方文檔,所有內容基於官方文檔+實踐記錄
- 所有代碼示例都有詳細註釋,建議自己動手嘗試
- 基本所有關鍵功能都會附上對應的文檔鏈接,強烈建議你點看看看
概述
Grid 網格元素拖拽交換功能在應用中經常會被使用,比如編輯九宮格圖片時需要拖拽圖片改變排序。當網格中圖片進行拖拽交換時,元素排列會跟隨圖片拖拽的位置而變化,並有對應的動畫效果,提供良好的用户體驗。
先來看看最終效果:

實現原理
關鍵技術
Grid 網格元素拖拽交換功能主要通過三個部分實現:
- Grid 容器組件 - 用來構建網格佈局
- 組合手勢 - 實現元素的拖拽操作
- animateTo 動畫 - 提供流暢的視覺效果
重要提醒! Grid 組件的支持 animation 功能有一些限制:
- 必須設置 supportAnimation 為 true
- 僅在滾動模式下(設置 rowsTemplate 或 columnsTemplate)支持
- 只在大小規則的 Grid 中支持拖拽動畫,跨行或跨列場景不支持
- 跨行跨列場景需要自定義 Grid 佈局、手勢和動畫
開發流程
實現拖拽交換的基本步驟:
- 實現 Grid 佈局,設置 editMode=true 開啓編輯模式
- 給 GridItem 組件綁定長按、拖拽等手勢
- 使用 animateTo 添加動畫效果
華為開發者聯盟 - 組合手勢參考文檔 華為開發者聯盟 - animateTo 參考文檔
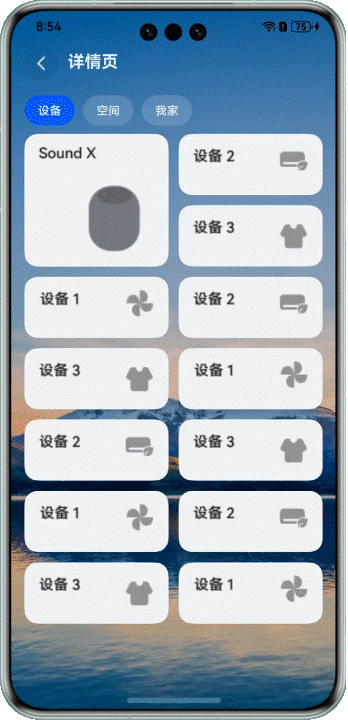
相同大小網格元素,長按拖拽
場景描述
最常見的場景就是編輯九宮格圖片,長按圖片可以拖拽交換排序,拖拽時旁邊的圖片會即時移動,形成新的佈局。
看看實際效果:

開發步驟
1. 創建 Grid 佈局
首先創建一個基本的 Grid 佈局,包含相同大小的 GridItem:
Grid() {
  // 使用ForEach遍歷數據生成GridItem
  ForEach(this.numbers, (item: number) => {
    GridItem() {
      Image($r(`app.media.image${item}`)) // 根據item加載對應的圖片資源
        .width('100%') // 寬度佔滿GridItem
        .height(this.curBp === 'md' ? 131 : 105) // 根據屏幕尺寸設置高度
        .draggable(false) // 禁止圖片自身的拖拽
        .animation({ curve: Curve.Sharp, duration: 300 }) // 設置動畫效果
    }
  }, (item: number) => item.toString()) // 設置唯一的key值
}
.width(this.curBp === 'md' ? '66%' : '100%') // 根據屏幕尺寸設置寬度
.scrollBar(BarState.Off) // 不顯示滾動條
.columnsTemplate('1fr 1fr 1fr') // 設置為3列布局
.columnsGap(this.curBp === 'md' ? 6 : 4) // 設置列間距
.rowsGap(this.curBp === 'md' ? 6 : 4) // 設置行間距
.height(this.curBp === 'md' ? 406 : 323) // 根據屏幕尺寸設置高度
2. 開啓編輯模式和動畫
給 Grid 組件添加兩個重要屬性:
.editMode(true) // 開啓編輯模式,允許拖拽
.supportAnimation(true) // 開啓動畫效果
3. 實現數組交換邏輯
定義一個函數來處理數組元素交換:
changeIndex(index1: number, index2: number) {
  // 從數組中刪除第一個索引的元素,並返回被刪除的元素
  let tmp = this.numbers.splice(index1, 1);
  // 在第二個索引位置插入被刪除的元素
  this.numbers.splice(index2, 0, tmp[0])
}
4. 綁定拖拽事件
給 Grid 組件綁定拖拽相關的事件:
// 拖拽開始時觸發
.onItemDragStart((_, itemIndex: number) => {
  // 記錄當前拖拽的圖片編號
  this.imageNum = this.numbers[itemIndex];
  // 返回拖拽時顯示的像素圖
  return this.pixelMapBuilder();
})
// 拖拽結束時觸發
.onItemDrop((_, itemIndex: number, insertIndex: number, isSuccess: boolean) => {
  // 檢查拖拽是否成功,並且插入索引是否有效
  if (!isSuccess || insertIndex >= this.numbers.length) {
    return;
  }
  // 執行數組元素交換
  this.changeIndex(itemIndex, insertIndex);
})

// pixelMapBuilder()方法用於創建拖拽時顯示的圖片
## 不同大小網格元素,長按拖拽
### 場景描述
在展示設備等場景中,我們經常需要混合使用不同大小的網格元素。這時候拖拽交換就會更復雜一些。
看看效果:
> 注意:當前方案僅適用於頁面包含一個較大網格元素的佈局
### 開發步驟
#### 1. 創建Grid佈局
首先創建一個包含不同大小GridItem的Grid佈局:
```typescript
Grid() {
ForEach(this.numbers, (item: number) => {
GridItem() {
Stack({ alignContent: Alignment.TopEnd }) {
Image(this.changeImage(item))
.width('100%')
.borderRadius(16)
.objectFit(this.curBp === 'md' ? ImageFit.Fill : ImageFit.Cover)
.draggable(false)
.animation({ curve: Curve.Sharp, duration: 300 })
}
}
.rowStart(0)
.rowEnd(this.getRowEnd(item)) // 根據item決定元素佔據的行數
.scale({ x: this.scaleItem === item ? 1.02 : 1, y: this.scaleItem === item ? 1.02 : 1 }) // 拖拽時放大效果
.zIndex(this.dragItem === item ? 1 : 0) // 拖拽元素置於頂層
.translate(this.dragItem === item ? { x: this.offsetX, y: this.offsetY } : { x: 0, y: 0 }) // 拖拽位移
.hitTestBehavior(this.isDraggable(this.numbers.indexOf(item)) ? HitTestMode.Default : HitTestMode.None) // 控制點擊行為
// ...
}, (item: number) => item.toString())
}
.width('100%')
.height('100%')
.editMode(true)
.scrollBar(BarState.Off)
.columnsTemplate('1fr 1fr') // 2列布局
.supportAnimation(true)
.columnsGap(12)
.rowsGap(12)
.enableScrollInteraction(true)2. 定義元素移動相關計算函數
實現元素交換重新排序的核心邏輯:
itemMove(index: number, newIndex: number): void {
  if (!this.isDraggable(newIndex)) {
    return;
  }
  let tmp = this.numbers.splice(index, 1);
  this.numbers.splice(newIndex, 0, tmp[0]);
  this.bigItemIndex = this.numbers.findIndex((item) => item === 0);
}

isInLeft(index: number) {
  if (index === this.bigItemIndex) {
    return index % 2 == 0;
  }
  if (this.bigItemIndex % 2 === 0) {
    if (index - this.bigItemIndex === 2 || index - this.bigItemIndex === 1) {
      return false;
    }
  } else {
    if (index - this.bigItemIndex === 1) {
      return false;
    }
  }
  if (index > this.bigItemIndex) {
    return index % 2 == 1;
  } else {
    return index % 2 == 0;
  }
}

// 上下左右移動的方法
down(index: number): void {
  if ([this.numbers.length - 1, this.numbers.length - 2].includes(index)) {
    return;
  }
  if (this.bigItemIndex - index === 1) {
    return;
  }
  if ([14, 15].includes(this.bigItemIndex) && this.bigItemIndex === index) {
    return;
  }
  this.offsetY -= this.FIX_VP_Y;
  this.dragRefOffSetY += this.FIX_VP_Y;
  if (index - 1 === this.bigItemIndex) {
    this.itemMove(index, index + 1);
  } else {
    this.itemMove(index, index + 2);
  }
}

up(index: number): void {
  if (!this.isDraggable(index - 2)) {
    return;
  }
  if (index - this.bigItemIndex === 3) {
    return;
  }
  this.offsetY += this.FIX_VP_Y;
  this.dragRefOffSetY -= this.FIX_VP_Y;
  if (this.bigItemIndex === index) {
    this.itemMove(index, index - 2);
  } else {
    if (index - 2 === this.bigItemIndex) {
      this.itemMove(index, index - 1);
    } else {
      this.itemMove(index, index - 2);
    }
  }
}

left(index: number): void {
  if (this.bigItemIndex % 2 === 0) {
    if (index - this.bigItemIndex === 2) {
      return;
    }
  }
  if (this.isInLeft(index)) {
    return;
  }
  if (!this.isDraggable(index - 1)) {
    return;
  }
  this.offsetX += this.FIX_VP_X;
  this.dragRefOffSetX -= this.FIX_VP_X;
  this.itemMove(index, index - 1)
}

right(index: number): void {
  if (this.bigItemIndex % 2 === 1) {
    if (index - this.bigItemIndex === 1) {
      return;
    }
  }
  if (!this.isInLeft(index)) {
    return;
  }
  if (!this.isDraggable(index + 1)) {
    return;
  }
  this.offsetX -= this.FIX_VP_X;
  this.dragRefOffSetX += this.FIX_VP_X;
  this.itemMove(index, index + 1)
}

isDraggable(index: number): boolean {
  return index >= 0;
}
3. 綁定組合手勢
給 GridItem 綁定長按和拖拽手勢,並設置顯式動畫:
注意事項
開發時一定要注意這些細節!
- Grid 拖拽基礎設置:
- editMode 必須設置為 true 才能啓用拖拽
- supportAnimation 設置為 true 才能有動畫效果
- 內置動畫僅支持大小規則的網格
- 不規則網格的特殊處理:
- 跨行跨列場景需要自定義實現
- 要特別注意元素位置關係的計算
- 大元素會影響周圍小元素的排列,需要特殊處理
- 性能優化:
- 拖拽過程中的計算要儘量高效
- 避免不必要的重排重繪
- 動畫持續時間不宜過長
總結
通過本文的學習,我們掌握了在 HarmonyOS 中實現 Grid 網格元素拖拽交換的方法:
- 基礎實現:
- 使用 Grid 和 GridItem 構建佈局
- 設置 editMode 和 supportAnimation 屬性
- 實現數組交換邏輯
- 綁定拖拽事件
- 進階實現:
- 處理不同大小元素的佈局
- 實現複雜的位置計算和移動邏輯
- 自定義手勢和動畫效果
Grid 網格拖拽交換是提升用户體驗的重要功能,合理使用可以讓你的應用交互更加直觀和友好。
再次提醒:官方文檔是最好的學習資源!
參考資料
- 華為開發者聯盟 - Grid 組件參考文檔
- 華為開發者聯盟 - GridItem 組件參考文檔
- 華為開發者聯盟 - 組合手勢參考文檔
- 華為開發者聯盟 - animateTo 參考文檔