

摘要
Vue3的組合式API大大減少了代碼量,以及使用也方便了很多,本案例使用Vite創建一個Vue3示例,簡單介紹Vue3的組合式API使用以及父傳子組件傳參示例。
創建Vue3項目
1、首先要安裝 Node.js 下載地址:https://nodejs.org/en/download
2、安裝完成後,創建一個文件夾,用於創建 Vue 項目,我是在桌面創建的
3、在你創建的文件夾內的路徑這一欄,輸入 cmd 回車

即可進入命令行工具,然後輸入以下命令,安裝 cnpm ,因為是中國大陸,所以使用 cnpm 會比較快。
npm install -g cnpm -registry=https://registry.npm.taobao.org安裝完成後,使用 cnpm 去創建 Vue 項目。輸入以下命令:
cnpm create vue@latest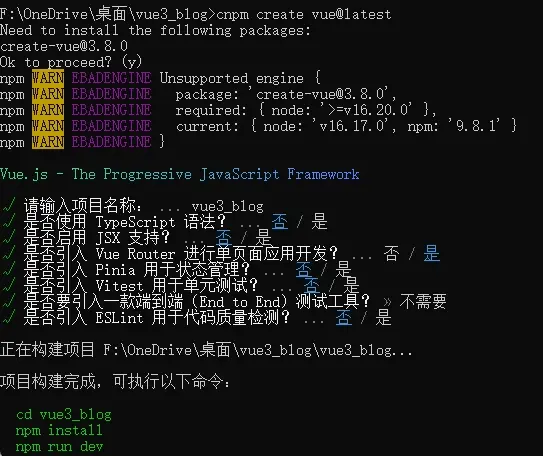
然後就會讓你選擇各種選項,大多數是選擇否,或者全部選擇否。執行完成後,就會讓你按順序執行3次命令,分別是:
cd 項目名
npm install
npm run dev
因為你已經安裝了 cnpm ,所以你可以後面需要使用 npm 的時候,改為 cnpm 即:
cd 項目名
cnpm install
cnpm run dev
執行 cnpm run dev 後,就會在你本地開啓一個端口,進入到項目的運行。
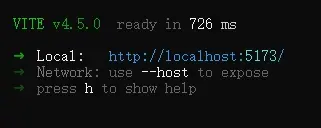
在瀏覽器訪問:
http://localhost:5173/就會打開 Vue 項目:
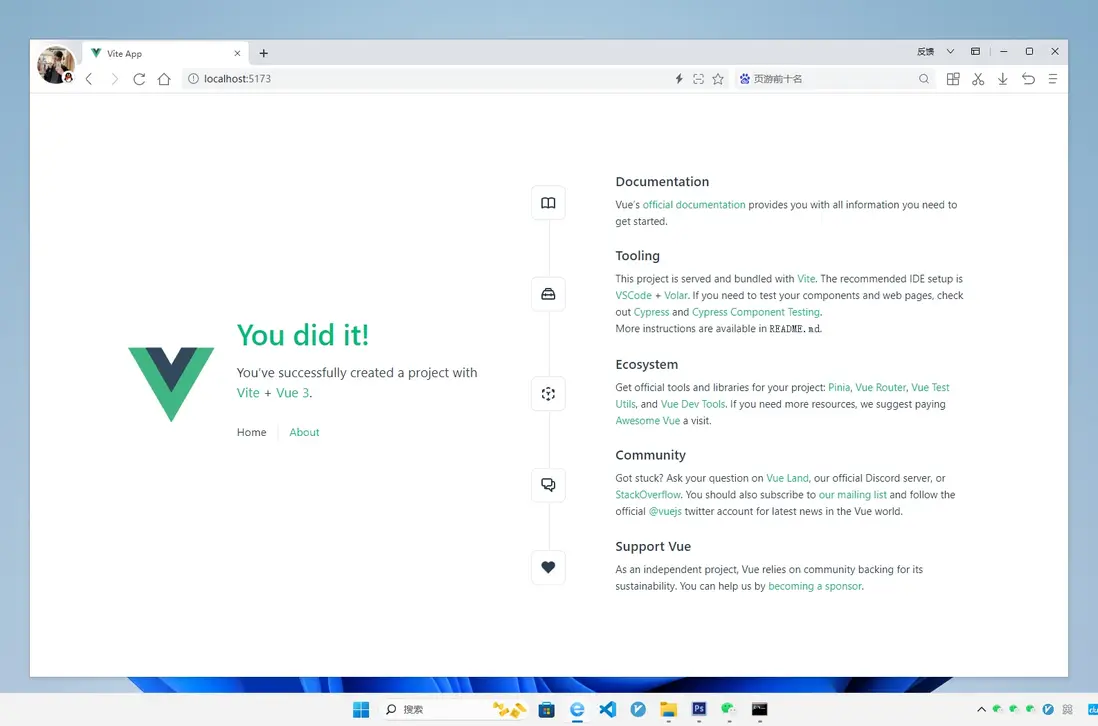
這代表你已經成功搭建了一個 Vue3 項目並運行。
上代碼
你可以將Vue項目的 view 目錄刪除,以及 components 裏面的所有文件刪除, main.css 裏面的代碼清空,如果你還沒使用到路由,也可以將路由相關的代碼註釋或者刪除。
新建 Index.vue 文件
這個是首頁組件,這個使用了 axios 發起一個請求,獲取微博熱搜數據然後渲染。其中每一條的微博熱搜都傳給 Datacard.vue 組件進行渲染。所以這裏通過:
import Datacard from './Datacard.vue';引入了組件。
因為使用了 axios ,所以你要通過以下命令下載 axios
cnpm install axiosIndex.vue
<template>
    <div class="container">
        <img src="https://pic.rmb.bdstatic.com/bjh/485143c0324905053289d1cdf74ff9933901.png" class="topimg" />
        <ul>
            <li v-for="(item,index) in data" :key="item.mid" v-if="data">
                <Datacard :word="item.word" :rawhot="item.raw_hot" :xuhao="index" />
            </li>
            <div v-else class="loading">{{ loading }}</div>
        </ul>
    </div>
</template>

<script setup>

    // 引入ref和onMounted
    import { ref,onMounted } from 'vue';

    // 引入axios
    import axios from 'axios';

    // 引入組件
    import Datacard from './Datacard.vue';

    // 創建響應式的變量初始值設置為null
    const data = ref(null);

    // 還沒加載到數據就使用這個變量
    const loading = ref('加載中...');

    // 請求接口獲取數據
    const getData = async () => {
        try {
            const response = await axios.get('https://demo.likeyunba.com/getSinawbHotSearch/');

            // 接口返回ok=1就是成功獲取到數據
            if(response.data.ok == 1) {
                data.value = response.data.data.realtime;
            }else{
                loading.value = '加載數據失敗!';
            }

        } catch (error) {
            loading.value = '加載數據失敗!';
        }
    };

    // 組件掛載後自動加載
    onMounted(() => {
        getData();
    });
</script>

<style scope>
    *{
        padding: 0;
        margin: 0;
        list-style: none;
        -webkit-tap-highlight-color:rgba(255,0,0,0);
    }

    body {
        background: #FF8200;
    }

    .container .topimg {
        display: block;
        width: calc(100% - 20px);
        border-radius: 20px;
        margin: 0 auto 20px;
    }

    .container ul li {
        padding: 8px;
        border-bottom: 1px solid #eee;
        display: flex;
    }

    .container ul li .word {
        flex: 1;
        font-size: 15px;
    }

    .container ul li .raw_hot {
        flex: 1;
        text-align: right;
        font-size: 15px;
        color: #999;
    }

    .container ul li a {
        text-decoration: none;
        color: #666;
    }

    .container ul li a:hover {
        color: #FF8200;
    }

    .container .loading {
        text-align: center;
        margin: 20px;
    }

    /* PC 設備 - 最小寬度為 1024px */
    @media screen and (min-width: 1024px) {
        .container {
            width: 800px;
            margin: 30px auto 100px;
            background: #fff;
            padding: 20px;
            border-radius: 20px;
        }
    }

    /* 平板設備 - 寬度在 768px 到 1023px 之間 */
    @media screen and (min-width: 768px) and (max-width: 1023px) {
        .container {
            width: 600px;
            margin: 30px auto 100px;
            background: #fff;
            padding: 20px;
            border-radius: 20px;
        }
    }

    /* 手機設備 - 最大寬度為 767px */
    @media screen and (max-width: 767px) {
        .container {
            width: calc(95% - 40px);
            margin: 30px auto 100px;
            background: #fff;
            padding: 20px;
            border-radius: 20px;
        }
    }

</style>
新建 Datacard.vue 文件
組合式API接收父類參數,使用 defineProps 即可,只需要對傳過來的參數指定數據類型,然後直接在模板中使用參數。
<template>

    <!-- 渲染參數 -->
    <a :href="'https://s.weibo.com/weibo?q=%23' + word + '%23&t=31&band_rank=1&Refer=top'" target="blank">
        <span class="word"> {{ xuhao+1 }} . {{ word }} </span>
    </a>
    <span class="raw_hot">{{ rawhot }}</span>
</template>

<script setup>

    // 接收參數
    defineProps({
        word: String,
        rawhot: Number,
        xuhao: Number
    })
</script>
App.vue
最後在 App.vue 中引入 Index 組件
<template>
  <Index />
</template>

<script setup>
  import Index from './components/Index.vue'
</script>
最終的代碼結構:

打包上線
打包上線需要通過一個命令編譯成瀏覽器可以運行的 html 代碼,因為 .vue 代碼是在開發的時候使用的,瀏覽器無法運行 .vue 文件,所以需要打包,打包就是將 .vue 文件裏面的代碼編譯成瀏覽器可以解析執行的 html 代碼。
在打包前,需要做一個簡單的配置,如果你的代碼最終會上傳到服務器的根目錄,無需配置,如果是上傳到其他目錄,例如二級目錄,需要進行配置,例如二級目錄名為 vue3-setup-weibo-hotserach ,在 vite.config.js 這個文件加入下面這行代碼:
base: process.env.NODE_ENV === 'production' ? '/vue3-setup-weibo-hotserach/' : '/',完整代碼:
vite.config.js
import { fileURLToPath, URL } from 'node:url'

import { defineConfig } from 'vite'
import vue from '@vitejs/plugin-vue'

// https://vitejs.dev/config/
export default defineConfig({
  base: process.env.NODE_ENV === 'production' ? '/vue3-setup-weibo-hotserach/' : '/',
  plugins: [
    vue(),
  ],
  resolve: {
    alias: {
      '@': fileURLToPath(new URL('./src', import.meta.url))
    }
  }
})
打包命令:
cnpm run build
執行這個命令後就會快速打包。打包完成後,會在你的項目文件夾內出現一個 dist 目錄,這個目錄裏面的代碼就是編譯後的 html 代碼。

將這些代碼上傳至服務器。

在線演示
https://demo.likeyunba.com/vue3-setup-weibo-hotserach/
作者
TANKING