
本文絕大部分代碼來源於 Raspberry Monster 夥伴提供。我只是代為記錄的工具人
本文是渲染相關係列博客中的一篇,該系列博客已按照邏輯順序編排,方便大家依次閲讀。本文屬於系列博客中,比較靠前的博客,可以獨立閲讀,無上下篇依賴。如您對渲染相關感興趣,可以通過以下鏈接訪問整個系列:渲染相關係列博客導航
在開始聊 Vortice 之前,必須要先聊聊 SharpDx 庫。 眾所周知,現在 SharpDx 已不維護,儘管 SharpDx 的不維護對咱開發影響很小,除非需要用到這幾年新加的功能,否則使用不維護的 SharpDx 的問題也不大。而 Vortice 是作為 SharpDx 的一個代替的存在,是從 SharpDx 的基礎上,繼續開發的一個項目。使用 Vortice 底層庫,能讓 C# 代碼比較方便的和 DirectX 對接
在本文這裏,將嘗試利用 Vortice 庫使得 D2D 繪製的內容能夠在 D3DImage 上顯示。本文將需要用到 WPF 的內建機制。如果大家希望看到最裸的無 UI 框架依賴的實現,還請參閲 DirectX 使用 Vortice 從零開始控制枱創建 Direct2D1 窗口
準備步驟
新建一個空 WPF 項目,按照 .NET 的慣例,通過 NuGet 安裝好 Vortice 的庫,安裝完成之後的 csproj 項目文件代碼大概如下
<Project Sdk="Microsoft.NET.Sdk">

  <PropertyGroup>
    <OutputType>WinExe</OutputType>
    <TargetFramework>net9.0-windows</TargetFramework>
    <Nullable>enable</Nullable>
    <ImplicitUsings>enable</ImplicitUsings>
    <UseWPF>true</UseWPF>
	<AllowUnsafeBlocks>True</AllowUnsafeBlocks>
  </PropertyGroup>

  <ItemGroup>
    <PackageReference Include="Vortice.Direct2D1" Version="3.6.2" />
    <PackageReference Include="Vortice.Direct3D11" Version="3.6.2" />
    <PackageReference Include="Vortice.Direct3D9" Version="3.6.2" />
    <PackageReference Include="Vortice.Wpf" Version="3.6.2" />
  </ItemGroup>

</Project>
添加界面代碼
修改 MainWindow.xaml 添加一點界面代碼
    <Grid>
        <Border Margin="10,10,10,10" BorderBrush="Black" BorderThickness="1">
            <Image x:Name="Image" Width="600" Height="500" Stretch="Fill">
                <Image.Source>
                    <interop:D3DImage x:Name="D3DImage" />
                </Image.Source>
            </Image>
        </Border>
    </Grid>
進入到 MainWindow.xaml.cs 文件,開始編寫本文的核心代碼
代碼需要放在 WPF 窗口獲取句柄之後,簡單方便來説在 Loaded 之後就可以了
        public MainWindow()
        {
            InitializeComponent();
            Loaded += MainWindow_Loaded;
        }

        private void MainWindow_Loaded(object sender, RoutedEventArgs e)
        {
            ...
        }
創建 D3D 設備
直接使用 D3D11.D3D11CreateDevice 方法即可創建 ID3D11Device 設備
            ID3D11Device device =
                D3D11.D3D11CreateDevice(Vortice.Direct3D.DriverType.Hardware, DeviceCreationFlags.BgraSupport);
對比 SharDx 的是直接 new 創建出來的,在 Vortice 裏是採用靜態工廠創建的,其思想沒有本質差別
創建出來的設備可用來創建紋理,創建出來的紋理最終將會轉換,作為 D3DImage 的 SetBackBuffer 所需的參數設置進去
創建紋理需要一些參數,如寬度高度信息。本文這裏直接採用界面的 Image 控件的寬度高度作為紋理的寬度高度。無需縮放的紋理可以獲得更高的渲染性能
            var desc = new Texture2DDescription()
            {
                BindFlags = BindFlags.RenderTarget | BindFlags.ShaderResource,
                Format = DXGIFormat.B8G8R8A8_UNorm,
                Width = width,
                Height = height,
                MipLevels = 1,
                SampleDescription = new SampleDescription(1, 0),
                Usage = ResourceUsage.Default,
                MiscFlags = ResourceOptionFlags.Shared,
                CPUAccessFlags = CpuAccessFlags.None,
                ArraySize = 1
            };
            ID3D11Texture2D renderTarget = device.CreateTexture2D(desc);
以上參數關鍵點除了尺寸信息之外,還在於顏色格式選用 B8G8R8A8_UNorm 格式。這是最通用的格式,可以很方便很設置給到 D3DImage 裏
對接 D2D 渲染
創建出來的紋理可先和 D2D 進行對接,也可先和 D3DImage 對接,這個順序可隨意排列。本文這裏先和 D2D 進行對接
和 D2D 對接時,需要先將 ID3D11Texture2D 當成 IDXGISurface 才能讓 D2D 將畫面繪製在紋理上,代碼如下
var surface = renderTarget.QueryInterface<IDXGISurface>();
在使用 D2D 之前,按照 DirectX 慣例,先創建工廠,代碼如下
var d2dFactory = D2D1.D2D1CreateFactory<ID2D1Factory>();
自然,在 SharpDx 裏面,是直接用 new 創建出來,代碼如下
// 以下是 SharpDx 的代碼:
            var d2DFactory = new D2D.Factory();
配置創建渲染的信息,代碼如下
            var renderTargetProperties =
                new RenderTargetProperties(new Vortice.DCommon.PixelFormat(DXGIFormat.B8G8R8A8_UNorm,
                    Vortice.DCommon.AlphaMode.Premultiplied));
以上代碼關鍵在於 B8G8R8A8_UNorm 像素格式。此外的 AlphaMode.Premultiplied 為像素預乘,簡單來説就是最終輸出的值裏的 RGB 分量都乘以透明度。更多細節請參閲 支持的像素格式和 Alpha 模式 - Win32 apps - Microsoft Learn
完成配置之後,即可創建 ID2D1RenderTarget 對象,代碼如下
        private ID2D1RenderTarget? _d2DRenderTarget;

_d2DRenderTarget = d2dFactory.CreateDxgiSurfaceRenderTarget(surface, renderTargetProperties);
對接 D3DImage 設置指針
創建 SetRenderTarget 方法,將傳入的 ID3D11Texture2D 參數和 D3DImage 綁定,方法簽名如下
        private void SetRenderTarget(ID3D11Texture2D target)
        {
            ...
        }
先將像素格式進行映射,這個過程中只是枚舉類型定義不相同而已,過程中不會發生任何的像素變換,也就沒有實際的性能損耗
        private static Vortice.Direct3D9.Format TranslateFormat(ID3D11Texture2D texture)
        {
            switch (texture.Description.Format)
            {
                case DXGIFormat.R10G10B10A2_UNorm:
                    return Vortice.Direct3D9.Format.A2B10G10R10;
                case DXGIFormat.R16G16B16A16_Float:
                    return Vortice.Direct3D9.Format.A16B16G16R16F;
                case DXGIFormat.B8G8R8A8_UNorm:
                    return Vortice.Direct3D9.Format.A8R8G8B8;
                default:
                    return Vortice.Direct3D9.Format.Unknown;
            }
        }
也許有夥伴感到困惑,為什麼在 DXGI 裏面是按照 B8G8R8A8 排列的,而在 D3D9 是按照 A8R8G8B8 排列的,這兩個是否是逆序關係?其實不是的,這兩個顏色格式從內存的角度來説是完全相同的。僅僅只是因為• DXGI 名稱按 內存字節順序(小端) 描述 B, G, R, A 每個 8 位。而 D3D9 名稱按 通道意義(從高位到低位) 描述 A, R, G, B 通道
在 C# 裏面默認也採用小端順序,這時候就和 DXGI 描述的更貼合,從內存的角度上講,一個 32bit 的像素顏色分量如下
byte0 = B
byte1 = G
byte2 = R
byte3 = A
按照 DirectX 的建議,推薦使用 BGRA 格式而不是 RGBA 格式,在底層實現裏面,會讓 BGRA 格式目標的性能優於 RGBA 格式。詳細請看 支持的像素格式和 Alpha 模式 - Win32 apps - Microsoft Learn
轉換顏色格式枚舉後,再獲取紋理的共享句柄,代碼如下
        private IntPtr GetSharedHandle(ID3D11Texture2D texture)
        {
            using (var resource = texture.QueryInterface<IDXGIResource>())
            {
                return resource.SharedHandle;
            }
        }
為了創建 D3D9 設備,還需要更多準備工作,如準備好參數,代碼如下
        private static Vortice.Direct3D9.PresentParameters GetPresentParameters()
        {
            var presentParams = new Vortice.Direct3D9.PresentParameters();

            presentParams.Windowed = true;
            presentParams.SwapEffect = Vortice.Direct3D9.SwapEffect.Discard;
            presentParams.DeviceWindowHandle = NativeMethods.GetDesktopWindow();
            presentParams.PresentationInterval = PresentInterval.Default;
            return presentParams;
        }

public static class NativeMethods
{
    [DllImport("user32.dll", SetLastError = false)]
    public static extern IntPtr GetDesktopWindow();
}
完成準備工作,開始創建 D3D9 設備,代碼如下
            var format = TranslateFormat(target);
            var handle = GetSharedHandle(target);

            var presentParams = GetPresentParameters();
            var createFlags = CreateFlags.HardwareVertexProcessing | CreateFlags.Multithreaded |
                              CreateFlags.FpuPreserve;
            var d3DContext = D3D9.Direct3DCreate9Ex();
            // 以下代碼強行獲取第 0 個適配器,可能會在多顯卡等情況下導致問題。如設置 CPU 的 CpuAccessFlags 為 Read 等無權限問題
            using IDirect3DDevice9Ex d3DDevice =
                d3DContext.CreateDeviceEx(adapter: 0, DeviceType.Hardware, focusWindow: IntPtr.Zero, createFlags, presentParams);
            _d3D9Device = d3DDevice;
讓 D3D9 設備,從 GetSharedHandle 方法獲取到的共享紋理創建 D3D9 的紋理,從而可以讓創建出來的 D3D9 的紋理設置到 D3DImage 上
        private IDirect3DTexture9? _renderTarget;

        private void SetRenderTarget(ID3D11Texture2D target)
        {
            ...
            _renderTarget = d3DDevice.CreateTexture(target.Description.Width, target.Description.Height, 1,
                Vortice.Direct3D9.Usage.RenderTarget, format, Pool.Default, ref handle);
            ...
        }
從 IDirect3DTexture9 取出表面,設置給到 D3DImage 上
            using var surface = _renderTarget.GetSurfaceLevel(0);
            D3DImage.Lock();
            D3DImage.SetBackBuffer(D3DResourceType.IDirect3DSurface9, surface.NativePointer,
                enableSoftwareFallback: true);
            D3DImage.Unlock();
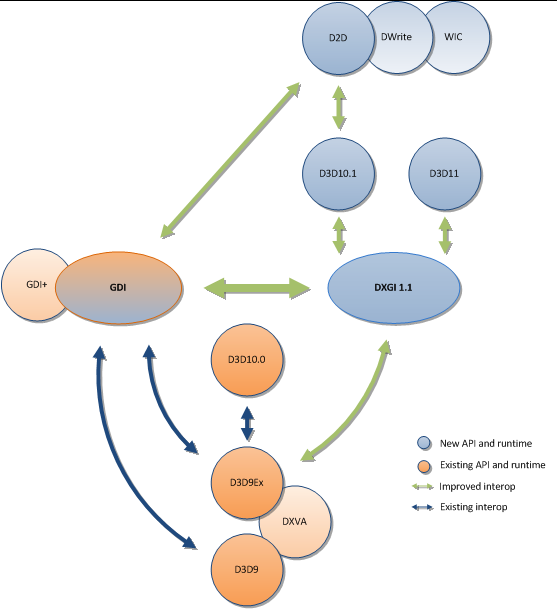
如此即可完成關聯對接工作。簡單來説就是讓 D3D11 和 D2D 對接,讓 D3D11 和 DXGI 對接,再讓 DXGI 和 D3D9 對接。渲染部分就拿 ID3D11Texture2D 共享紋理給到 D3D9 的 d3DDevice.CreateTexture 轉換為 IDirect3DTexture9 紋理。整個過程就是讓 D2D 繪製在 ID3D11Texture2D 紋理上,再將 ID3D11Texture2D 紋理當成 IDirect3DTexture9 給 D3DImage 使用,如下圖所示
渲染畫面
監聽 WPF 的 CompositionTarget.Rendering 事件,在此事件裏面完成 D2D 的畫面渲染
            CompositionTarget.Rendering += CompositionTarget_Rendering;

        private void CompositionTarget_Rendering(object? sender, EventArgs e)
        {
            if (_d2DRenderTarget is null)
            {
                return;
            }

            _d2DRenderTarget.BeginDraw();

            OnRender(_d2DRenderTarget);

            _d2DRenderTarget.EndDraw();
            _d3D11Device?.ImmediateContext.Flush();

            D3DImage.Lock();

            D3DImage.AddDirtyRect(new Int32Rect(0, 0, D3DImage.PixelWidth, D3DImage.PixelHeight));
            D3DImage.Unlock();

            Image.InvalidateVisual();
        }
在 OnRender 方法裏面,僅僅只面向 D2D 進行渲染,邏輯十分簡單。可以嘗試自己編寫好看的渲染畫面,本文這裏只是做簡單的矩形動畫,代碼如下
        private void OnRender(ID2D1RenderTarget renderTarget)
        {
            using var brush = renderTarget.CreateSolidColorBrush(new Color4(Random.Shared.Next() | 0xFF << 24 /*確保 A 是不透明的*/));

            renderTarget.Clear(null);

            const int size = 10;
            renderTarget.DrawRectangle(new Vortice.RawRectF(left: _x, top: _y, right: _x + size, bottom: _y + size), brush);

            _x = _x + _xDirection * Random.Shared.Next(size);
            _y = _y + _yDirection * Random.Shared.Next(size);

            var minX = 0;
            var maxX = D3DImage.Width - size;
            var minY = 0;
            var maxY = D3DImage.Height - size;
            if (_x >= maxX || _x <= minX)
            {
                _xDirection = -_xDirection;
                _x = (float) Math.Clamp(_x, minX, maxX);
            }

            if (_y >= maxY || _y <= minY)
            {
                _yDirection = -_yDirection;

                _y = (float) Math.Clamp(_y, minY, maxY);
            }
        }

        private float _x;

        private float _y;

        private float _xDirection = 1;

        private float _yDirection = 1;
如此就完成了在 WPF 裏面,通過 Vortice 在 D3DImage 顯示 D2D 繪製的內容
本文代碼放在 github 和 gitee 上,可以使用如下命令行拉取代碼。我整個代碼倉庫比較龐大,使用以下命令行可以進行部分拉取,拉取速度比較快
先創建一個空文件夾,接着使用命令行 cd 命令進入此空文件夾,在命令行裏面輸入以下代碼,即可獲取到本文的代碼
git init
git remote add origin https://gitee.com/lindexi/lindexi_gd.git
git pull origin b3b32cf4560c2dfa2d59ef49c9ed41ba5d288c5d
以上使用的是國內的 gitee 的源,如果 gitee 不能訪問,請替換為 github 的源。請在命令行繼續輸入以下代碼,將 gitee 源換成 github 源進行拉取代碼。如果依然拉取不到代碼,可以發郵件向我要代碼
git remote remove origin
git remote add origin https://github.com/lindexi/lindexi_gd.git
git pull origin b3b32cf4560c2dfa2d59ef49c9ed41ba5d288c5d
獲取代碼之後,進入 DirectX/WPF/GoqudeqeljaigealelNilacifelyall 文件夾,即可獲取到源代碼
更多技術博客,請參閲 博客導航