

前面文章中 體驗了webpack的打包 、解析css資源 、處理圖片字體等文件 接下來看看 plugins 有什麼作用吧~
項目路徑如下,和上一篇 處理圖片字體等文件 項目保持一致
demo
├─ src
│   ├─ css
│   │   ├─ index.css
│   │   └─ file.css
│   ├─ img
│   │  ├─ portrait.png
│   │  └─ sky.jpg
│   ├─ js
│   │  ├─ component.js
│   │  └─ createElement.js
│   └─ index.js
├─  index.html
├─  package.json
└─  webpack.config.js
clean-webpack-plugin
我們通過 npm run build 來生成打包後文件夾 dist ,但每次打包後是刪除 dist 重新創建文件夾,還是僅覆蓋同名文件呢?
答案是:僅覆蓋同名文件
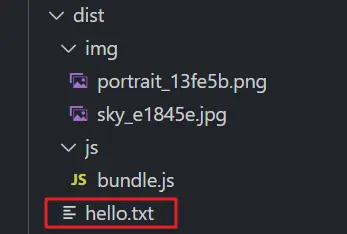
我們在 dist 文件夾中新建一個 hello.txt 文件,再通過 npm run build 重新編譯,發現 hello.txt 文件仍然存在,也就是説 dist 文件夾沒有被刪除和重新創建
如果在 webpack.config.js 文件中修改配置,打包後文件名發生變化,打包文件夾不被刪除,只會覆蓋同名文件,會導致文件夾越來越大,除了每次手動刪除,還可以使用 clean-webpack-plugin。
通過 npm i clean-webpack-plugin -D 安裝依賴,在 webpack.config.js 中配置 plugin
const { CleanWebpackPlugin } = require("clean-webpack-plugin");

module.exports = {
  // 其它配置省略
  plugins: [new CleanWebpackPlugin()],
};
再次通過 npm run build 編譯,發現我們創建的 hello.txt 文件就已經被刪除,已經可以通過 plugin 自動刪除 dist 文件夾啦~
html-webpack-plugin
目前用於查看打包結果的方式是,通過項目根目錄下的 index.html 文件,引入編譯後的 js 文件,但這種方式存在兩個問題。
- 當 js 文件非常多時,需要一個個引入,可能有遺漏
- 在發佈線上的時候,編譯後的 dist 文件夾作為靜態資源,裏面需要有 index.html 作為入口文件,而手動將根目錄下的 index.html 移動過去,可能需要修改大量的文件路徑
html-webpack-plugin 提供了自動生成 html 文件並引入資源的功能,可以解決以上問題
通過 npm install html-webpack-plugin -D 安裝依賴,並在 webpack.config.js 中配置
const HtmlWebpackPlugin = require("html-webpack-plugin");
module.exports = {
// 其它配置省略
plugins: [
new HtmlWebpackPlugin({
// 自定義 index.html 的 title
title: "hello webpack",
}),
],
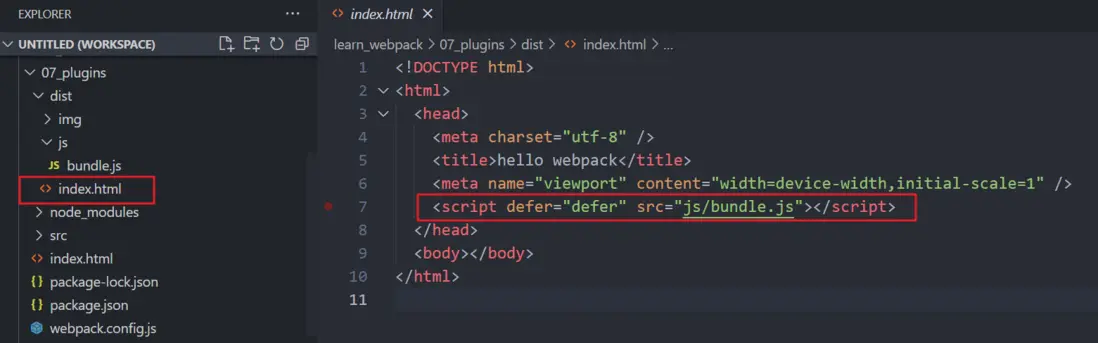
};編譯後入口文件 bundle.js 會被自動引入到 index.html 中
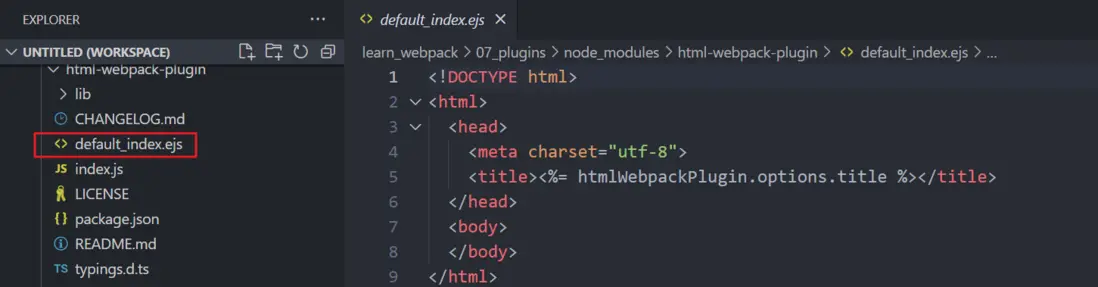
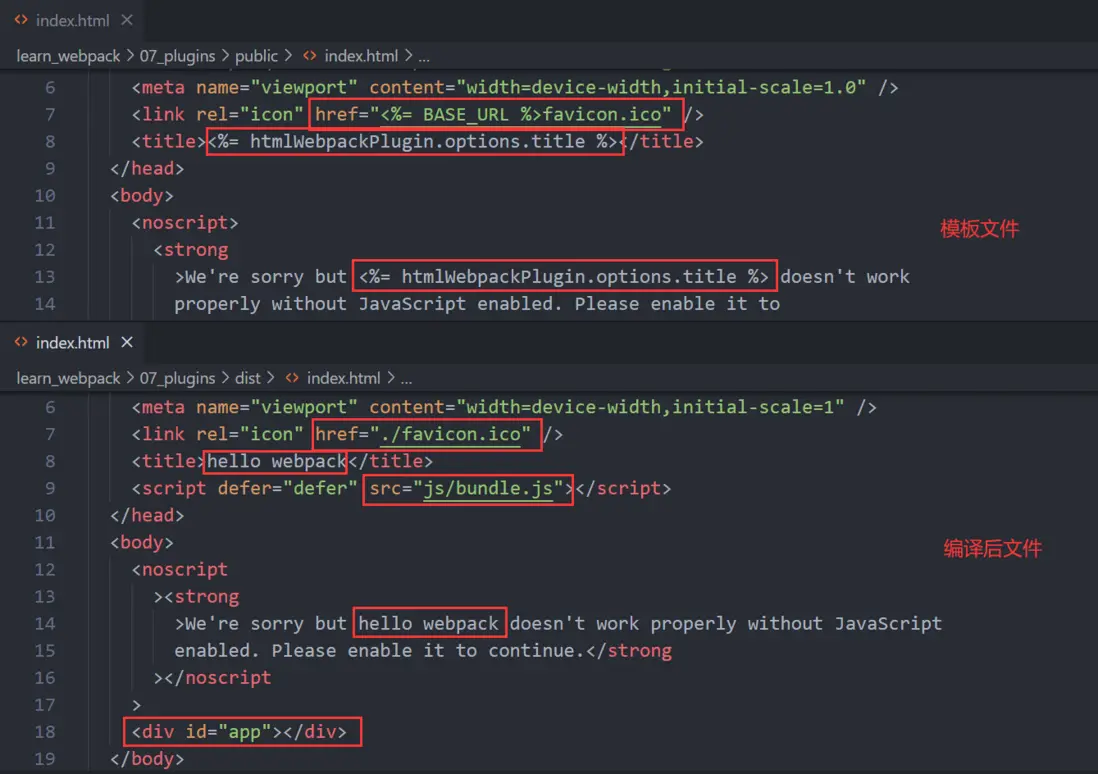
html-webpack-plugin 中 ejs 文件就是用於生成 html 的模板
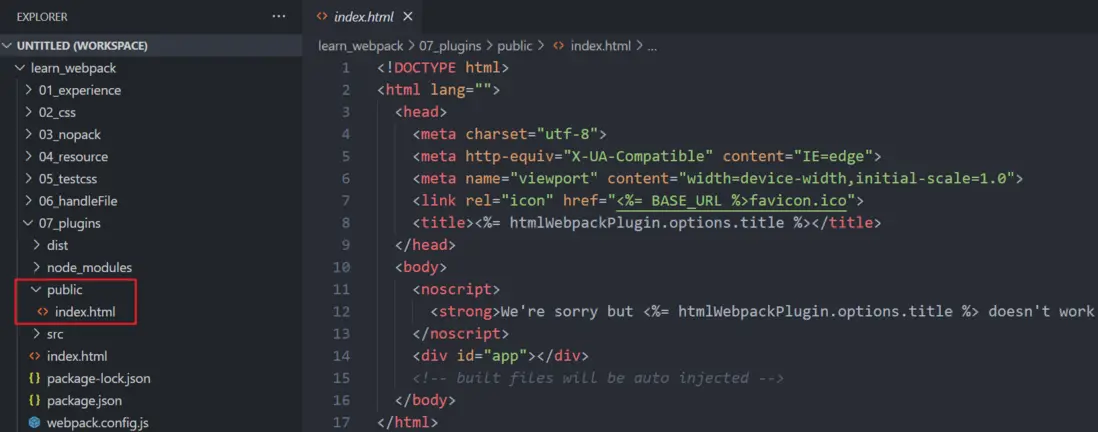
但比如 vue、react 的入口 index.html 文件中需要添加 id 為 app 或者 root 的 div 標籤,使用默認的 html 模板就不合適了,html-webpack-plugin 提供了自定義模板文件的選項。
將 vue 中位於 public 文件夾下 index.html 的模板文件複製過來
在 webpack.config.js 中配置自定義模板文件
module.exports = {
  // 其它配置省略
  plugins: [
    new HtmlWebpackPlugin({
      // 自定義 index.html 的 title
      title: "hello webpack",
      template: "./public/index.html",
    }),
  ],
};
再通過 npm run build 編譯,但此時報錯,BASE_URL is not defined
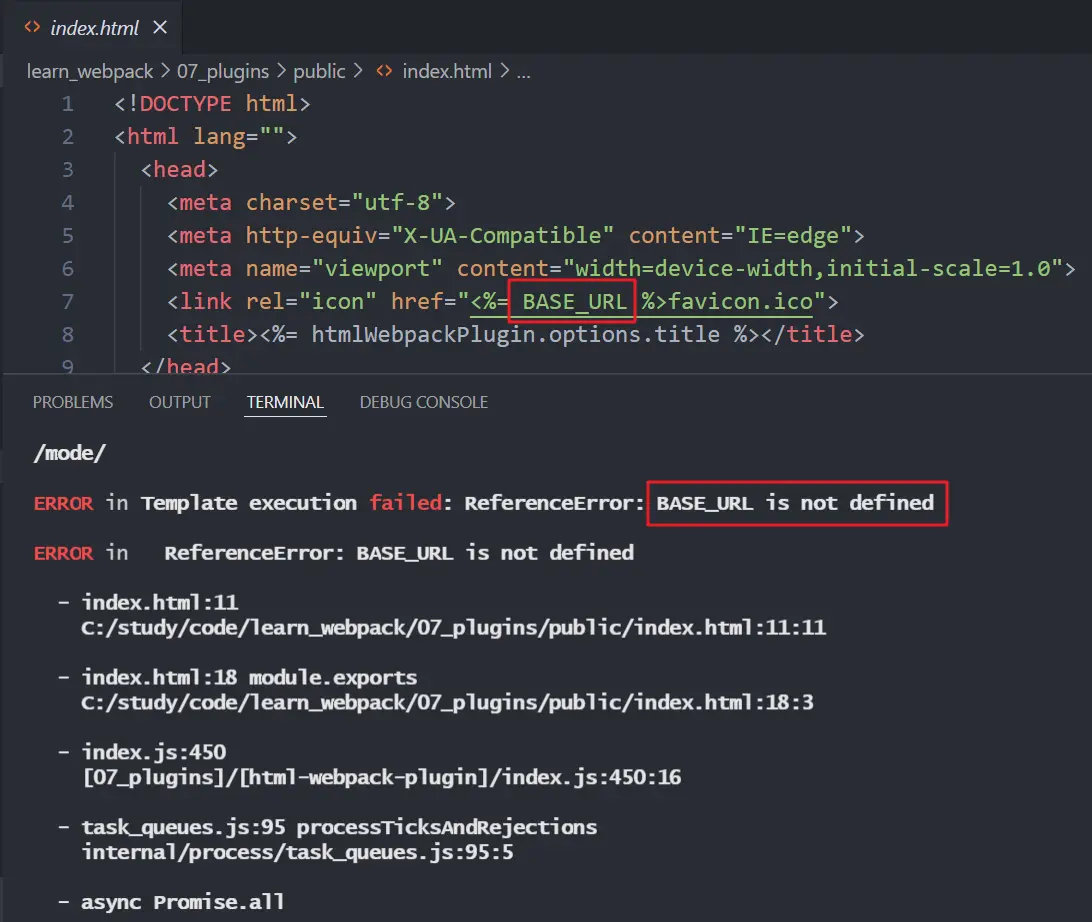
這裏BASE_URL需要配置全局變量,要使用下面這個 plugin
DefinePlugin
DefinePlugin 存在於 webpck 的包中,不需要單獨安裝
const { DefinePlugin } = require("webpack");

module.exports = {
  // 其它配置省略
  plugins: [
    new HtmlWebpackPlugin({
      // 自定義 index.html 的 title
      title: "hello webpack",
      template: "./public/index.html",
    }),
    new DefinePlugin({
      // 雙引號裏的內容會被拿出來作為一個變量,所以 ./ 外面還要加一層引號
      BASE_URL: "'./'",
    }),
  ],
};
再次運行 npm run build,index.html 就可以通過模板生成啦
copy-webpack-plugin
在上面的 html 頁面中引入了一個 favicon.ico,用於展示在網頁左上角的圖標,這個icon 在 vue/react 項目中是放置在 public 目錄下,我們也在 public 目錄下放置一個 icon,用於展示。
因為 public 文件下的資源是固定的,直接拷貝到編譯後的文件夾引入使用就可以,這裏使用 copy-webpack-plugin 來操作。
通過 npm i copy-webpack-plugin -D 安裝後,在 webpack.config.js 中配置。
const CopyWebpackPlugin = require("copy-webpack-plugin");

module.exports = {
  // 其它配置省略
  plugins: [
    new HtmlWebpackPlugin({
      // 自定義 index.html 的 title
      title: "hello webpack",
      template: "./public/index.html",
    }),
    new DefinePlugin({
      // 雙引號裏的內容會被拿出來作為一個變量,所以 ./ 外面還要加一層引號
      BASE_URL: "'./'",
    }),
    new CopyWebpackPlugin({
      // 用於匹配複製文件的規則
      patterns: [
        {
          from: "public",
        },
      ],
    }),
  ],
};
只配置複製文件來源是不夠的,因為HtmlWebpackPlugin已經處理了一次html,會報錯index.html文件衝突
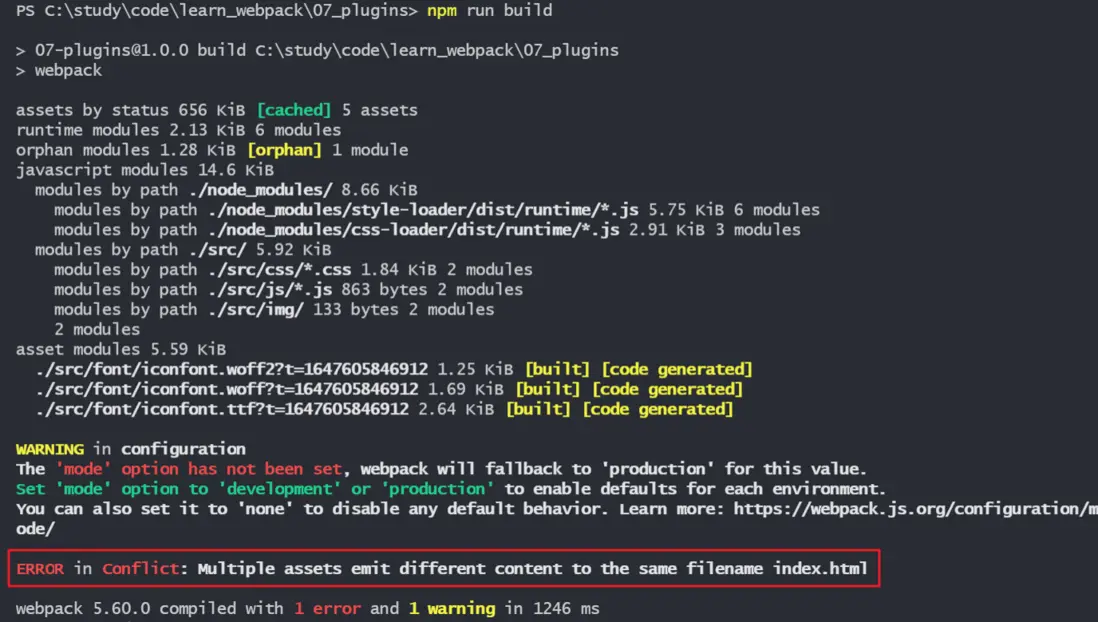
在上面的 patterns 中需要加上忽略文件的配置
patterns: [
{
from: "public",
globOptions: {
// 忽略的文件如果在from屬性配置的文件夾下,需要在文件名前加上 **/
ignore: ["**/index.html"],
},
},
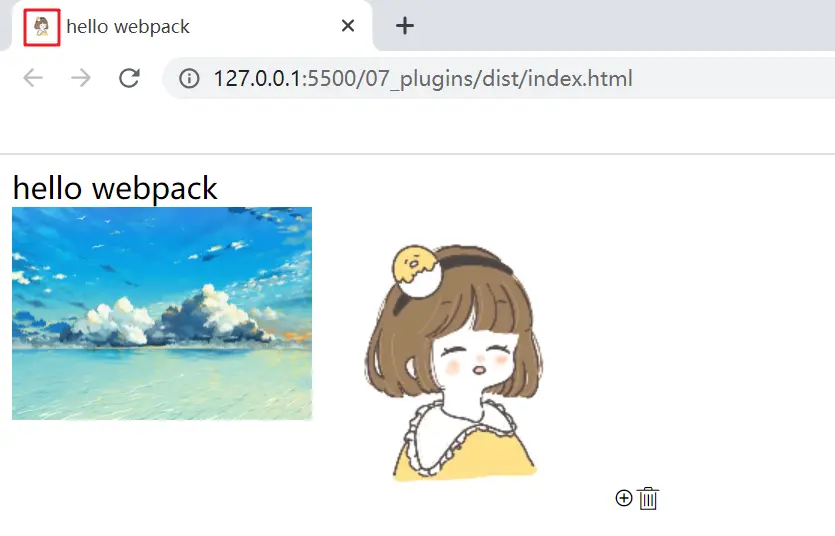
];再次運行 npm run build,圖標就已經被複制到 dist 文件夾下,網頁左上角也能成功顯示
以上通過 clean-webpack-plugin 自動刪除編譯後文件夾、html-webpack-plugin 配置 html 模板、definePlugin 定義全局變量、copy-webpack-plugin 複製 public 下靜態資源,使項目資源處理更為簡單。
更多有關webpack的內容可以參考我其它的博文,持續更新中~