

hugo是什麼
Hugo 是最受歡迎的開源靜態網站生成器之一。用户可以使用 Hugo 來快速搭建自己的網站。
搭建步驟
1.安裝hugo
在mac上面,可以使用以下命令來安裝hugo:
brew install hugo
安裝完之後可以使用 hugo version 來查看是否安裝好:

2.使用hugo創建blog網站
安裝完 hugo 之後,就可以使用 hugo 來搭建自己的blog網站了。
使用hugo new site my-blog 來創建一個名為 my-blog 的網站。

運行完之後就會在當前目錄創建一個 my-blog 的目錄。
之後進入該目錄,並使用 git 進行初始化。
cd my-blog
git init
3.選擇一個theme
在創建好網站之後,需要選擇一個theme。這裏有很多主題可供選擇:hugo themes
在這裏我選擇的是 hugo-theme-even 這個主題。此時需要將其作為一個 submodule 放在themes/even下面。
git submodule add https://github.com/olOwOlo/hugo-theme-even.git themes/even
之後將 themes/even/exampleSite/config.toml 拷貝到當前目錄,並覆蓋 hugo.toml
cp themes/even/exampleSite/config.toml hugo.toml4.創建一篇blog
當配置好主題之後,就可以創建自己的blog了。
使用hugo new content content/post/my-first-post.md 即可創建一篇blog。
可以看到當執行完該命令後,在 content/post/ 下面會出現一個新的md文件。

5.運行hugo
當前面的配置好之後,就可以使用 hugo server 來啓動一個hugo server。
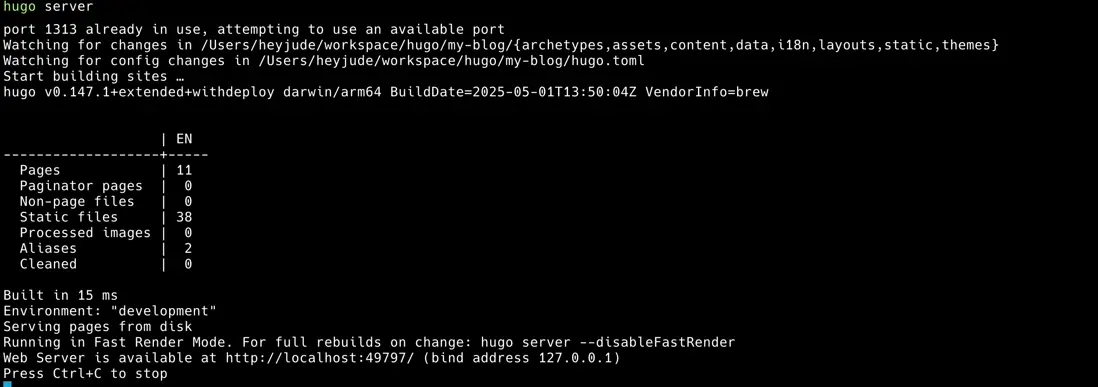
點擊鏈接,即可訪問blog網站的地址
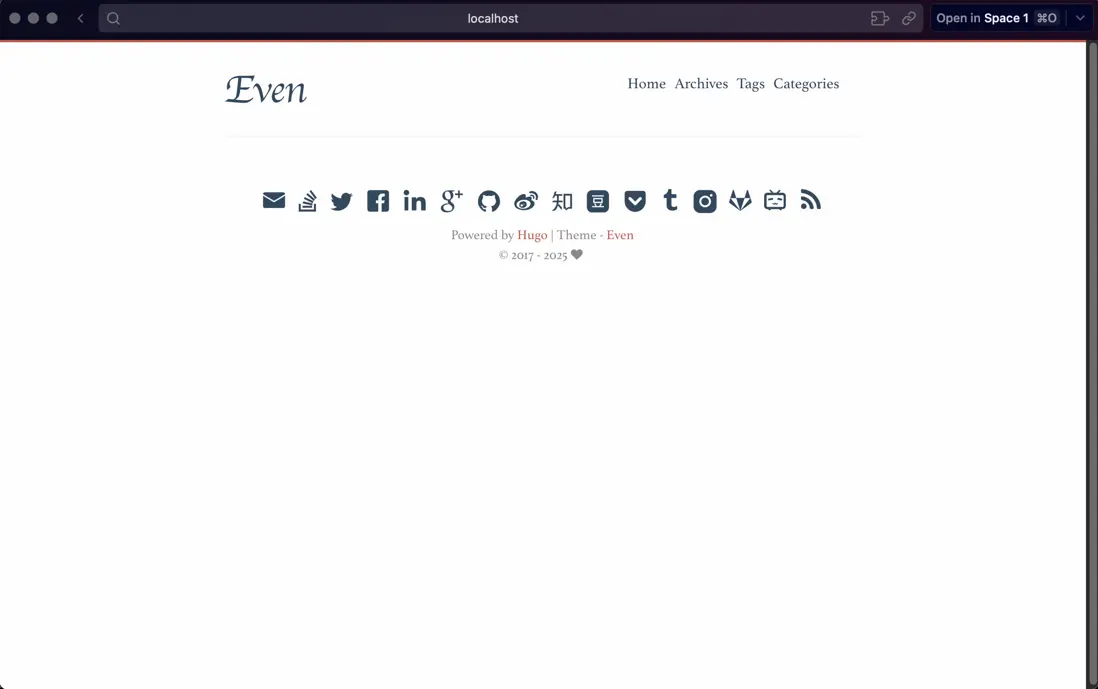
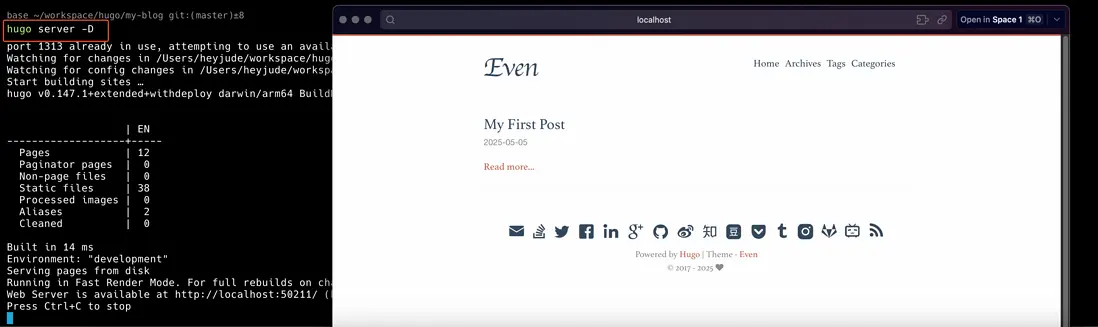
此時會發現,之前創建的那篇blog並沒有在裏面顯示,原因是一開始創建的blog是draft,在hugo server 模式下並不會顯示draft的blog。
如果需要顯示,則需要使用hugo server -D。
以上就可以完成了blog網站的搭建了。
參考鏈接
- https://gohugo.io/getting-started/quick-start/
- https://github.com/olOwOlo/hugo-theme-even
- https://medium.com/@magstherdev/hugo-in-10-minutes-2dc4ac70ee11