
1. 添加依賴
"electron-updater": "^4.0.0"
升級的時候往往就是因為electron-updater版本不搭配,導致一些亂七八糟的問題出現,此時electron的版本是2.0.4,打包的時候如果electron-updater的版本小於4.0.0,會出現無法打包,所以修改electron-updater的版本為^4.0.0
2 配置更新程序的地址
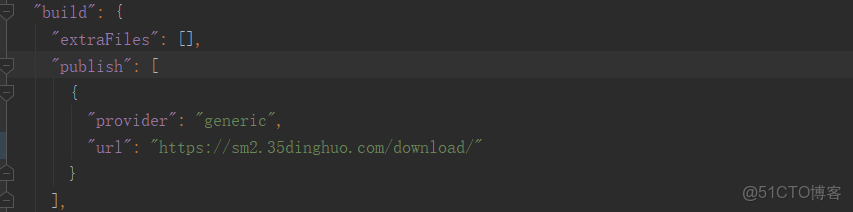
打開package.json文件在build標籤下添加public配置,執行npm run build時,將會在build目錄中生成latest.yml文件
這裏的的url對應的是升級包的所在目錄的網絡地址,不用指向具體的升級包文件。
以下放一張服務器所在的升級包的目錄圖片,做過後台開發的小夥伴一看就懂了。
舉例:
"publish": [
{ "provider": "generic",
"url": "http://119.30.229.43/app/version/p/"
}
]
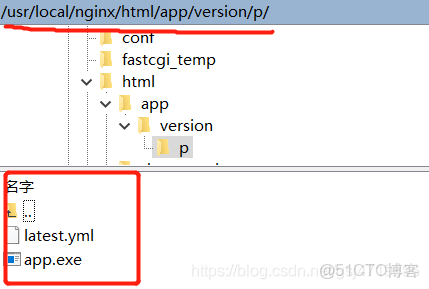
url地址指向的是升級包所在目錄,升級包的文件名稱和yml的文件名稱沒有限制,可以隨意命名。
3 主進程中配置升級
新建一個checkupdate.ts文件,或者自己建立JS文件 內容如下
import { autoUpdater } from 'electron-updater'
import { ipcMain, BrowserWindow } from 'electron'
/**
 * -1 檢查更新失敗 0 正在檢查更新 1 檢測到新版本,準備下載 2 未檢測到新版本 3 下載中 4 下載完成
 **/
// 負責向渲染進程發送信息
function Message(mainWindow: BrowserWindow, type: Number, data?: String) {
    const senddata = {
        state: type,
        msg: data || ''
    }
    mainWindow.webContents.send('UpdateMsg', senddata)
}
// 更新應用的方法
export default (mainWindow: BrowserWindow) => {
    // 在下載之前將autoUpdater的autoDownload屬性設置成false,通過渲染進程觸發主進程事件來實現這一設置(將自動更新設置成false)
    autoUpdater.autoDownload = false
    //設置版本更新地址,即將打包後的latest.yml文件和exe文件同時放在
    //http://xxxx/test/version/對應的服務器目錄下,該地址和package.json的publish中的url保持一致
    // https://sm2.35dinghuo.com/download/
    autoUpdater.setFeedURL('https://sm2.35dinghuo.com/download/')
    // 當更新發生錯誤的時候觸發。
    autoUpdater.on('error', (err) => {
        if (err.message.includes('sha512 checksum mismatch')) {
            Message(mainWindow, -1, 'sha512校驗失敗')
        }
    })
    // 當開始檢查更新的時候觸發
    autoUpdater.on('checking-for-update', (event, arg) => {
        Message(mainWindow, 0)
    })
    // 發現可更新數據時
    autoUpdater.on('update-available', (event, arg) => {
        Message(mainWindow, 1)
    })
    // 沒有可更新數據時
    autoUpdater.on('update-not-available', (event, arg) => {
        Message(mainWindow, 2)
    })
    // 下載監聽
    autoUpdater.on('download-progress', (progressObj) => {
        Message(mainWindow, 3, progressObj)
    })
    // 下載完成
    autoUpdater.on('update-downloaded', () => {
        Message(mainWindow, 4)
    })
    // 執行更新檢查
    ipcMain.handle('check-update', () => {
        autoUpdater.checkForUpdates().catch(err => {
            console.log('網絡連接問題', err)
        })
    })
    // 退出並安裝
    ipcMain.handle('confirm-update', () => {
        autoUpdater.quitAndInstall()
    })

    // 手動下載更新文件
    ipcMain.handle('confirm-downloadUpdate', () => {
        autoUpdater.downloadUpdate()
    })
}
4.在main/index.js主進程中進行導入:
import Update from './checkupdate'; // 引入上面的文件
   //檢測版本更新

Update(mainWindow);
5.渲染進程顯示更新進度
<template>
   <div class="systemExample width100 height100">
        <main>
            <div class="right-side">
                <div class="doc">
                    <div class="title alt">您可以點擊的按鈕測試功能</div>
                    <el-button type="primary" round @click="CheckUpdate">檢查更新, 不可用於開發環境</el-button>
                </div>
            </div>
        </main>
        <el-dialog
                title="下載進度"
                :visible.sync="dialogVisible"
                :show-close="true"
                :close-on-press-escape="false"
                :close-on-click-modal="false"
                center
                width="50%"
                top="45vh">
            <div class="conten">
                <el-progress :percentage="percentage" :color="colors" :status="progressStaus"></el-progress>
            </div>
        </el-dialog>
    </div>
</template>

<script>
    let ipcRenderer = require("electron").ipcRenderer;
    export default {
        name: "systemExample",
        data: () => ({
            percentage: 0,
            colors: [
                { color: "#f56c6c", percentage: 20 },
                { color: "#e6a23c", percentage: 40 },
                { color: "#6f7ad3", percentage: 60 },
                { color: "#1989fa", percentage: 80 },
                { color: "#5cb87a", percentage: 100 }
            ],
            dialogVisible: false,
            progressStaus: null,
        }),
        mounted () {
            ipcRenderer.on('UpdateMsg', (event, arg) => {
                switch (arg.state) {
                    case 1:
                        this.$confirm('檢查到商盟訂貨有新版本,是否更新?', '提示', {
                            confirmButtonText: '確定',
                            cancelButtonText: '取消',
                            type: 'warning'
                        }).then(() => {
                            this.dialogVisible = true
                            this.$ipcApi.send("confirm-downloadUpdate")
                        })
                        break;
                    case 3:
                        this.percentage = arg.msg.percent.toFixed(1);
                        break;
                    case 4:
                        this.progressStaus = "success";
                        this.$alert("下載完成!", "提示", {
                           confirmButtonText: "確定",
                           callback: (action) => {
                           this.$ipcApi.send("confirm-update");
                          },
                        });
                        break;
                    default:
                        break;
                }
            })
        },
        methods: {
           // 下面方法點擊按鈕去檢查,那麼如果你想實現應用打開就去檢查呢,你就吧此文件寫在你項目的根頁面,然後然後開始就去執行這個方法即可!
            CheckUpdate() {this.$ipcApi.send("check-update")},
        }
    };
</script>
6. 最後上效果圖:

6.5:默認下載成功後:下載的exe文件在這個位置: C:\Users\Administrator\AppData\Local\electron-vue-seed-updater\pending
7. 注意點:不可用於本地環境去檢查更新,一定是打包後的exe文件運行:不然會報錯,大概就是他會把electron的版本進行比較!
Update for version 10.1.3 is not available (latest version: 2.0.0, downgrade is disallowed).
8. 如果本地測試呢你可以用express啓動個服務:(你可能用不着)
const express = require('express')
const path = require('path')
const app = express()
// 下面在幹嘛,你具體可看:https://www.jianshu.com/p/1d92463ebb69,大概加個路徑文件
app.use(express.static(path.join(__dirname, './client')))

const server = app.listen(25565, function () {
  const host = server.address().address
  const port = server.address().port

  console.log('服務啓動', host, port)
})
client目錄呢就是打包後的yml,exe文件啦。

然後吧上面的那些ull替換為node服務器
本文章為轉載內容,我們尊重原作者對文章享有的著作權。如有內容錯誤或侵權問題,歡迎原作者聯繫我們進行內容更正或刪除文章。