

0.基礎環境
類別:筆記本
型號:中國長城 NF14C
硬件平台:飛騰處理器D2000(ArmV8 指令集)
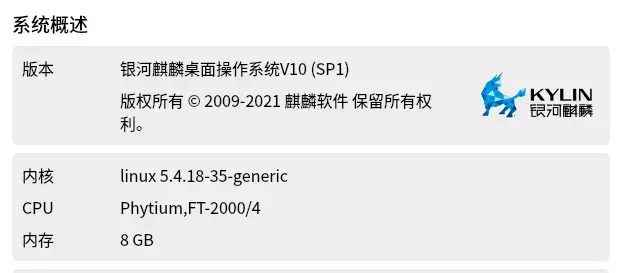
系統:銀河麒麟操作系統 V10 SP1(2303)
關鍵詞:Linux,進程監控,apache,nginx,samba,nfs,ftp
0.準備工作
為方便網絡連接,關掉防火牆
sudo ufw disable #方式1
sudo systemctl stop firewalld  #方式2
1.NFS服務部署
NFS(Network File System,網絡文件系統)是 Unix/Linux 環境下非常重要且基礎的網絡服務,它的核心思想是允許網絡上的計算機之間像訪問本地文件一樣訪問遠程共享的文件和目錄。
您可以使用以下命令安裝這些軟件包:
sudo apt-get update
sudo apt-get install nfs-kernel-server nfs-common rpcbind -y
服務端的設備需要安裝:nfs-kernel-server rpcbind
客户端的設備需要安裝: nfs-common組件
創建共享目錄
首先,您需要創建一個要共享的目錄。例如,創建一個名為 /share 的目錄:
sudo mkdir /share然後,設置適當的權限:
sudo chmod 777 /share配置NFS
在圖形界面中,打開終端,並輸入以下命令以編輯 /etc/exports 文件:
sudo apt install gedit -y #安裝gedit編輯器
sudo gedit /etc/exports
在打開的文件中,添加以下行以指定要共享的目錄和客户端:
/share *(rw,sync,no_subtree_check) #* 和 (rw之間沒有空格這裏的 /share 是您要共享的目錄,* 表示所有客户端都可以訪問,(rw,sync,nolock) 是共享的權限。
其他參考
# Share /home/data with IP 192.168.1.10, read-write, sync
/home/data 192.168.1.10(rw,sync,no_subtree_check)

# Share /mnt/nfs_share with the entire subnet, read-only
/mnt/nfs_share 192.168.1.0/24(ro,sync,no_subtree_check)
檢查配置是否正確
sudo exportfs -rv配置防火牆
sudo apt install ufw -y #安裝防火牆
sudo systemctl start ufw #啓動防火牆
sudo systemctl enable ufw  #開機啓動防火牆
sudo ufw status  #確認狀態
放行端口或服務
NFS 的核心是 TCP/UDP 端口 111 和 2049。
| 服務 | 端口 | 協議 | 描述 | UFW 命令 (示例 IP 限制) |
|---|---|---|---|---|
| rpcbind | 111 | TCP/UDP | 端口映射服務,NFS 啓動必備。 | sudo ufw allow from 192.168.1.0/24 to any port 111 |
| nfs | 2049 | TCP/UDP | NFS 核心數據傳輸端口。 | sudo ufw allow from 192.168.1.0/24 to any port 2049 |
# 1. Portmap/Rpcbind: 端口 111 (TCP/UDP)
sudo ufw allow 111/tcp
sudo ufw allow 111/udp

# 2. NFS: 端口 2049 (TCP/UDP)
sudo ufw allow 2049/tcp
sudo ufw allow 2049/udp
啓動NFS服務
在終端中,輸入以下命令以啓動NFS服務:
sudo systemctl restart nfs-kernel-server
sudo systemctl restart rpcbind
您還可以使用以下命令啓用NFS服務在啓動時自動運行:
sudo systemctl enable nfs-kernel-server
sudo systemctl enable rpcbind
配置客户端
在客户端計算機上,使用以下命令安裝NFS客户端:
sudo apt-get install nfs-common然後,使用以下命令掛載NFS共享:
sudo mount -t nfs <NFS_SERVER_IP_ADDRESS>:<SHARED_DIRECTORY> <MOUNT_POINT>例如,如果您要掛載IP地址 的服務器上的 /share 目錄到本地目錄 /mnt/nfs`,請使用以下命令:
sudo mkdir /mnt/nfs #創建掛載目錄
sudo chmod 777 -R /mnt/nfs # 設置權限為全放開
sudo mount -t nfs 127.0.0.1:/share /mnt/nfs #掛載,127.0.0.1代表本機地址,如果是遠程服務器,需要換成真正的可達的IP地址
2.DHCP服務部署
DHCP(Dynamic Host Configuration Protocol,動態主機配置協議)是網絡管理中一個至關重要的協議,它的核心目的是實現網絡中設備的 自動化 和 集中化 IP 地址配置。
| 虛擬機 (VM) | 角色 | 操作系統 | 配置要求 |
|---|---|---|---|
| VM-A | DHCP 服務器 | 任意 Linux (如 Ubuntu Server, CentOS) | 安裝 isc-dhcp-server 或其他 DHCP 軟件。配置一個靜態 IP 地址作為服務器地址。 |
| VM-B | DHCP 客户端 | 任意 Linux 或 Windows | 網絡配置為自動獲取 IP (DHCP)。 |
安裝DHCP服務器
- 打開終端。
-
輸入以下命令更新軟件包列表:
sudo apt-get update -
安裝isc-dhcp-server軟件包,該軟件包包含了DHCP服務器的所有必需組件:
sudo apt-get install isc-dhcp-server
配置DHCP服務器
-
編輯DHCP配置文件
/etc/dhcp/dhcpd.conf,該文件包含了DHCP服務器的配置信息:sudo cp /etc/dhcp/dhcpd.conf /etc/dhcp/dhcpd.conf.bak sudo gedit /etc/dhcp/dhcpd.conf - 在配置文件中,添加以下內容以設置IP地址池、子網掩碼、網關和DNS服務器等信息。以下是一個示例配置:
# 匹配你的實際網絡:192.168.200.0/24
subnet 192.168.200.0 netmask 255.255.255.0 {
    range 192.168.200.50 192.168.200.100;  # IP分配範圍
    option routers 192.168.200.1;          # 網關地址
    option domain-name-servers 8.8.8.8, 8.8.4.4;  # DNS服務器
    option subnet-mask 255.255.255.0;      # 子網掩碼
    option broadcast-address 192.168.200.255;  # 廣播地址
    default-lease-time 600;
    max-lease-time 7200;
}
保存並關閉文件。
重置leases文件和權限
# 停止服務
sudo systemctl stop isc-dhcp-server

# 備份並重建 leases 文件
sudo mv /var/lib/dhcp/dhcpd.leases /var/lib/dhcp/dhcpd.leases.bak
# 沒有就新建
sudo touch /var/lib/dhcp/dhcpd.leases
sudo touch /var/lib/dhcp/dhcpd.leases~

# 設置正確權限(關鍵)
sudo chown -R root:root /var/lib/dhcp/
sudo chmod 777 /var/lib/dhcp/
sudo chmod 666 /var/lib/dhcp/dhcpd.leases
sudo chmod 666 /var/lib/dhcp/dhcpd.leases~
最終的配置文件
# dhcpd.conf
#
# Sample configuration file for ISC dhcpd
#
# Attention: If /etc/ltsp/dhcpd.conf exists, that will be used as
# configuration file instead of this file.
#

# option definitions common to all supported networks...
option domain-name "example.org";
option domain-name-servers ns1.example.org, ns2.example.org;

default-lease-time 600;
max-lease-time 7200;

# The ddns-updates-style parameter controls whether or not the server will
# attempt to do a DNS update when a lease is confirmed. We default to the
# behavior of the version 2 packages ('none', since DHCP v2 didn't
# have support for DDNS.)
ddns-update-style none;

# If this DHCP server is the official DHCP server for the local
# network, the authoritative directive should be uncommented.
authoritative;
ping-check false;
# Use this to send dhcp log messages to a different log file (you also
# have to hack syslog.conf to complete the redirection).
#log-facility local7;

# No service will be given on this subnet, but declaring it helps the
# DHCP server to understand the network topology.

#subnet 10.152.187.0 netmask 255.255.255.0 {
#}
# 匹配你的實際網絡:192.168.200.0/24
subnet 192.168.200.0 netmask 255.255.255.0 {
    range 192.168.200.50 192.168.200.100;  # IP分配範圍
    option routers 192.168.200.1;          # 網關地址
    option domain-name-servers 8.8.8.8, 8.8.4.4;  # DNS服務器
    option subnet-mask 255.255.255.0;      # 子網掩碼
    option broadcast-address 192.168.200.255;  # 廣播地址
    default-lease-time 600;
    max-lease-time 7200;
}
# This is a very basic subnet declaration.

#subnet 10.254.239.0 netmask 255.255.255.224 {
#  range 10.254.239.10 10.254.239.20;
#  option routers rtr-239-0-1.example.org, rtr-239-0-2.example.org;
#}


# This declaration allows BOOTP clients to get dynamic addresses,
# which we don't really recommend.

#subnet 10.254.239.32 netmask 255.255.255.224 {
#  range dynamic-bootp 10.254.239.40 10.254.239.60;
#  option broadcast-address 10.254.239.31;
#  option routers rtr-239-32-1.example.org;
#}

# A slightly different configuration for an internal subnet.
#subnet 10.5.5.0 netmask 255.255.255.224 {
#  range 10.5.5.26 10.5.5.30;
#  option domain-name-servers ns1.internal.example.org;
#  option domain-name "internal.example.org";
#  option subnet-mask 255.255.255.224;
#  option routers 10.5.5.1;
#  option broadcast-address 10.5.5.31;
#  default-lease-time 600;
#  max-lease-time 7200;
#}

# Hosts which require special configuration options can be listed in
# host statements.   If no address is specified, the address will be
# allocated dynamically (if possible), but the host-specific information
# will still come from the host declaration.

#host passacaglia {
#  hardware ethernet 0:0:c0:5d:bd:95;
#  filename "vmunix.passacaglia";
#  server-name "toccata.example.com";
#}

# Fixed IP addresses can also be specified for hosts.   These addresses
# should not also be listed as being available for dynamic assignment.
# Hosts for which fixed IP addresses have been specified can boot using
# BOOTP or DHCP.   Hosts for which no fixed address is specified can only
# be booted with DHCP, unless there is an address range on the subnet
# to which a BOOTP client is connected which has the dynamic-bootp flag
# set.
#host fantasia {
#  hardware ethernet 08:00:07:26:c0:a5;
#  fixed-address fantasia.example.com;
#}

# You can declare a class of clients and then do address allocation
# based on that.   The example below shows a case where all clients
# in a certain class get addresses on the 10.17.224/24 subnet, and all
# other clients get addresses on the 10.0.29/24 subnet.

#class "foo" {
#  match if substring (option vendor-class-identifier, 0, 4) = "SUNW";
#}

#shared-network 224-29 {
#  subnet 10.17.224.0 netmask 255.255.255.0 {
#    option routers rtr-224.example.org;
#  }
#  subnet 10.0.29.0 netmask 255.255.255.0 {
#    option routers rtr-29.example.org;
#  }
#  pool {
#    allow members of "foo";
#    range 10.17.224.10 10.17.224.250;
#  }
#  pool {
#    deny members of "foo";
#    range 10.0.29.10 10.0.29.230;
#  }
#}
配置網絡接口
這裏需要配置正確的網絡接口
-
編輯
/etc/default/isc-dhcp-server文件,設置DHCP服務監聽的網絡接口。默認情況下,它將監聽所有網絡接口。如果需要指定特定接口,請按照以下步驟操作:sudo gedit /etc/default/isc-dhcp-server -
找到
INTERFACESv4行,並將其設置為要監聽的接口名稱,例如ens33,具體要用ifconfig可以查詢到:INTERFACESv4="ens33" - 保存並關閉文件。
啓動和啓用DHCP服務
-
重啓DHCP服務以應用更改:
sudo systemctl restart isc-dhcp-server -
使DHCP服務在啓動時自動運行:
sudo systemctl enable isc-dhcp-server
測試DHCP服務
-
在另一台計算機上,將其網絡設置更改為自動獲取IP地址(DHCP)。
可以兩台物理機,一台做服務,一台做客户機設置DHCP,用一個交換機或者一根網線直連就可以實現。
如果是VMWare,參照書上的做實驗,將兩台虛擬機連接在一起,虛擬網卡的DHCP服務關閉,兩台開機就可以了。
- 重啓計算機或斷開並重新連接網絡。
-
在新計算機的命令行中,輸入以下命令以查看分配的IP地址:
ifconfig或者
ip addr
3.DNS服務部署
DNS(域名系統)是互聯網上不可或缺的服務之一,它將易於記憶的域名轉換為IP地址。在Ubuntu系統中搭建DNS服務器對於網絡管理和維護至關重要。
安裝BIND
BIND(Berkeley Internet Name Domain)是Linux系統中常用的DNS服務器軟件。以下是安裝BIND的步驟:
sudo apt-get update
sudo apt-get install bind9 bind9-utils
配置DNS服務器
1. 編輯主配置文件
打開主配置文件/etc/bind/named.conf,添加或修改以下內容:
zone "example.com" IN {
        type master;
        file "/etc/bind/zones/db.example.com";
};
2. 創建區域文件
創建目錄
#確保目錄存在
sudo mkdir -p /etc/bind/zones
#在`/etc/bind/zones/`目錄下創建名為`db.example.com`的區域文件
sudo gedit /etc/bind/zones/db.example.com
db.example.com的示例內容如下(IP可以換成你自己的機器IP):
$TTL    604800
@       IN      SOA     ns1.example.com. admin.example.com. (
                          2023100401         ; Serial
                          604800            ; Refresh
                          86400             ; Retry
                          2419200           ; Expire
                          604800 )          ; Negative Cache TTL
;
@       IN      NS      ns1.example.com.
ns1     IN      A       192.168.1.10
www     IN      A       192.168.1.11
3. 配置DNS解析
在/etc/resolv.conf文件中添加以下內容:
nameserver 127.0.0.1
search example.com
啓動和測試DNS服務器
1. 啓動DNS服務器
#啓動服務
sudo systemctl restart bind9
#設置開機啓動
sudo systemctl enable bind9
#確認服務狀態
sudo systemctl status bind9
2. 測試DNS解析
使用nslookup命令測試DNS解析:
nslookup www.example.com如果結果顯示解析到的IP地址正確,則表示DNS服務器配置成功。
4.Apache服務部署
Apache服務器是一款廣泛使用的開源Web服務器軟件,因其穩定性和功能強大而備受青睞。在Ubuntu系統下,安裝和配置Apache服務器相對簡單。本文將為您詳細介紹如何在Ubuntu系統下快速啓動和配置Apache服務器。
準備工作
在開始之前,請確保您的Ubuntu系統已經更新到最新版本。可以通過以下命令更新系統:
sudo apt update
sudo apt upgrade
確保80端口可用。可以通過以下命令來檢查:
sudo netstat -tlnp | grep :80如果輸出為空,則表示系統上沒有其他Web服務器。
安裝Apache服務器
- 使用以下命令安裝Apache服務器:
sudo apt install apache2 -y在安裝過程中,系統可能會提示您輸入密碼以確認安裝。
- 安裝完成後,啓動Apache服務:
sudo systemctl restart apache2- 設置開機自啓服務,以便在系統啓動時自動啓動Apache服務:
sudo systemctl enable apache2- 檢查Apache服務的狀態,確保它正在運行:
sudo systemctl status apache2配置Apache服務器
Apache服務器的配置文件位於/etc/apache2/目錄下。以下是一些基本的配置步驟:
1. 修改默認網站文檔根目錄
默認情況下,Apache服務器將網站文檔根目錄設置為/var/www/html/。您可以根據需要修改該目錄:
sudo gedit /etc/apache2/apache2.conf找到以下行並修改:
DocumentRoot /var/www/html/將/var/www/html/替換為您想要設置的目錄。
5.FTP服務部署
在數字化時代,文件傳輸是日常工作中不可或缺的一部分。FTP(文件傳輸協議)作為一項基礎的互聯網服務,廣泛應用於文件的上傳和下載。對用户來説,掌握FTP文件傳輸是一項基本技能。
Windows下,可以下載filezilla server快速創建,客户端無論是銀河麒麟還是Windows都可以使用filezilla client。
一、FTP基礎
1.1 什麼是FTP?
FTP(File Transfer Protocol)是一種網絡協議,用於在網絡上進行文件傳輸。它允許用户在網絡上共享文件、文件夾以及上傳或下載文件。
1.2 FTP工作原理
FTP基於客户端-服務器模型,由FTP客户端和FTP服務器組成。客户端是用户用來上傳、下載和管理文件的應用程序,而服務器則是存儲文件並處理用户連接請求的服務器程序。
二、安裝FTP服務器
2.1 使用vsftpd
Ubuntu系統通常預裝了vsftpd(Very Secure FTP Daemon),這是最常用的FTP服務器之一。
2.1.1 安裝vsftpd
sudo apt-get install vsftpd -y
sudo ufw disable  # 臨時關閉(測試用)
2.1.2 配置vsftpd
安裝完成後,可以編輯配置文件 /etc/vsftpd.conf 來自定義FTP服務器的行為。
sudo gedit /etc/vsftpd.conf在配置文件中,可以設置用户權限、匿名訪問、數據傳輸模式等。
將默認設置改為如下(簡化的配置,確保ftp服務正常啓動)
# 基礎配置
listen=YES
listen_ipv6=NO
anonymous_enable=NO
local_enable=YES
write_enable=YES
local_umask=022

# 目錄配置
dirmessage_enable=YES
use_localtime=YES
xferlog_enable=YES
connect_from_port_20=YES

# 安全配置
chroot_local_user=YES
allow_writeable_chroot=YES

# 用户控制
userlist_enable=YES
userlist_file=/etc/vsftpd.userlist
userlist_deny=NO

# 其他必要配置
secure_chroot_dir=/var/run/vsftpd/empty
pam_service_name=vsftpd
rsa_cert_file=/etc/ssl/certs/ssl-cert-snakeoil.pem
rsa_private_key_file=/etc/ssl/private/ssl-cert-snakeoil.key
ssl_enable=NO
utf8_filesystem=YES
使用虛擬用户
創建獨立的虛擬用户,不使用系統用户,安全性更高:
- 安裝必要工具
sudo apt install libpam-pwdfile- 創建虛擬用户密碼文件
sudo mkdir /etc/vsftpd #如果沒有存在就建一個
# 創建密碼文件並添加用户
sudo touch /etc/vsftpd/virtual_users.passwd
sudo chmod 600 /etc/vsftpd/virtual_users.passwd

# 添加虛擬用户(替換 yourpassword 為實際密碼)
sudo htpasswd -b /etc/vsftpd/virtual_users.passwd virtualuser1 yourpassword1
sudo htpasswd -b /etc/vsftpd/virtual_users.passwd virtualuser2 yourpassword2- 配置 PAM 認證
創建 /etc/pam.d/vsftpd.virtual 文件:
sudo gedit /etc/pam.d/vsftpd.virtual添加內容:
auth    required    pam_pwdfile.so pwdfile /etc/vsftpd/virtual_users.passwd
account required pam_permit.so- 創建虛擬用户映射的系統用户
sudo useradd -d /data/ftp/virtual -s /usr/sbin/nologin virtual
sudo mkdir -p /data/ftp/virtual/{virtualuser1,virtualuser2}
sudo chown -R virtual:virtual /data/ftp/virtual- 修改 vsftpd.conf 配置
# 啓用虛擬用户
guest_enable=YES
guest_username=virtual
virtual_use_local_privs=YES

# PAM 配置
pam_service_name=vsftpd.virtual

# 用户配置目錄
user_config_dir=/etc/vsftpd/user_conf- 創建用户獨立配置
sudo mkdir -p /etc/vsftpd/user_conf

# 為 virtualuser1 創建配置
sudo gedit /etc/vsftpd/user_conf/virtualuser1
添加內容:
local_root=/data/ftp/virtual/virtualuser1
write_enable=YES
anon_upload_enable=YES
anon_mkdir_write_enable=YES
同理為 virtualuser2 創建配置:
sudo gedit /etc/vsftpd/user_conf/virtualuser2添加內容:
local_root=/data/ftp/virtual/virtualuser2
write_enable=YES
anon_upload_enable=YES
anon_mkdir_write_enable=YES
2.1.3 重啓vsftpd
配置完成後,重啓vsftpd以應用更改。
sudo systemctl restart vsftpd
sudo systemctl status vsftpd
2.2 設置開機自啓
為了確保FTP服務在系統啓動時自動運行,可以將vsftpd設置為開機自啓。
sudo systemctl enable vsftpd在文件瀏覽中輸入服務的IP地址
ftp://192.168.10.2006.Samba服務部署
Samba是一種允許Unix-like系統(如Ubuntu)與其他Windows系統之間進行文件和打印機共享的協議。通過配置Samba,您可以輕鬆地在不同的操作系統之間共享文件和打印機。本文將詳細介紹如何在Ubuntu上配置Samba,實現跨平台文件共享。
Samba的基本概念
在開始配置之前,讓我們先了解一些基本概念:
- SMB/CIFS:Samba基於SMB(Server Message Block)和CIFS(Common Internet File System)協議,這些協議是Windows文件共享的基礎。
- Samba服務器:運行Samba軟件的計算機,它允許其他計算機訪問共享資源。
- Samba客户端:連接到Samba服務器並訪問共享資源的計算機。
安裝Samba
在Ubuntu上安裝Samba非常簡單。打開終端並執行以下命令:
sudo apt update
sudo apt install samba samba-common
配置Samba
Samba的配置文件位於/etc/samba/目錄下,主要的配置文件是smb.conf。
編輯smb.conf文件
打開smb.conf文件進行編輯:
sudo cp /etc/samba/smb.conf /etc/samba/smb.conf.bak #先備份
sudo gedit /etc/samba/smb.conf #再修改
基本配置
在smb.conf文件中,找到[global]部分,進行以下配置(smb.conf最小配置,確保服務啓動):
[global]
    workgroup = WORKGROUP
    security = user

[myshare]
    path = /srv/samba/myshare
    writable = yes
    valid users = user1 user2  # 只允許這兩個用户訪問
配置用户
第一步:創建共享目錄
sudo mkdir -p /srv/samba/myshare
sudo chmod 777 /srv/samba/myshare  # 簡單設置權限
第二步:創建用户並設置密碼
# 創建系統用户(如果沒有)
sudo useradd user1
sudo useradd user2

# 設置Samba密碼(關鍵!)
sudo smbpasswd -a user1  # 按提示輸入密碼
sudo smbpasswd -a user2  # 按提示輸入密碼
第三步:重啓服務
sudo systemctl restart smbd更簡單的 "任何人可訪問" 配置(如果不需要限制用户)
[global]
    workgroup = WORKGROUP
    security = user
    map to guest = Bad User

[public]
    path = /srv/samba/public
    writable = yes
    guest ok = yes  # 允許匿名訪問
重啓Samba服務
完成配置後,重啓Samba服務使更改生效:
sudo systemctl restart smbd
sudo systemctl restart nmbd
測試Samba共享
在Windows上,您可以打開“文件資源管理器”,在地址欄中輸入Samba服務器的IP地址,然後輸入正確的用户名和密碼即可訪問共享文件夾。
\\192.168.10.2007.nginx服務部署
Nginx是一個高性能的HTTP和反向代理web服務器,同時也是IMAP/POP3/SMTP服務的提供者。由於其輕量級和高併發處理能力,Nginx在互聯網中得到了廣泛的應用。本文將詳細介紹如何在Ubuntu系統上從零開始安裝和配置Nginx。
注意:Apache默認也是80端口,將apache服務停掉。我們也可以在nginx配置中,改掉商品,改成8080,8090等其他的端口
sudo systemctl disable apache2 #停止開機啓動
sudo systemctl stop apache2 #停止服務
sudo reboot #重啓系統
確保80端口可用。可以通過以下命令來檢查:
sudo netstat -tlnp | grep :80如果輸出為空,則表示系統上沒有其他Web服務器。
安裝Nginx
更新軟件包索引
在安裝Nginx之前,首先需要更新軟件包索引:
sudo apt update安裝Nginx
接下來,使用以下命令安裝Nginx:
sudo apt install nginx安裝過程中可能會提示您確認安裝,輸入Y並按回車繼續。
驗證安裝
安裝完成後,可以通過以下命令驗證Nginx是否安裝成功:
nginx -v如果看到Nginx的版本信息,説明安裝成功。
啓動和停止Nginx
啓動Nginx
使用以下命令啓動Nginx:
sudo systemctl start nginx停止Nginx
使用以下命令停止Nginx:
sudo systemctl stop nginx重啓Nginx
使用以下命令重啓Nginx:
sudo systemctl restart nginx設置Nginx開機自啓
使用以下命令設置Nginx開機自啓:
sudo systemctl enable nginx配置Nginx
查看默認配置文件
Nginx的默認配置文件位於/etc/nginx/nginx.conf。您可以使用以下命令查看:
sudo vim /etc/nginx/nginx.conf編輯默認配置文件
根據您的需求,您可以修改默認配置文件。以下是一些常見的修改內容:
- 修改服務器監聽的端口
- 配置服務器根目錄
- 配置反向代理
這裏面可以默認監聽端口和網站文件目錄
/etc/nginx/sites-enabled/default內容如下
server {
    listen 809default_server;
    listen [::]:80 default_server;
    root /var/www/html;
    # Add index.php to the list if you are using PHP
    index index.html index.htm index.nginx-debian.html;
    server_name _;
    location / {
            # First attempt to serve request as file, then
            # as directory, then fall back to displaying a 404.
            try_files $uri $uri/ =404;
    }
}
重載Nginx配置
重新加載Nginx配置以使更改生效:
sudo systemctl reload nginx測試網站
在瀏覽器中輸入您的服務器IP地址,如果一切正常,您應該能看到Nginx的默認歡迎頁面。
注:本文參考了https://www.oryoy.com/上的Ubuntu輕鬆上手系列教程
寫在最後
本篇主要目標是告訴大家怎麼簡單快速的部署常見的服務
麒麟操作系統,從入門到精通
麒麟操作系統專欄:https://segmentfault.com/blog/kylinos
麒麟操作系統x64專欄:https://segmentfault.com/blog/kylinos-x64
B站視頻地址:https://www.bilibili.com/list/243784204
個人主頁:
https://segmentfault.com/u/code4world/articles
https://twitter.com/xiaohelong
https://github.com/xiaohelong
聯繫郵箱:1179611323@qq.com
羣:662512340
發行日志:
20251124 首發
20251126 修正bind dns 配置地址錯誤