1. 引言
在本教程中,我們將學習如何創建一個能夠創建、檢索、更新和刪除(CRUD)客户端數據的應用程序。該應用程序將包含一個簡單的 Spring Boot RESTful API 以及使用 React JavaScript 庫實現的用户界面(UI)。
2. Spring Boot
Spring Boot 是一個讓構建獨立、生產就緒 Spring 應用程序變得簡單起來的框架。它通過自動化配置和依賴注入,減少了配置的複雜性,並提供了快速原型設計和開發的功能。
Spring Boot 提供了以下核心特性:
- Auto-Configuration: Spring Boot 會自動配置 Spring 應用,根據 classpath 中依賴的庫和配置,推斷出合適的配置。
- Starter Projects: Spring Boot 提供了各種 Starter 項目,可以快速啓動一個特定類型的 Spring 應用,例如 Web 應用、REST API 應用等。
- Actuator: Spring Boot Actuator 提供了豐富的監控和管理功能,例如健康檢查、指標收集、日誌管理等。
- Embedded Servers: Spring Boot 可以嵌入 Tomcat、Jetty 等 Servlet 服務器,無需單獨部署 WAR 文件。
- Simplified Development: Spring Boot 提供了簡化的開發流程,例如自動配置、快速啓動等,提高了開發效率。
Spring Boot 旨在簡化 Spring 應用的開發和部署,讓開發者能夠專注於業務邏輯的實現。
2.1. Maven 依賴
讓我們先在我們的 pom.xml文件中添加幾個依賴:
<dependencies>
    <dependency>
        <groupId>org.springframework.boot</groupId>
        <artifactId>spring-boot-starter-web</artifactId>
        <version>3.1.5</version>
    </dependency>

    <dependency>
        <groupId>org.springframework.boot</groupId>
        <artifactId>spring-boot-starter-data-jpa</artifactId>
        <version>3.1.5</version>
    </dependency>

    <dependency>
        <groupId>org.springframework.boot</groupId>
        <artifactId>spring-boot-starter-test</artifactId>
        <version>3.1.5</version>
        <scope>test</scope>
    </dependency>

    <dependency>
        <groupId>com.h2database</groupId>
        <artifactId>h2</artifactId>
        <version>2.1.214</version>
        <scope>runtime</scope>
    </dependency>
</dependencies>
我們添加了Web、測試和JPA持久化啓動器,以及H2依賴項,因為應用程序將使用H2內存數據庫。
2.2. 創建模型
接下來,讓我們創建一個 Client 實體類,包含 name 和 email 屬性,以表示我們的數據模型:
@Entity
@Table(name = "client")
public class Client {

    @Id
    @GeneratedValue
    private Long id;

    private String name;
    private String email;

    // getter, setters, contructors
}
2.3. 創建倉庫
然後我們將創建我們的 ClientRepository 類,從 JpaRepository 繼承 以提供 JPA CRUD 功能:
public interface ClientRepository extends JpaRepository<Client, Long> {
}
2.4. 創建 REST 控制器
最後,通過創建控制器來與 ClientRepository 交互,從而暴露一個 REST API。
@RestController
@RequestMapping("/clients")
public class ClientsController {

    private final ClientRepository clientRepository;

    public ClientsController(ClientRepository clientRepository) {
        this.clientRepository = clientRepository;
    }

    @GetMapping
    public List<Client> getClients() {
        return clientRepository.findAll();
    }

    @GetMapping("/{id}")
    public Client getClient(@PathVariable Long id) {
        return clientRepository.findById(id).orElseThrow(RuntimeException::new);
    }

    @PostMapping
    public ResponseEntity createClient(@RequestBody Client client) throws URISyntaxException {
        Client savedClient = clientRepository.save(client);
        return ResponseEntity.created(new URI("/clients/" + savedClient.getId())).body(savedClient);
    }

    @PutMapping("/{id}")
    public ResponseEntity updateClient(@PathVariable Long id, @RequestBody Client client) {
        Client currentClient = clientRepository.findById(id).orElseThrow(RuntimeException::new);
        currentClient.setName(client.getName());
        currentClient.setEmail(client.getEmail());
        currentClient = clientRepository.save(client);

        return ResponseEntity.ok(currentClient);
    }

    @DeleteMapping("/{id}")
    public ResponseEntity deleteClient(@PathVariable Long id) {
        clientRepository.deleteById(id);
        return ResponseEntity.ok().build();
    }
}
2.5. 啓動我們的 API
完成上述步驟後,我們現在可以開始啓動我們的 Spring Boot API。我們可以使用 spring-boot-maven-plugin 來實現:
mvn spring-boot:run然後,我們就可以通過訪問 http://localhost:8080/clients 獲取客户列表。
2.6. 創建客户端
此外,我們還可以使用 Postman 創建一些客户端:
curl --location 'http://localhost:8080/clients' \ --header 'Content-Type: application/json' \ --data-raw '{"name": "John Doe", "email": "[email protected]"}'3. React
React 是一個用於創建用户界面的 JavaScript 庫。 使用 React 需要安裝 Node.js。 您可以在 Node.js 下載頁面 找到安裝説明。
3.1. 創建 React UI
Create React App 是一個命令行工具,為我們生成 React 項目。 讓我們在我們的 Spring Boot 應用基礎目錄下,通過運行以下命令創建我們的 前端 應用:
npx create-react-app frontend在完成應用程序創建流程後,我們將安裝 Bootstrap、React Router 和 reactstrap 目錄下的 前端 目錄:
npm install --save [email protected] [email protected] [email protected] [email protected]我們將使用 Bootstrap 的 CSS 和 reactstrap 的組件來創建一個更美觀的用户界面,並使用 React Router 組件來處理應用程序中的導航。
讓我們在 app/src/index.js 中添加 Bootstrap 的 CSS 文件作為導入。
import 'bootstrap/dist/css/bootstrap.min.css';3.2. 啓動我們的 React UI
現在我們準備好啓動我們的 前端應用程序:
npm start當通過瀏覽器訪問 http://localhost:3000 時,我們應該看到 React 示例頁面:
3.3. 調用我們的 Spring Boot API
調用我們的 Spring Boot API 需要在 React 應用的 package.json文件中配置代理,以便在調用 API 時進行配置。
為此,我們將 API 的 URL 添加到 package.json中:
...
"proxy": "http://localhost:8080",
...
接下來,我們編輯 frontend/src/App.js,使其調用我們的 API 以顯示具有 name 和 email 屬性的客户端列表:
class App extends Component {
  state = {
    clients: []
  };

  async componentDidMount() {
    const response = await fetch('/clients');
    const body = await response.json();
    this.setState({clients: body});
  }

  render() {
    const {clients} = this.state;
    return (
        <div className="App">
          <header className="App-header">
            <img src={logo} className="App-logo" alt="logo" />
            <div className="App-intro">
              <h2>Clients</h2>
              {clients.map(client =>
                  <div key={client.id}>
                    {client.name} ({client.email})
                  </div>
              )}
            </div>
          </header>
        </div>
    );
  }
}
export default App;
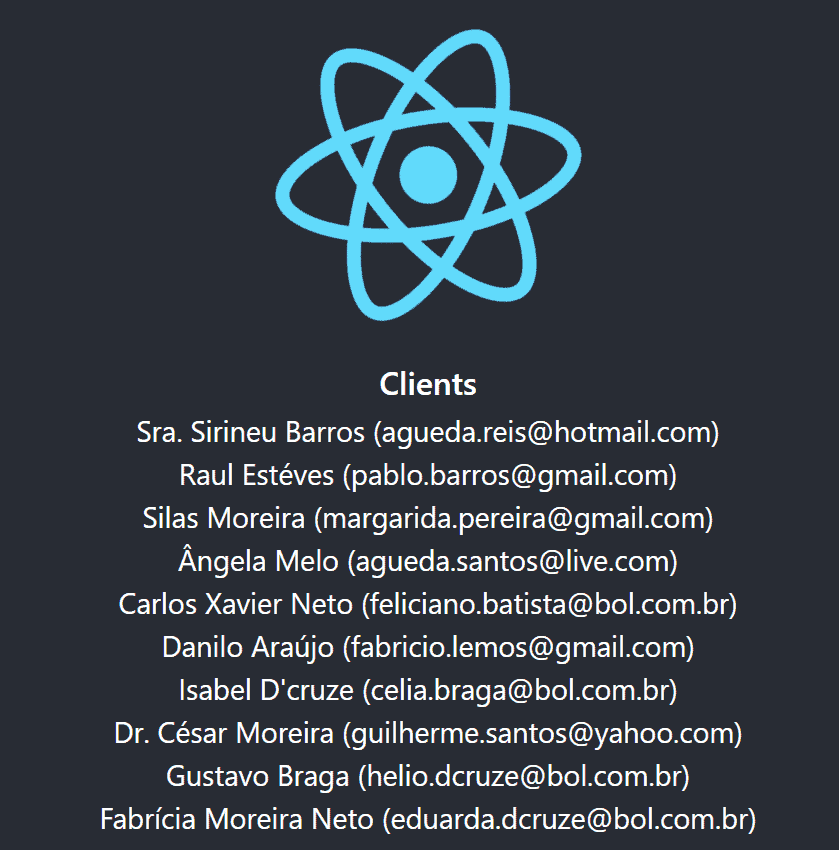
在 componentDidMount 函數中,我們調用客户端 API 並將響應體設置為 clients 變量。 在我們的 render 函數中,我們返回包含 API 中找到的客户端列表的 HTML。
我們將看到客户端頁面,它將如下所示:
注意:請確保 Spring Boot 應用程序正在運行,以便 UI 能夠調用 API。
3.4. 創建 ClientList 組件
我們可以現在改進我們的UI,以顯示一個 更復雜的組件,該組件用於 列出、編輯、刪除 和 創建 客户,利用我們的API。稍後,我們將看到如何使用此組件並從 App 組件中刪除客户列表。
讓我們在 frontend/src/ClientList.js 文件中創建一個文件:
import React, { Component } from 'react';
import { Button, ButtonGroup, Container, Table } from 'reactstrap';
import AppNavbar from './AppNavbar';
import { Link } from 'react-router-dom';

class ClientList extends Component {

    constructor(props) {
        super(props);
        this.state = {clients: []};
        this.remove = this.remove.bind(this);
    }

    componentDidMount() {
        fetch('/clients')
            .then(response => response.json())
            .then(data => this.setState({clients: data}));
    }
}
export default ClientList;
如在 App.js 中所示,componentDidMount 函數正在調用我們的 API 以加載客户端列表。
我們還將包含 remove 函數來處理當我們要刪除客户端時,對 API 的 DELETE 調用。此外,我們還將創建 render 函數,該函數將使用 Edit、Delete 和 Add Client 操作渲染 HTML。
async remove(id) {
    await fetch(`/clients/${id}`, {
        method: 'DELETE',
        headers: {
            'Accept': 'application/json',
            'Content-Type': 'application/json'
        }
    }).then(() => {
        let updatedClients = [...this.state.clients].filter(i => i.id !== id);
        this.setState({clients: updatedClients});
    });
}

render() {
    const {clients, isLoading} = this.state;

    if (isLoading) {
        return <p>Loading...</p>;
    }

    const clientList = clients.map(client => {
        return <tr key={client.id}>
            <td style={{whiteSpace: 'nowrap'}}>{client.name}</td>
            <td>{client.email}</td>
            <td>
                <ButtonGroup>
                    <Button size="sm" color="primary" tag={Link} to={"/clients/" + client.id}>Edit</Button>
                    <Button size="sm" color="danger" onClick={() => this.remove(client.id)}>Delete</Button>
                </ButtonGroup>
            </td>
        </tr>
    });

    return (
        <div>
            <AppNavbar/>
            <Container fluid>
                <div className="float-right">
                    <Button color="success" tag={Link} to="/clients/new">Add Client</Button>
                </div>
                <h3>Clients</h3>
                <Table className="mt-4">
                    <thead>
                    <tr>
                        <th width="30%">Name</th>
                        <th width="30%">Email</th>
                        <th width="40%">Actions</th>
                    </tr>
                    </thead>
                    <tbody>
                    {clientList}
                    </tbody>
                </Table>
            </Container>
        </div>
    );
}
3.5. 創建 ClientEdit 組件
ClientEdit 組件將負責 創建和編輯我們的客户端。
讓我們在 frontend/src/ClientEdit.js 中創建一個文件:
import React, { Component } from 'react';
import { Link, withRouter } from 'react-router-dom';
import { Button, Container, Form, FormGroup, Input, Label } from 'reactstrap';
import AppNavbar from './AppNavbar';

class ClientEdit extends Component {

    emptyItem = {
        name: '',
        email: ''
    };

    constructor(props) {
        super(props);
        this.state = {
            item: this.emptyItem
        };
        this.handleChange = this.handleChange.bind(this);
        this.handleSubmit = this.handleSubmit.bind(this);
    }
}
export default withRouter(ClientEdit);讓我們添加<em >componentDidMount</em>函數,以檢查我們是否正在處理創建或編輯功能;如果是編輯,它將從API獲取我們的客户端:
async componentDidMount() {
    if (this.props.match.params.id !== 'new') {
        const client = await (await fetch(`/clients/${this.props.match.params.id}`)).json();
        this.setState({item: client});
    }
}
然後,在 handleChange 函數中,我們將更新組件的狀態項屬性,該屬性將在提交表單時使用:
handleChange(event) {
    const target = event.target;
    const value = target.value;
    const name = target.name;
    let item = {...this.state.item};
    item[name] = value;
    this.setState({item});
}
在 handeSubmit 中,我們將調用我們的 API,通過 PUT 或 POST 方法將請求發送出去,具體取決於我們正在調用的功能。為此,我們可以檢查 id 屬性是否已填充:
async handleSubmit(event) {
    event.preventDefault();
    const {item} = this.state;

    await fetch('/clients' + (item.id ? '/' + item.id : ''), {
        method: (item.id) ? 'PUT' : 'POST',
        headers: {
            'Accept': 'application/json',
            'Content-Type': 'application/json'
        },
        body: JSON.stringify(item),
    });
    this.props.history.push('/clients');
}
最後,但並非最不重要的,我們的 渲染 函數將處理我們的表單:
render() {
    const {item} = this.state;
    const title = <h2>{item.id ? 'Edit Client' : 'Add Client'}</h2>;

    return <div>
        <AppNavbar/>
        <Container>
            {title}
            <Form onSubmit={this.handleSubmit}>
                <FormGroup>
                    <Label for="name">Name</Label>
                    <Input type="text" name="name" id="name" value={item.name || ''}
                           onChange={this.handleChange} autoComplete="name"/>
                </FormGroup>
                <FormGroup>
                    <Label for="email">Email</Label>
                    <Input type="text" name="email" id="email" value={item.email || ''}
                           onChange={this.handleChange} autoComplete="email"/>
                </FormGroup>
                <FormGroup>
                    <Button color="primary" type="submit">Save</Button>{' '}
                    <Button color="secondary" tag={Link} to="/clients">Cancel</Button>
                </FormGroup>
            </Form>
        </Container>
    </div>
}注意:我們還提供一個 鏈接,該鏈接在點擊 取消按鈕時,將返回 /clients 目錄。
3.6. 創建 AppNavbar 組件
為了使我們的應用程序具有更好的可導航性,讓我們在 frontend/src/AppNavbar.js 中創建一個文件:
import React, {Component} from 'react';
import {Navbar, NavbarBrand} from 'reactstrap';
import {Link} from 'react-router-dom';

export default class AppNavbar extends Component {
    constructor(props) {
        super(props);
        this.state = {isOpen: false};
        this.toggle = this.toggle.bind(this);
    }

    toggle() {
        this.setState({
            isOpen: !this.state.isOpen
        });
    }

    render() {
        return <Navbar color="dark" dark expand="md">
            <NavbarBrand tag={Link} to="/">Home</NavbarBrand>
        </Navbar>;
    }
}
在 渲染 函數中,我們將使用 react-router-dom 的功能來創建一個 Link,以便將應用程序路由到我們的 Home 頁面。
3.7. 創建我們的 Home 組件
該組件將是我們的應用程序的 Home 頁面,並且將有一個按鈕指向我們之前創建的 ClientList 組件。
讓我們在 frontend/src/Home.js 中創建一個文件:
import React, { Component } from 'react';
import './App.css';
import AppNavbar from './AppNavbar';
import { Link } from 'react-router-dom';
import { Button, Container } from 'reactstrap';

class Home extends Component {
    render() {
        return (
            <div>
                <AppNavbar/>
                <Container fluid>
                    <Button color="link"><Link to="/clients">Clients</Link></Button>
                </Container>
            </div>
        );
    }
}
export default Home;注意:在本組件中,我們還擁有一個從 react-router-dom 提供的 鏈接,它將引導我們前往 /clients 路由。 此路由將在下一步中進行配置。
3.8. 使用 React Router
現在我們將使用 React Router 在我們的組件之間進行導航。
讓我們修改我們的 <em >App.js</em >>:
import React, { Component } from 'react';
import './App.css';
import Home from './Home';
import { BrowserRouter as Router, Route, Switch } from 'react-router-dom';
import ClientList from './ClientList';
import ClientEdit from "./ClientEdit";

class App extends Component {
  render() {
    return (
        <Router>
          <Switch>
            <Route path='/' exact={true} component={Home}/>
            <Route path='/clients' exact={true} component={ClientList}/>
            <Route path='/clients/:id' component={ClientEdit}/>
          </Switch>
        </Router>
    )
  }
}

export default App;
如我們所見,我們為我們創建的每個組件都定義了應用程序路由。
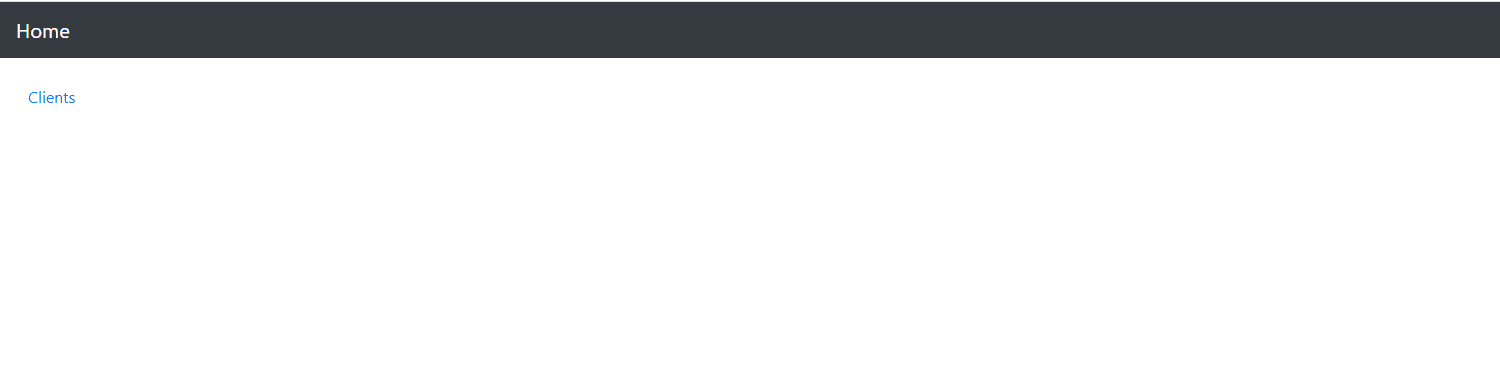
通過訪問localhost:3000,我們現在擁有帶有主頁和客户鏈接的頁面:
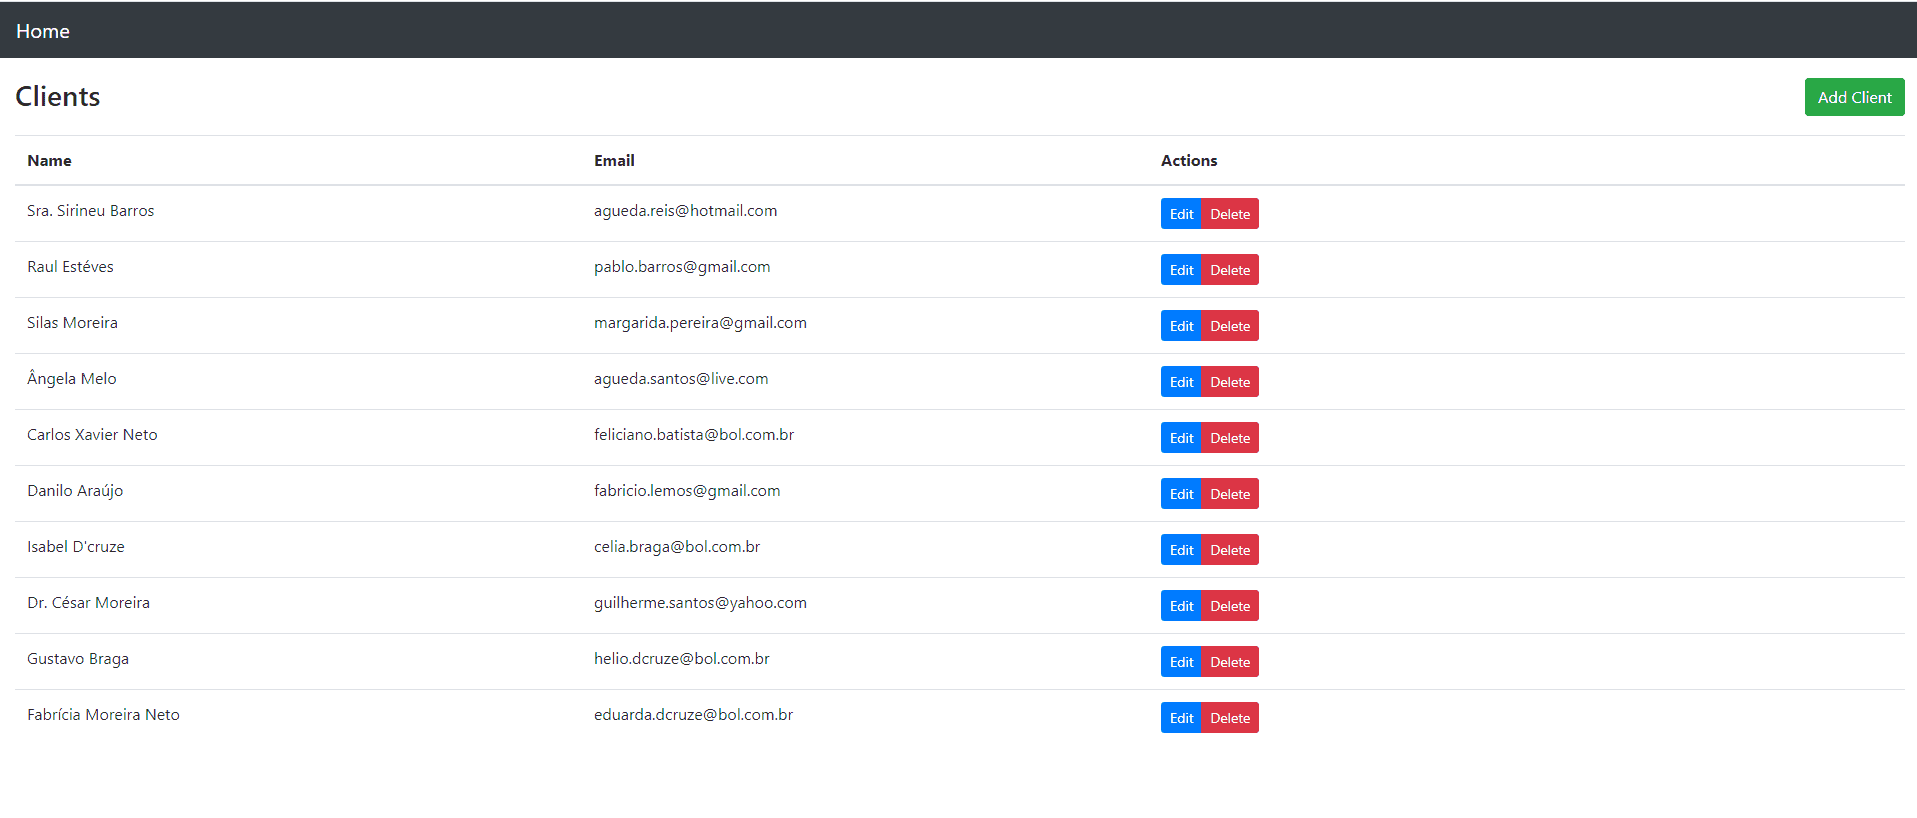
點擊客户鏈接,我們現在擁有客户列表,以及編輯、刪除和添加客户功能:
4. 構建與打包
為了使用 Maven 構建和打包我們的 React 應用程序,我們將使用 frontend-maven-plugin。
該插件將負責將我們的 前端應用程序打包並複製到我們的 Spring Boot API 構建文件夾中:
<properties>
    ...
    <frontend-maven-plugin.version>1.6</frontend-maven-plugin.version>
    <node.version>v14.8.0</node.version>
    <yarn.version>v1.12.1</yarn.version>
    ...
</properties>
...
<build>
    <plugins>
        <plugin>
            <groupId>org.apache.maven.plugins</groupId>
            <artifactId>maven-resources-plugin</artifactId>
            <version>3.1.0</version>
            <executions>
                ...
            </executions>
        </plugin>
        <plugin>
            <groupId>com.github.eirslett</groupId>
            <artifactId>frontend-maven-plugin</artifactId>
            <version>${frontend-maven-plugin.version}</version>
            <configuration>
                ...
            </configuration>
            <executions>
                ...
            </executions>
        </plugin>
        ...
    </plugins>
</build>
讓我們更詳細地瞭解一下我們的 maven-resources-plugin,它負責將我們的 前端資源複製到應用程序的 目標文件夾中:
...
<plugin>
    <groupId>org.apache.maven.plugins</groupId>
    <artifactId>maven-resources-plugin</artifactId>
    <version>3.1.0</version>
    <executions>
        <execution>
            <id>copy-resources</id>
            <phase>process-classes</phase>
            <goals>
                <goal>copy-resources</goal>
            </goals>
            <configuration>
                <outputDirectory>${basedir}/target/classes/static</outputDirectory>
                <resources>
                    <resource>
                        <directory>frontend/build</directory>
                    </resource>
                </resources>
            </configuration>
        </execution>
    </executions>
</plugin>
...
我們的 front-end-maven-plugin 將負責安裝 Node.js 和 Yarn,然後構建和測試我們的 前端 應用程序:
...
<plugin>
    <groupId>com.github.eirslett</groupId>
    <artifactId>frontend-maven-plugin</artifactId>
    <version>${frontend-maven-plugin.version}</version>
    <configuration>
        <workingDirectory>frontend</workingDirectory>
    </configuration>
    <executions>
        <execution>
            <id>install node</id>
            <goals>
                <goal>install-node-and-yarn</goal>
            </goals>
            <configuration>
                <nodeVersion>${node.version}</nodeVersion>
                <yarnVersion>${yarn.version}</yarnVersion>
            </configuration>
        </execution>
        <execution>
            <id>yarn install</id>
            <goals>
                <goal>yarn</goal>
            </goals>
            <phase>generate-resources</phase>
        </execution>
        <execution>
            <id>yarn test</id>
            <goals>
                <goal>yarn</goal>
            </goals>
            <phase>test</phase>
            <configuration>
                <arguments>test</arguments>
                <environmentVariables>
                    <CI>true</CI>
                </environmentVariables>
            </configuration>
        </execution>
        <execution>
            <id>yarn build</id>
            <goals>
                <goal>yarn</goal>
            </goals>
            <phase>compile</phase>
            <configuration>
                <arguments>build</arguments>
            </configuration>
        </execution>
    </executions>
</plugin>
...注意:要指定不同的 Node.js 版本,只需在我們的 pom.xml 中的 node.version 屬性中進行編輯即可。
5. 運行我們的 Spring Boot React CRUD 應用
最後,通過添加插件,我們可以通過運行以下命令訪問我們的應用程序:
mvn spring-boot:run我們的React應用程序將在http://localhost:8080/與我們的API完全集成。
6. 結論
在本文中,我們探討了如何使用 Spring Boot 和 React 創建 CRUD 應用程序。為此,我們首先創建了一些 REST API 端點,以便與我們的數據庫進行交互。然後,我們創建了一些 React 組件,用於使用我們的 API 檢索和寫入數據。我們還學習瞭如何將 Spring Boot 應用程序與我們的 React UI 組合成一個單一的應用程序包。
