1. 概述
在本教程中,我們將使用 Spring Boot 設置 SAML2。SAML2 是一種經過廣泛信任的技術,用於實現安全的應用程序。設置 SAML 需要多個方的配置,因此過程有些複雜。我們需要在服務提供者和身份提供者之間來回切換幾次,因此在按照分步指南進行操作時,需要耐心。讓我們深入瞭解每個步驟,以創建我們的應用程序。
2. 服務提供者的設置 (Sp)
在我們的例子中,Spring Boot 應用程序是我們的服務提供者。讓我們使用 Spring Security、Spring MVC 和 OpenSAML 依賴項設置一個 Spring Boot 應用程序。 關鍵的依賴項是 Spring Security SAML2。 Spring Security 框架中新增的 SAML2 支持通過一個單一的依賴項提供:
<dependency>
    <groupId>org.springframework.security</groupId>
    <artifactId>spring-security-saml2-service-provider</artifactId>
</dependency>
2.1. SAML 配置
現在,讓我們在我們的 application.yml 中添加必要的 SAML2 配置。 最重要的配置是 Identity Provider 的元數據。 儘管我們已經將 metadata-uri 添加到我們的配置中以完成,但目前它尚未可用:
spring:
  security:
    saml2:
      relyingparty:
        registration:
          okta:
            signing:
              credentials:
                - private-key-location: classpath:local.key
                  certificate-location: classpath:local.crt
            singlelogout:
              binding: POST
              response-url: "{baseUrl}/logout/saml2/slo"
            assertingparty:
              metadata-uri: "classpath:metadata/metadata-idp.xml"
singlelogout 配置定義了 Identity Provider 在成功註銷後將我們的應用程序重定向到的端點。 此外, signing credentials 配置添加了我們的應用程序用於向 Identity Provider 簽名註銷請求的密鑰和證書。 我們使用 OpenSSL 工具生成 local.key 和 local.crt 文件:
openssl req -newkey rsa:2048 -nodes -keyout local.key -x509 -days 365 -out local.crt2.2. 代碼中的安全配置
在此步驟中,讓我們在我們的過濾器鏈中添加一個安全過濾器。 此過濾器將 Identity Provider 的元數據添加到我們的安全上下文中。 此外,讓我們還添加 saml2Login() 和 saml2Logout() 方法調用到我們的 http 對象,以啓用登錄和註銷,分別:
Saml2MetadataFilter filter = new Saml2MetadataFilter(relyingPartyRegistrationResolver, new OpenSamlMetadataResolver());

http.csrf(AbstractHttpConfigurer::disable).authorizeHttpRequests(authorize -> authorize.anyRequest()
  .authenticated())
  .saml2Login(withDefaults())
  .saml2Logout(withDefaults())
  .addFilterBefore(filter, Saml2WebSsoAuthenticationFilter.class);

return http.build();
我們正在使用 withDefaults() 方法來配置 saml2Login 和 saml2Logout 的默認行為。 這就是使用 Spring Boot 平台的力量所在。 僅需幾行代碼即可完成我們所有的 SAML2 應用程序設置。 接下來,我們將設置我們的 Identity Provider 在 Okta。
3. Setting Up the Identity Provider (IdP)
In this step, let’s set up Okta as our Identity Provider. The Identity Provider is the party that authenticates our users and generates a SAML assertion as a result. Then, this SAML assertion is communicated back to our User Agents. The User Agents present this SAML assertion to the Service Provider for authentication. The Service Provider verifies it from the Identity Provider and allows the users to access its resources.
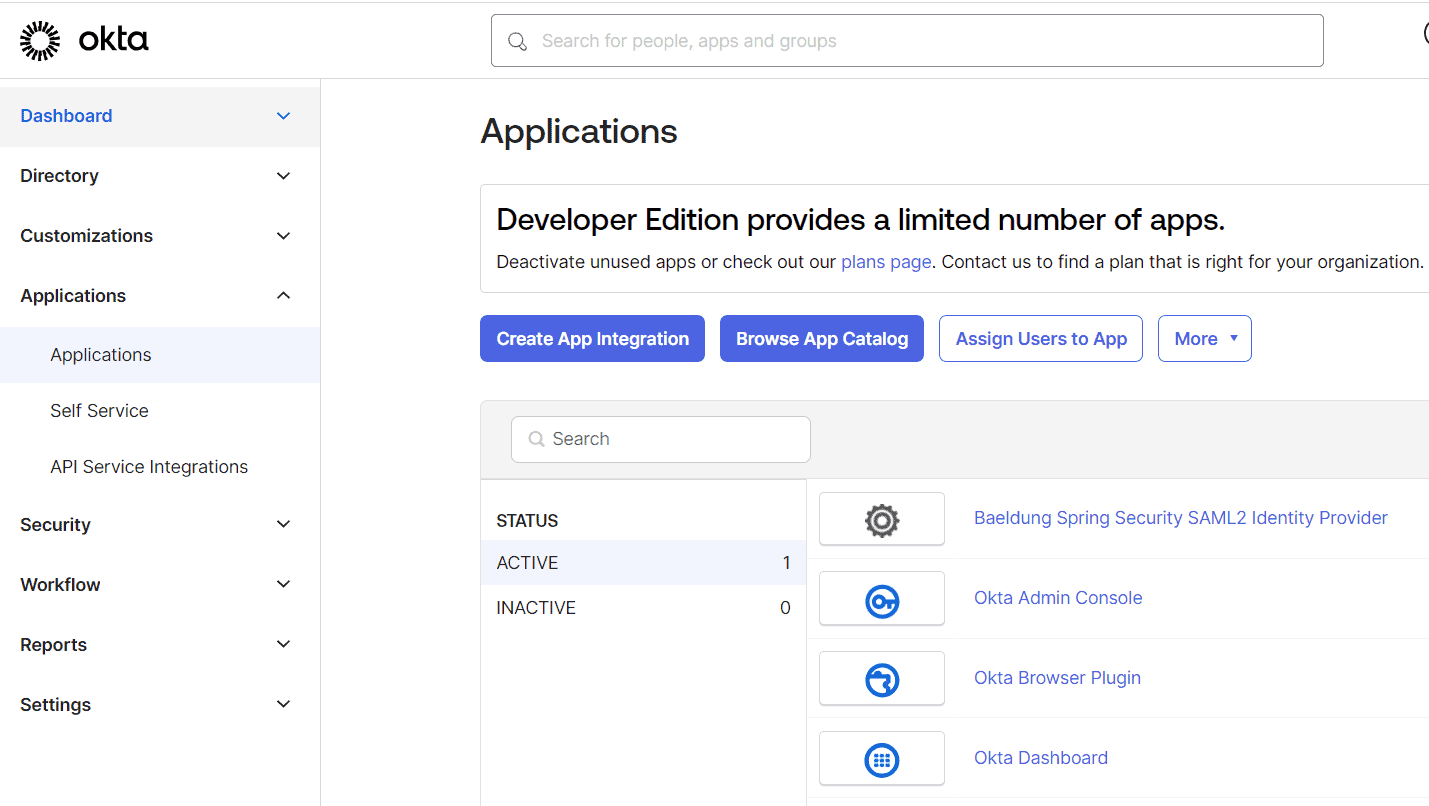
On the Okta developer account after signup and login, we get a screen with a left sidebar. In this sidebar, let’s navigate to the Applications page and start our SAML application integration process:
3.1. Create App Integration
Next, let’s click ‘Create App Integration’ to open the ‘Create a new app integration’ dialog and choose SAML 2.0:
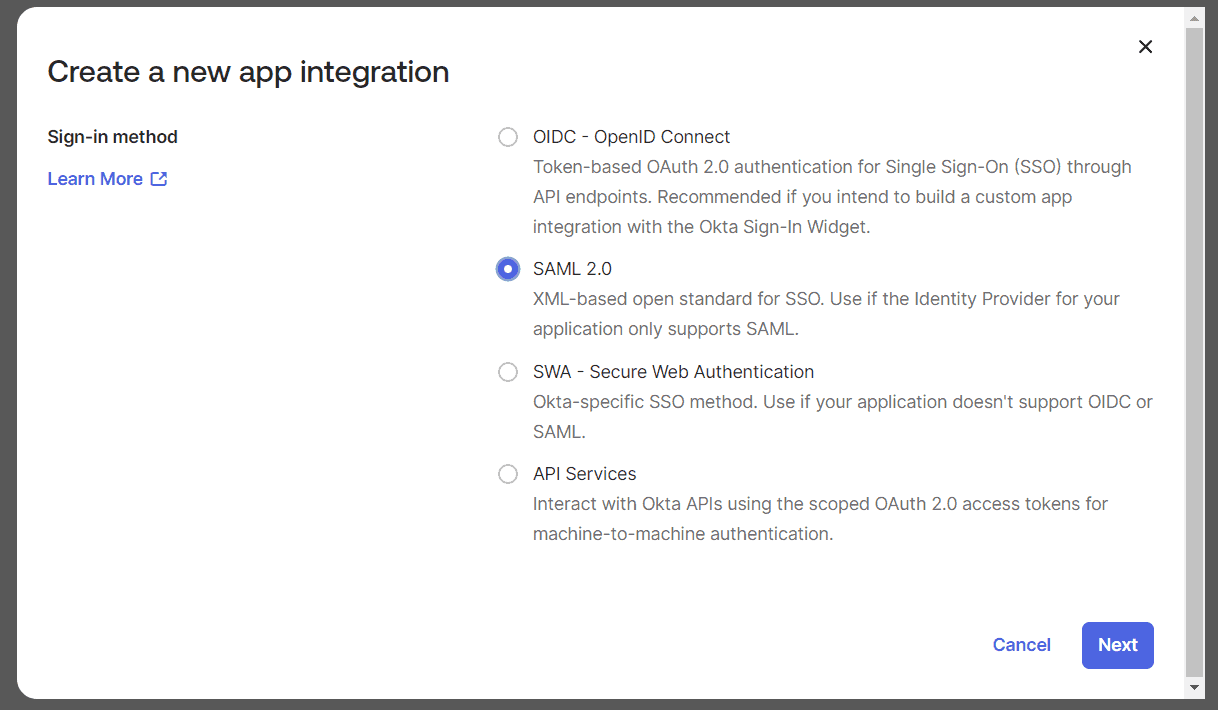
We’ll click on ‘Next’ to start the ‘Create SAML Integration’ wizard. This is a three-step wizard. Let’s complete each step to finish our setup.
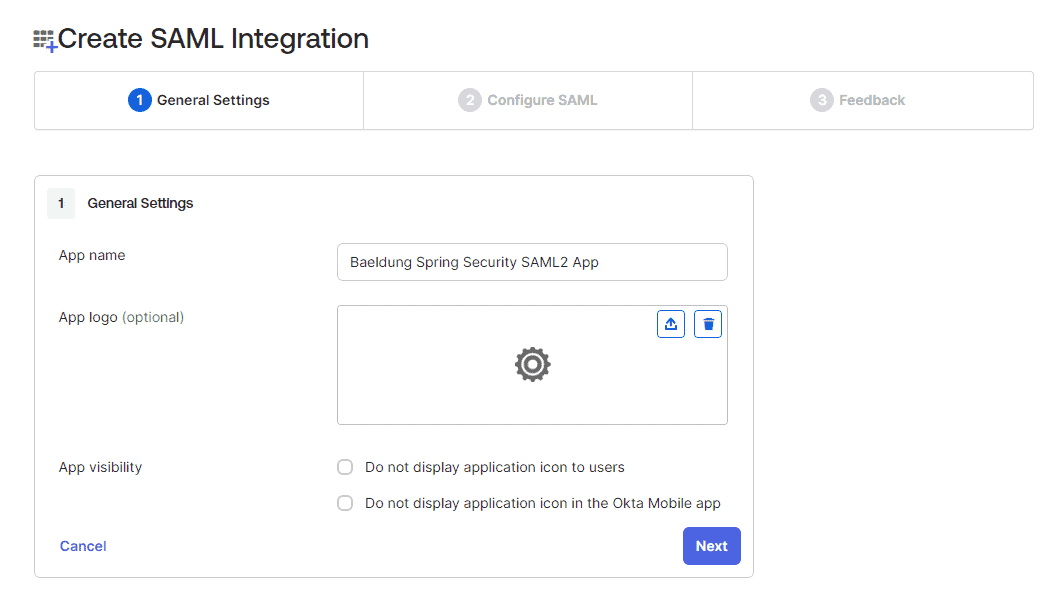
3.2. General Settings
We enter our app name in this step as ‘Baeldung Spring Security SAML2 App’:
3.3. Configure SAML
Let’s now configure the most important details for our SAML app. Here, we’ll register the Single Sign-on URL in the Identity Provider. As a result, the Identity Provider accepts the SSO request coming from this URL. The Audience URI is the identifier for the SAML assertion recipient. This is added to the SAML assertion that is generated and sent back to the user agent:
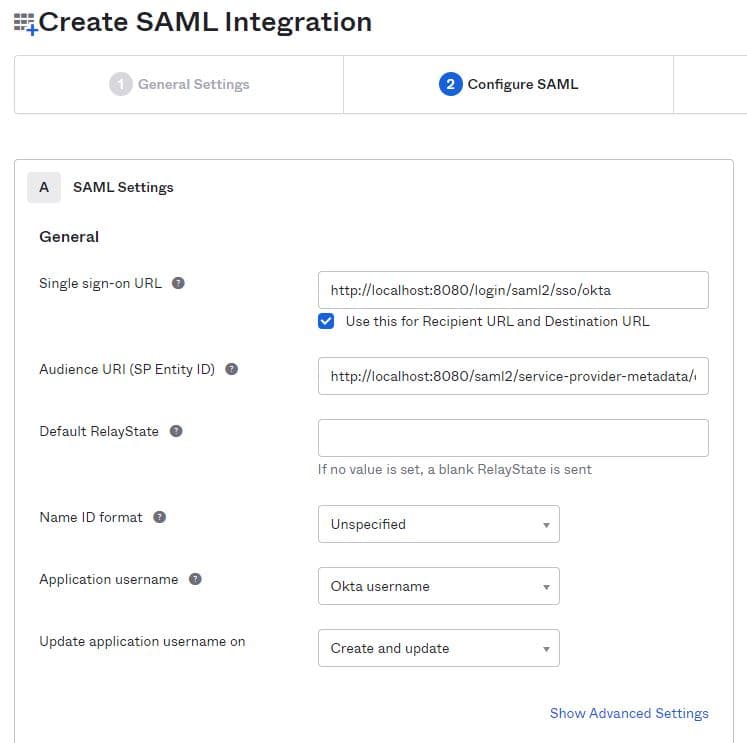
The Audience URI in our example is http://localhost:8080/saml2/service-provider-metadata/okta while the single sign-on URL is http://localhost:8080/login/saml2/sso/okta
3.4. Advanced Settings and User Attributes
Let’s now expand the ‘Show Advanced Settings’ section. In order to enable the singlelogout feature, we’ll need to upload the local.crt certificate here. This is the same certificate we have configured in our Service Provider application.yml. The Service Provider app signs any logout request using this certificate.
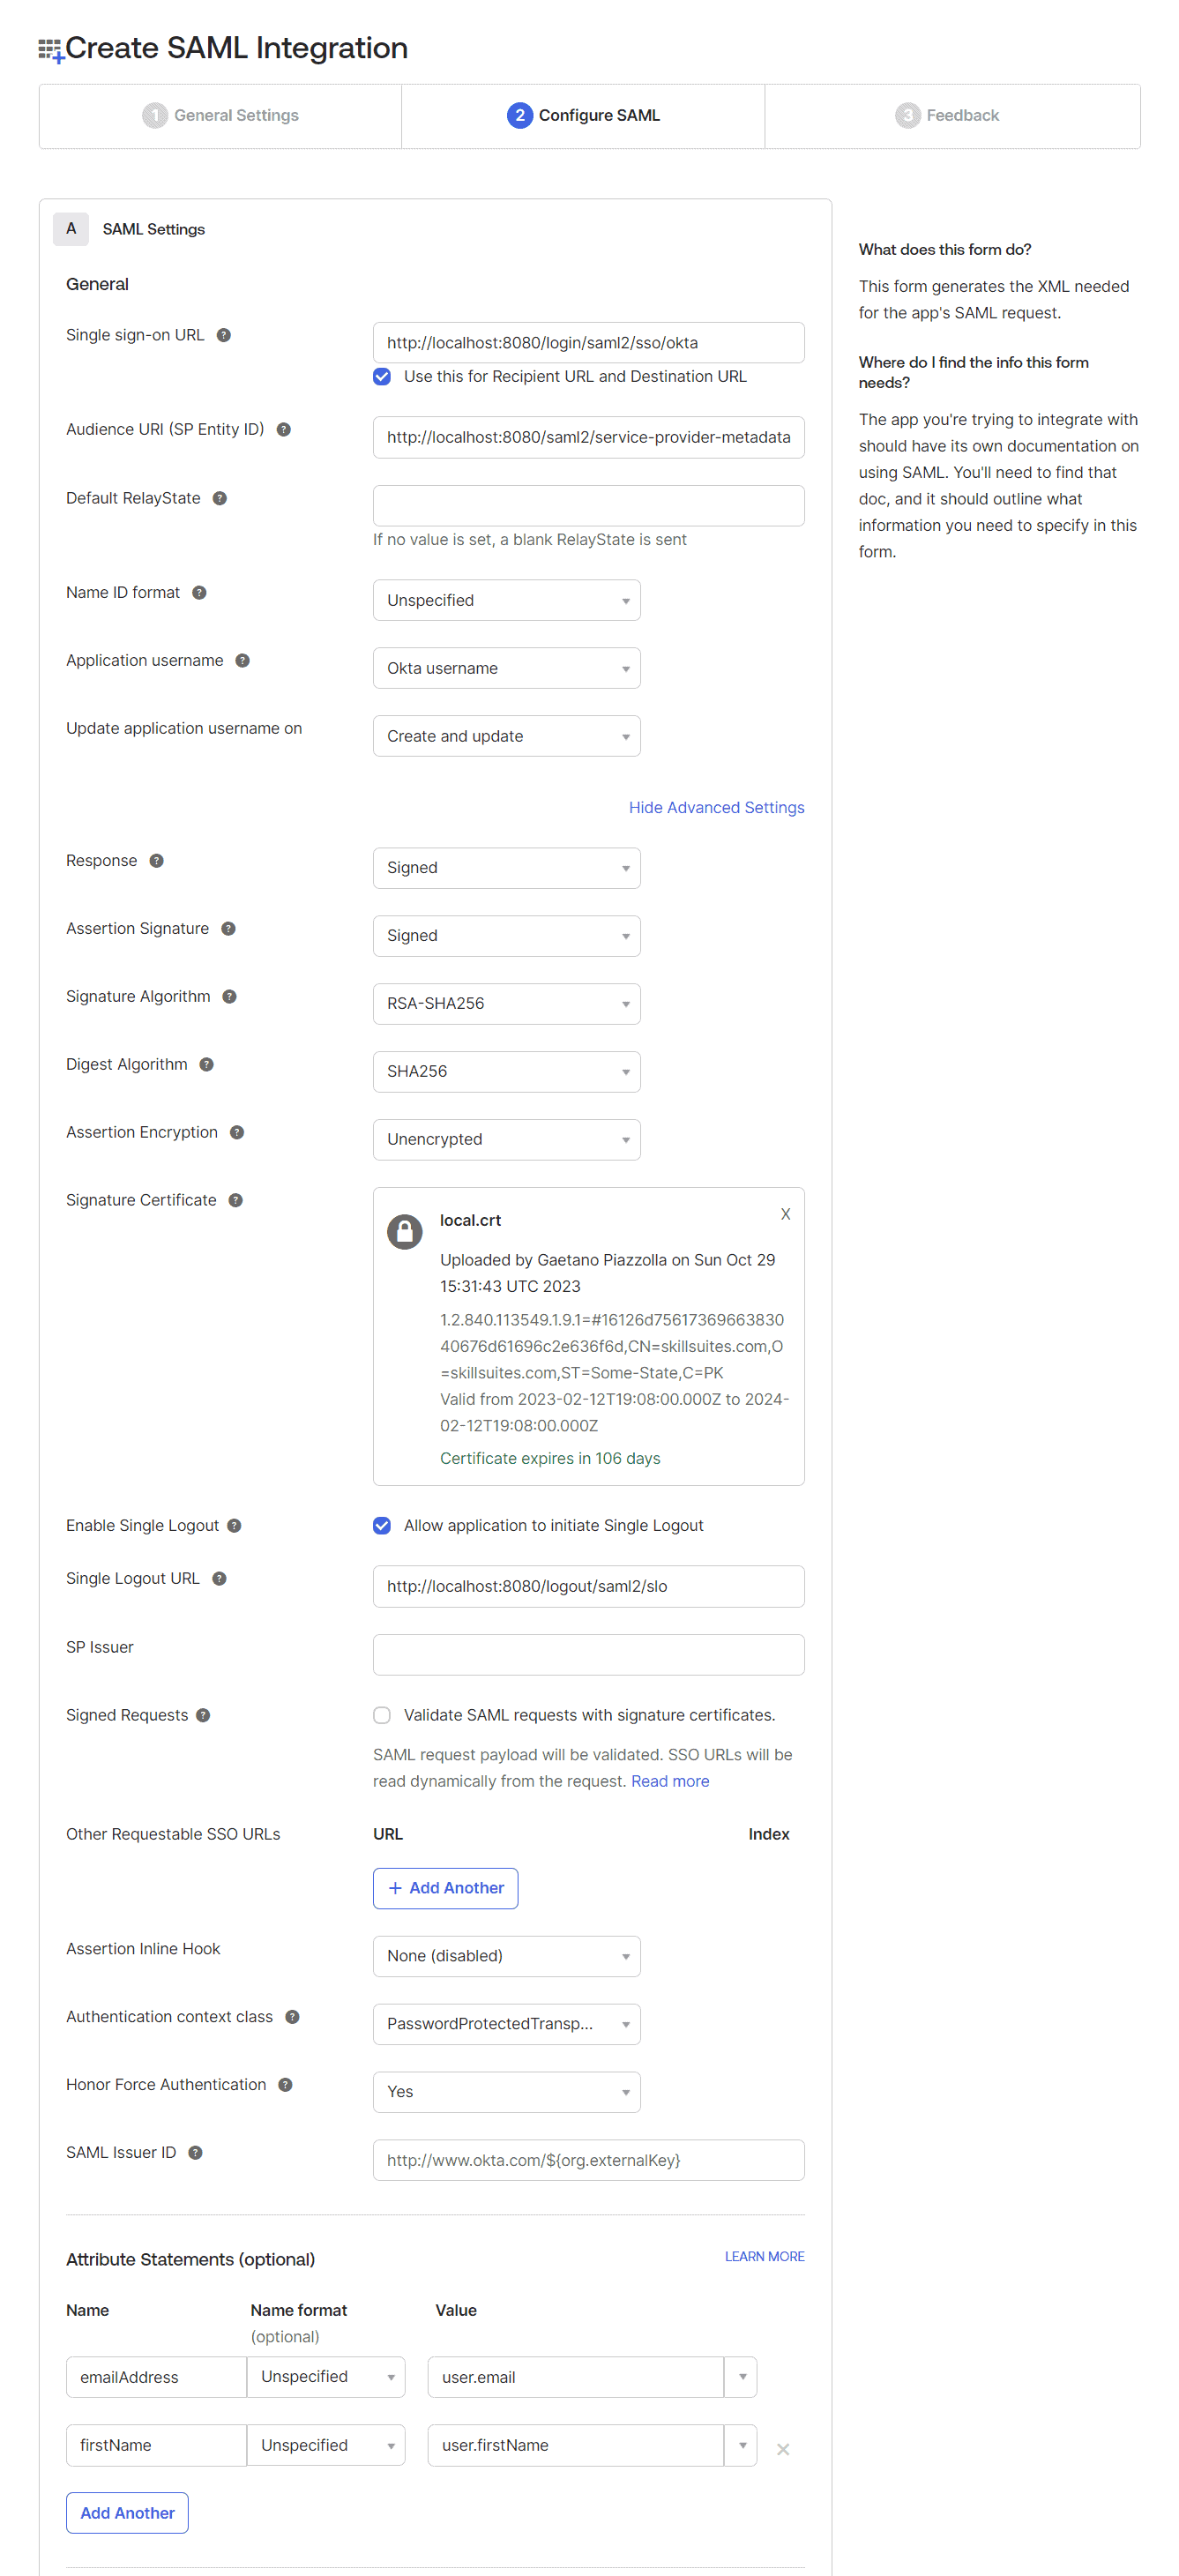
Additionally, let’s configure the ‘Single Logout URL’ as http://localhost:8080/logout/saml2/slo.
In the end, we also configure the Attribute Statements for emailAddress and firstName:
emailAddress -> Unspecified -> user.email
firstName -> Unspecified -> user.firstName
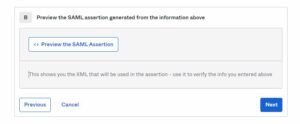
Let’s preview the SAML assertion using the ‘Preview the SAML Assertion’ link at the bottom of this step before moving to the ‘Next’ step.
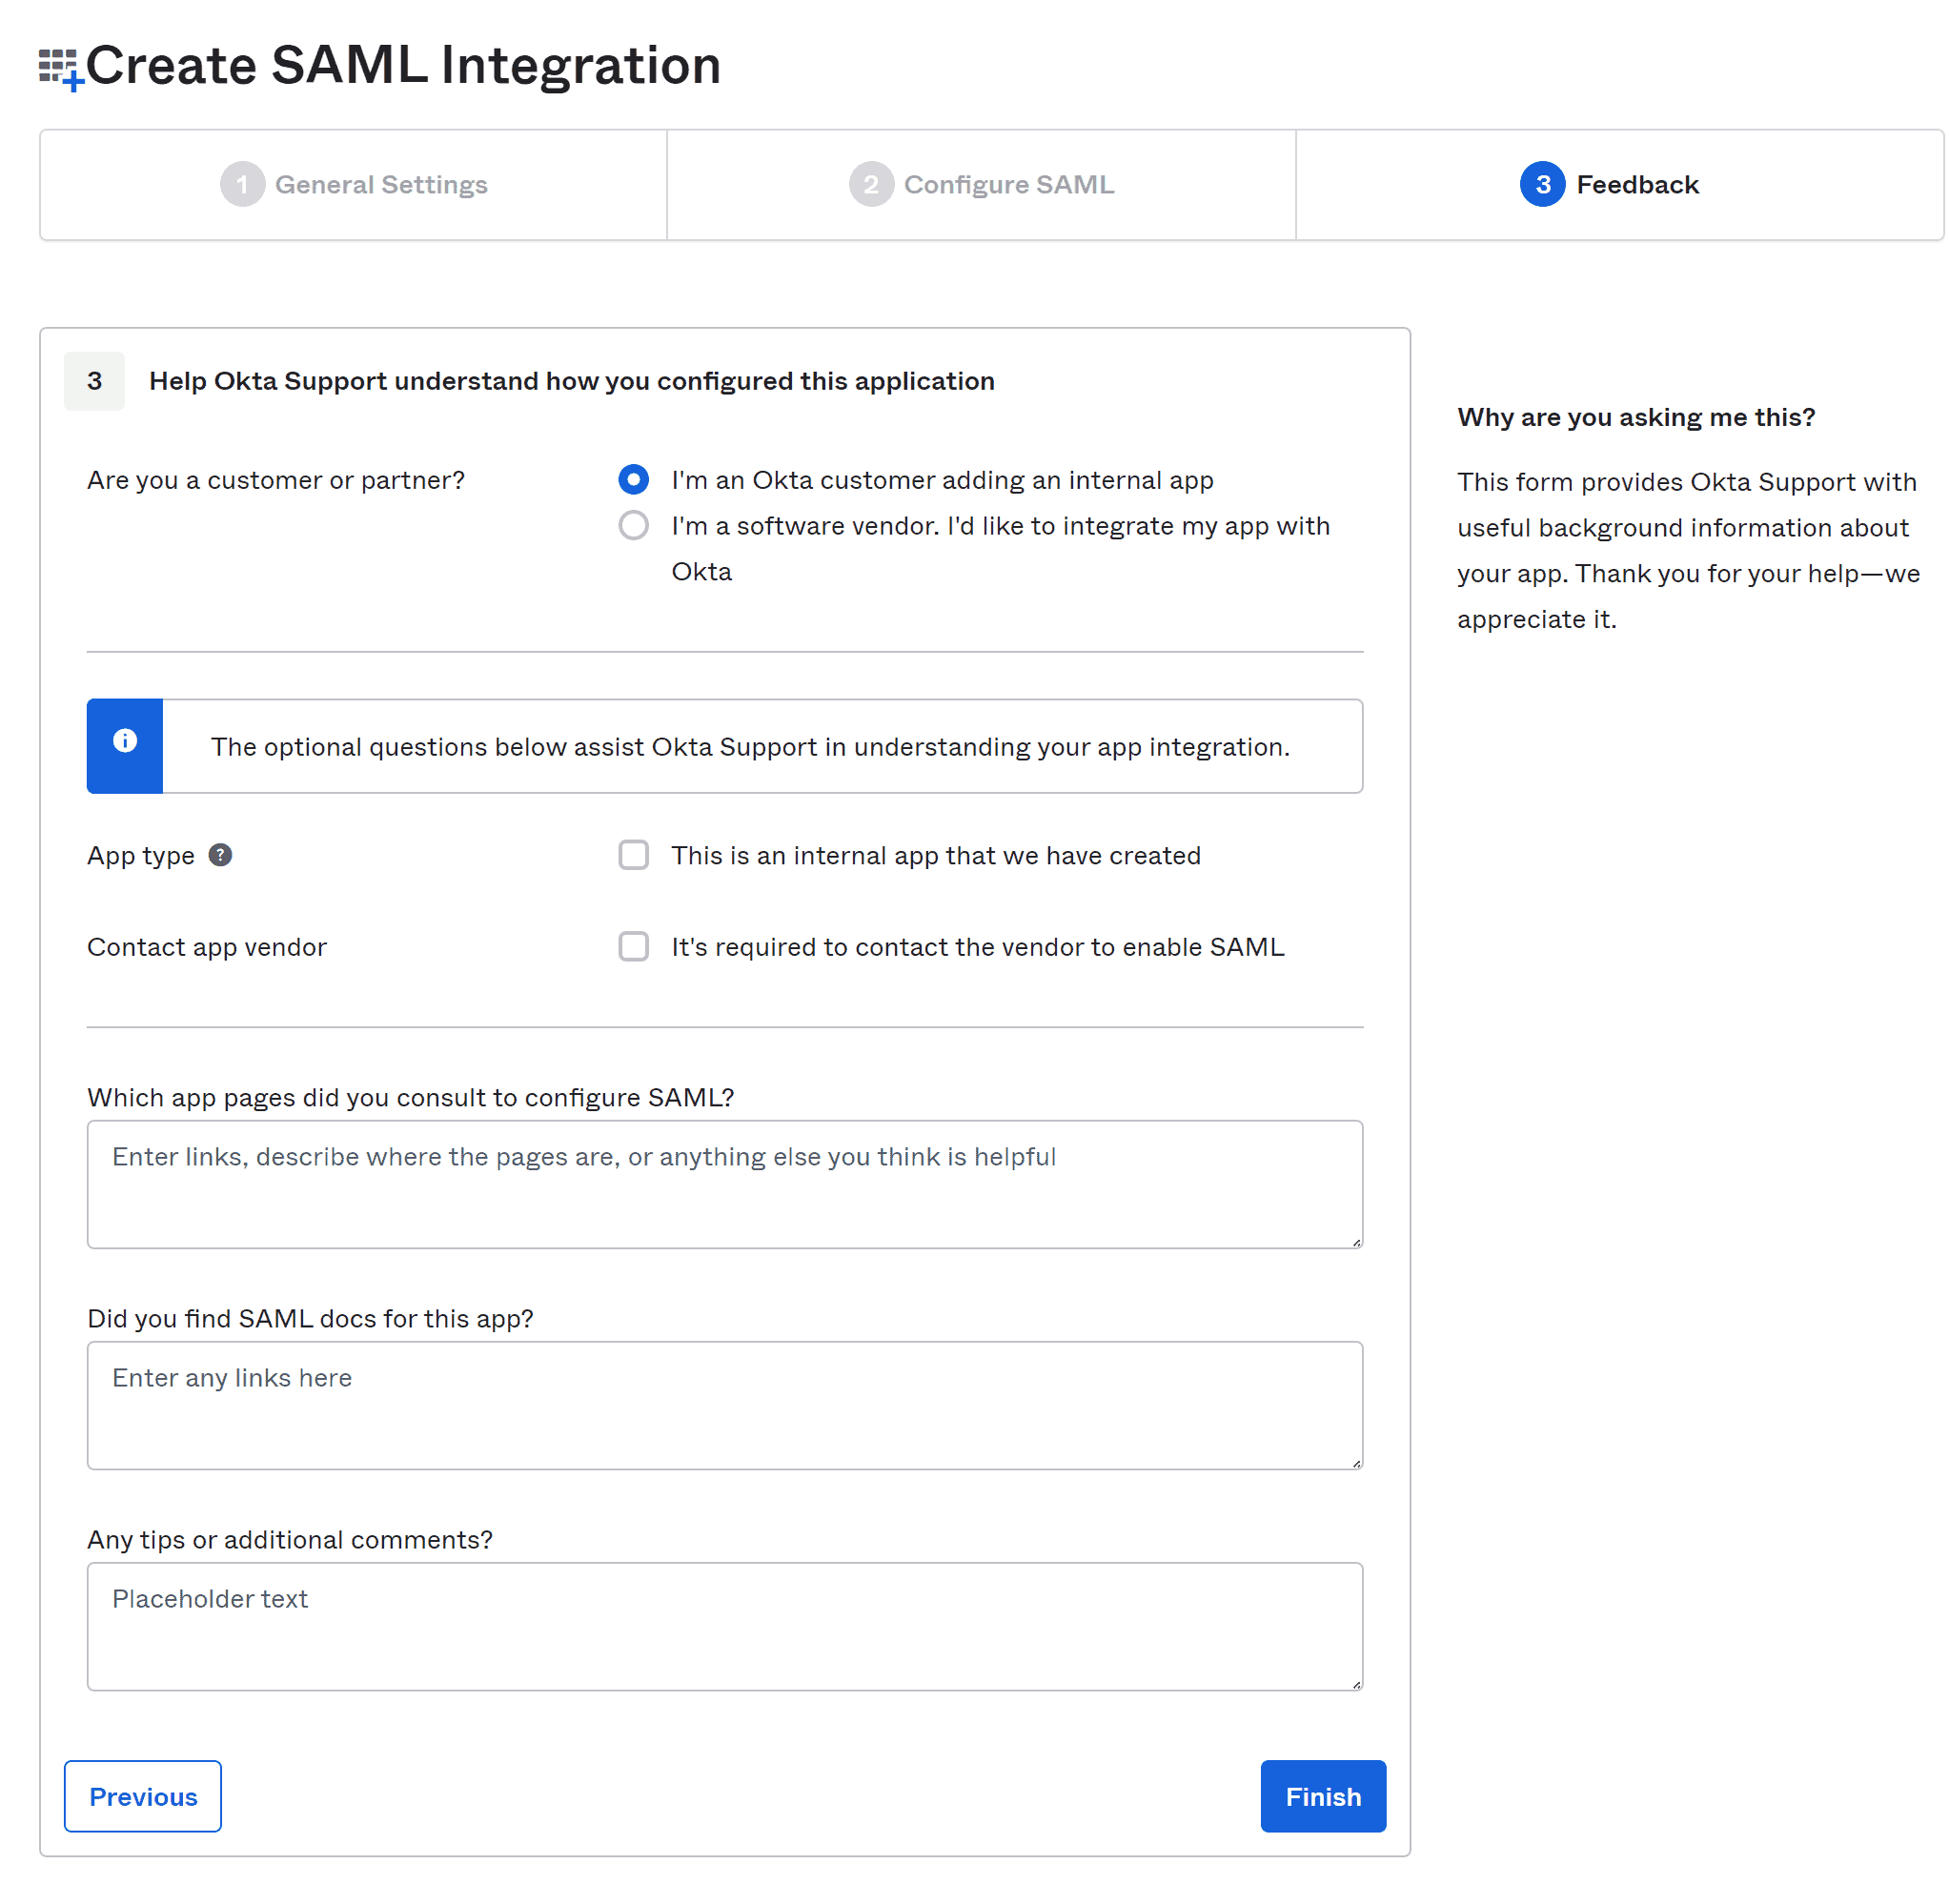
3.5. Final Feedback
On the feedback step, let’s choose the option, “I’m an Okta customer adding an internal app”.
3.6. SAML Setup Instructions
After completing the feedback step, we’ll end up on the ‘Sign On’ tab for our application. On this screen let’s follow the link “View SAML setup instructions” at the bottom of the right sidebar:
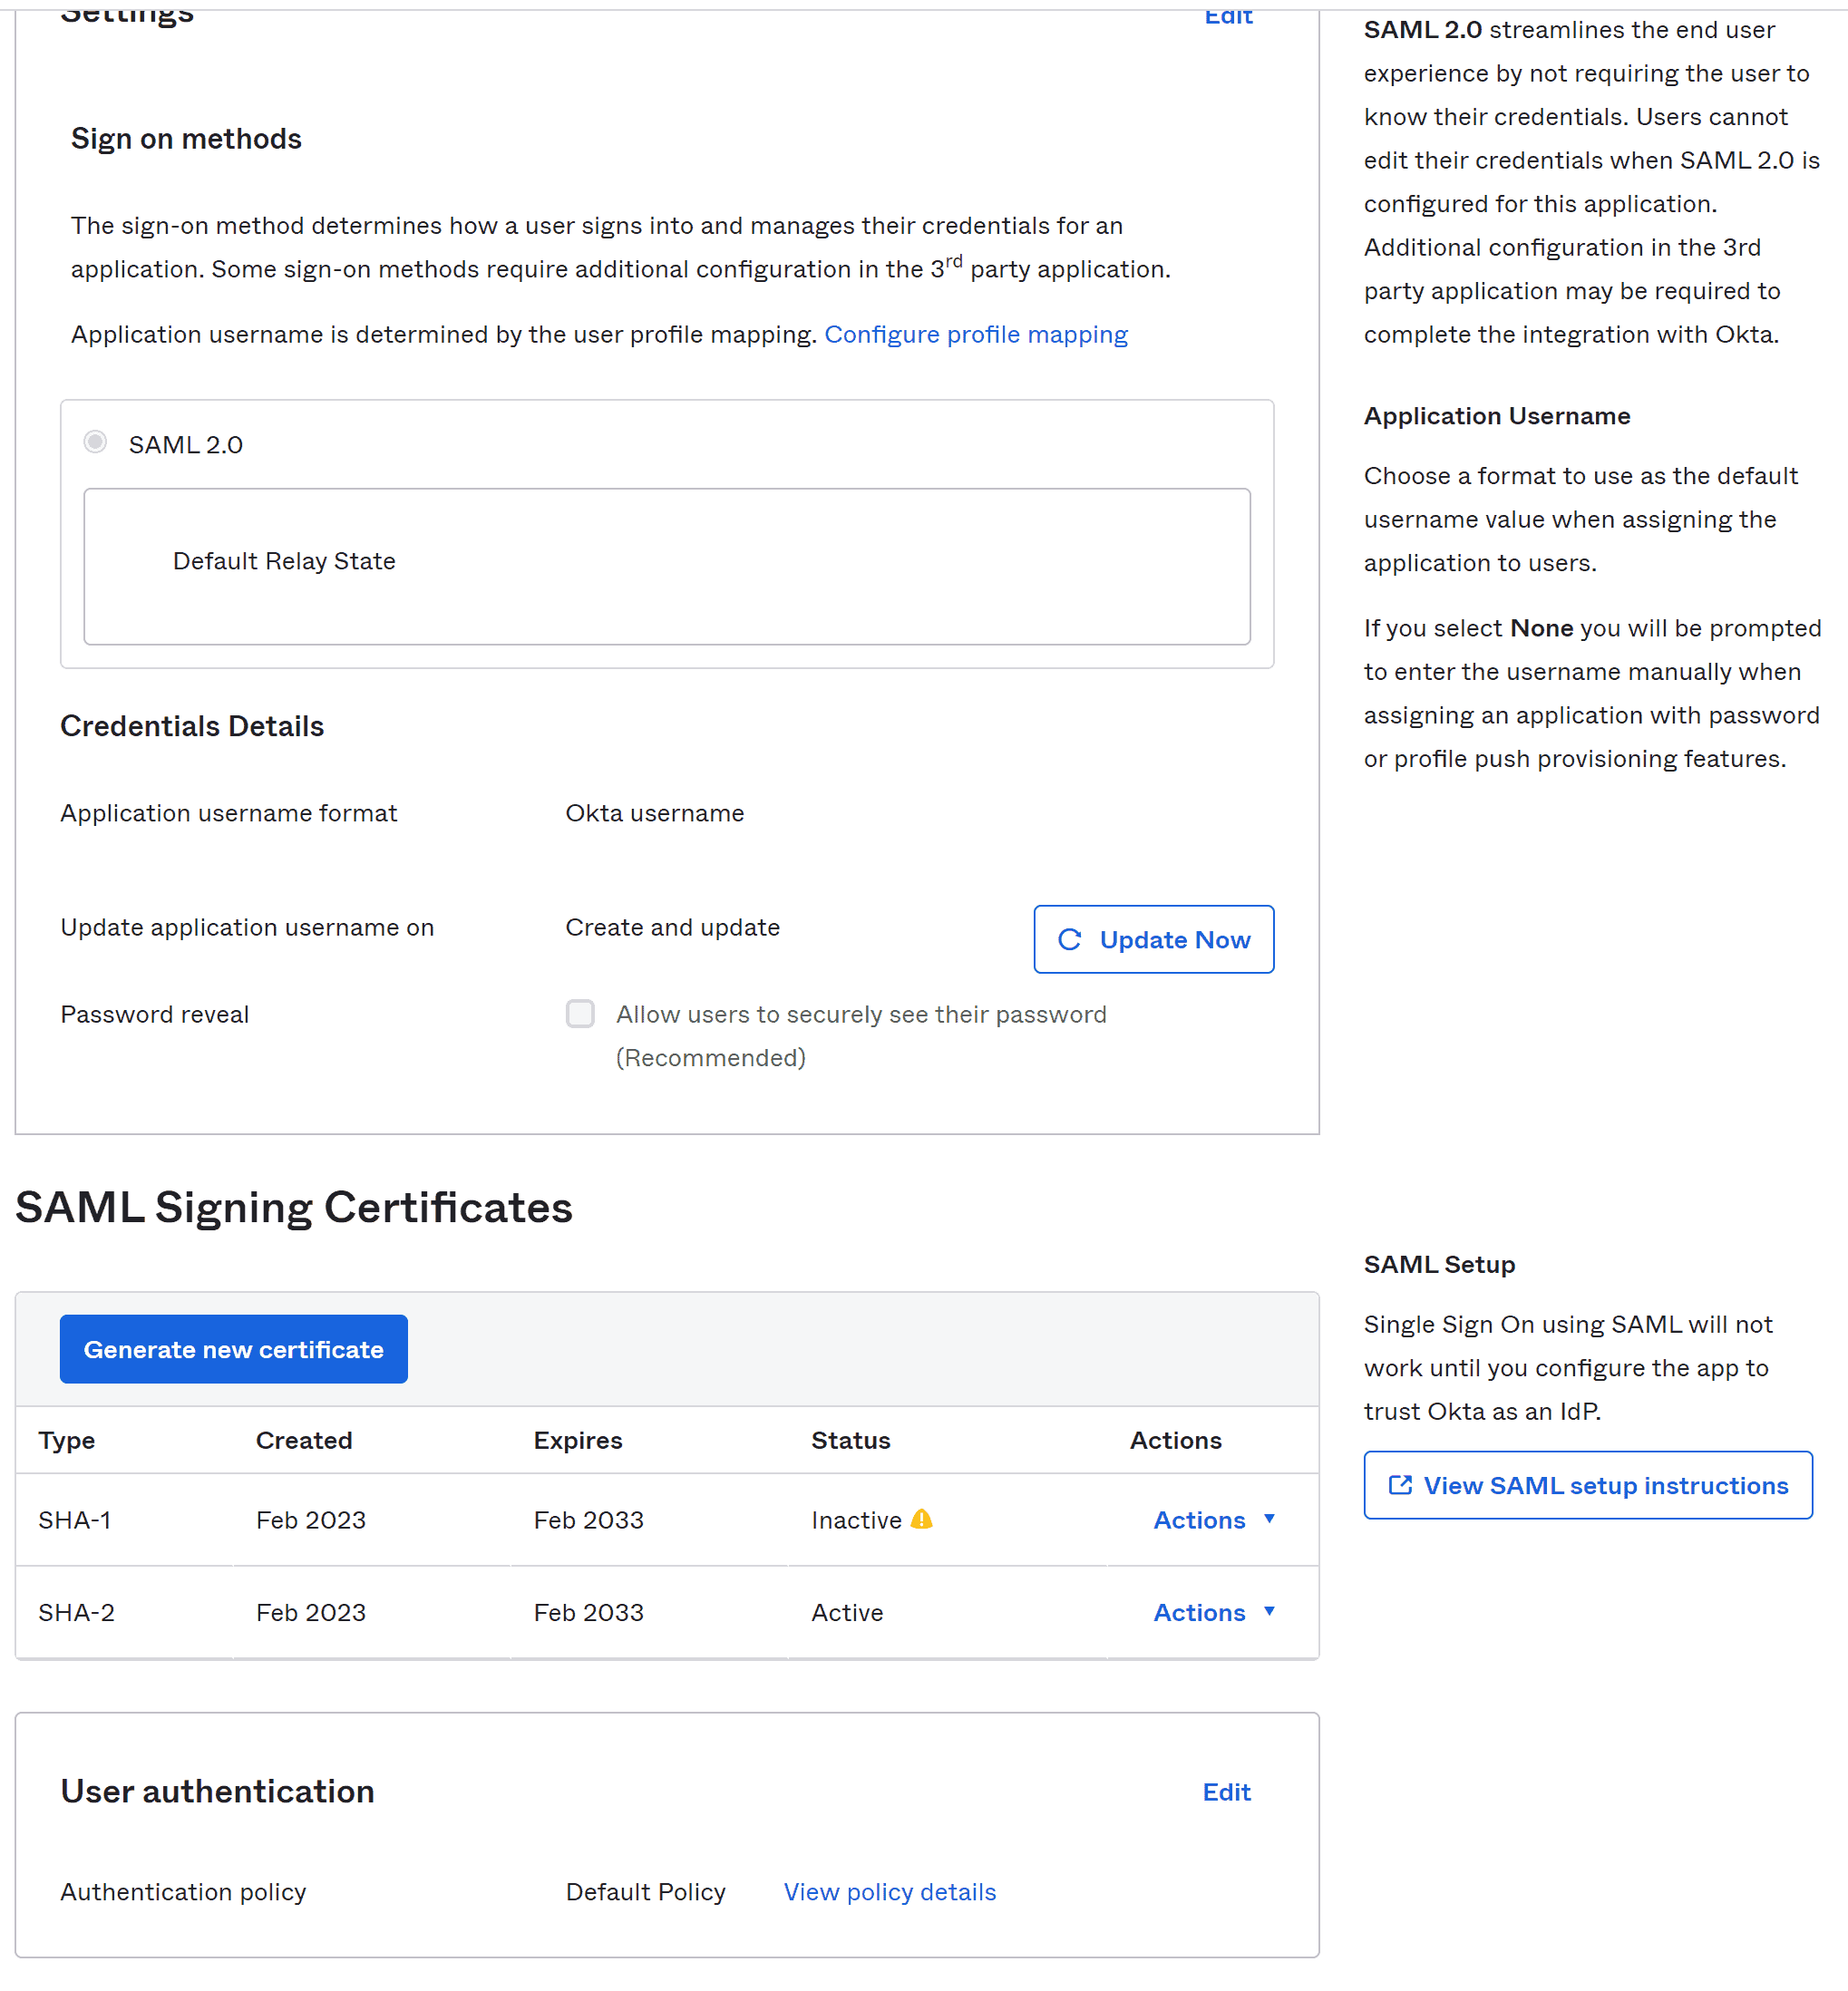
This takes us to a page with the necessary information about our Identity Provider. Let’s move to the last field that has IdP metadata present in it:

We copy this metadata and save it as metadata-idp-okta.xml in our Service Provider app resources/metadata folder, hence fulfilling the requirement of metadata_uri in our application.yml:
4. 創建用户主體
讓我們登錄到 Okta 開發者賬户,並在左側側邊欄的“目錄”部分下的“人員”頁面中導航。在這裏,我們將填寫“添加人員”表單以創建用户。有時,可能需要刷新“人員”頁面才能在列表中看到新用户:
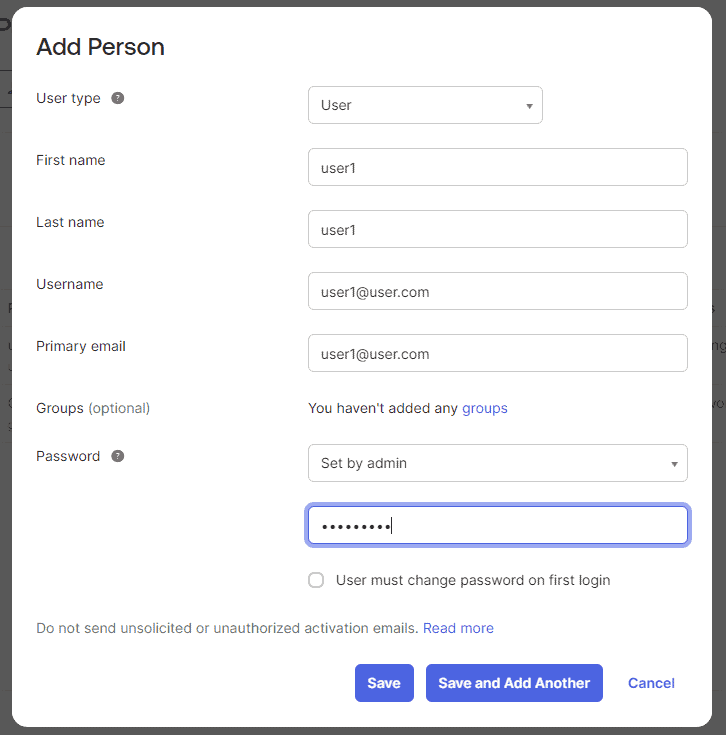
在這種情況下,我們正在自動激活用户。通常,您可能希望發送激活電子郵件或切換開關,以便用户在首次嘗試時更改分配的密碼。
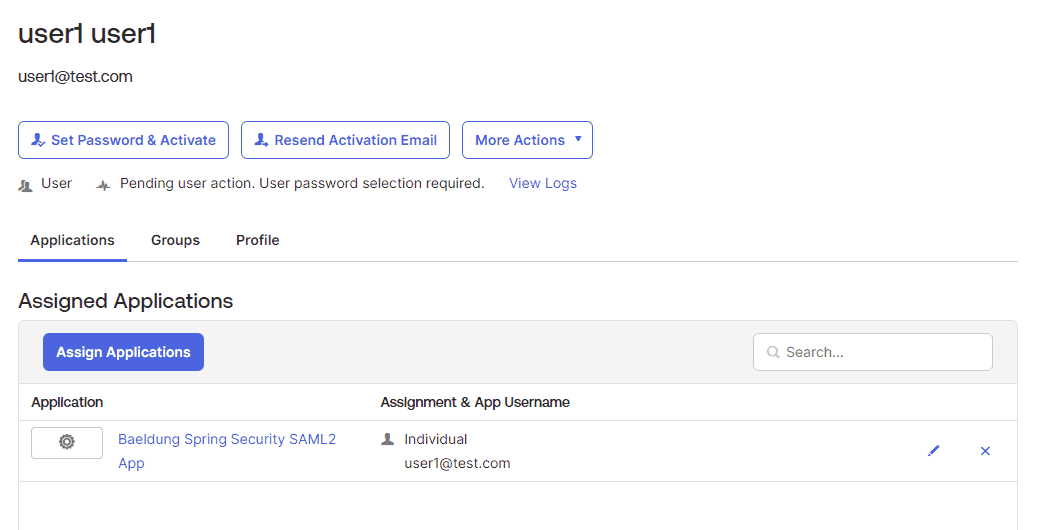
最後,我們點擊“分配”並按照幾步操作來將新用户分配到我們的 SAML 應用程序。
5. 測試應用程序
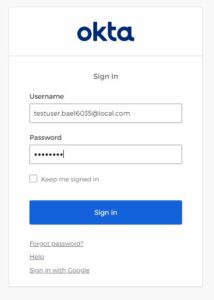
現在,我們已準備好測試我們的應用程序。啓動我們的 Spring Boot 應用程序,並打開應用程序的默認端點,即 http://localhost:8080。這將帶我們登錄屏幕:
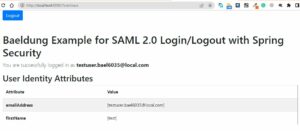
接下來,我們已登錄成功頁面。除了用户名,我們還可以看到該頁面上顯示的用户的屬性,例如 emailAddress 和 firstName:

以上就是設置 SAML 應用程序的整個過程。但在此之前,讓我們檢查一個最後的事情:‘註銷’按鈕。
首先,我們需要將 <OKTA-ID> 屬性設置為你的 Okta 標識符(你可以從 URL 中看到它):
spring:
  security:
    saml2:
      relyingparty:
        registration:
          okta:
            ...
            singlelogout:
              url: https://dev-<OKTA-ID>.okta.com/app/dev-56617222_springbootsaml_1/exk8b5jr6vYQqVXp45d7/slo/saml
              binding: POST
              response-url: "{baseUrl}/logout/saml2/slo"
然後,我們就可以從所有 SAML 會話中註銷,並使用登錄用户:
6. 結論
在本文中,我們學習了 Spring Boot Security SAML2 支持。雖然 SAML2 是一種複雜的技術,但對於大型企業來説,它是首選。一旦我們理解了 SAML2,就能充分利用它提供的強大功能。除了安全我們的應用程序之外,SAML2 還允許我們使用 SSO 並避免為數十個應用程序記住多個用户名和密碼。
