1. 簡介
OAuth 是一種開放標準,描述了一種授權過程。它可用於授權用户訪問 API。例如,REST API 可以限制僅對具有適當角色的註冊用户訪問。
OAuth 授權服務器負責驗證用户並頒發包含用户數據和適當訪問策略的訪問令牌。
在本教程中,我們將使用 Spring Security OAuth 授權服務器 項目來實現一個簡單的 OAuth 應用程序。
在此過程中,我們將創建一個客户端-服務器應用程序,該應用程序將從 REST API 中檢索 Baeldung 文章列表。客户端服務和服務器服務都需要 OAuth 身份驗證。
2. Authorization Server Implementation
我們將從配置 OAuth 授權服務器開始。它將作為文章資源和客户端服務器的身份驗證源。
2.1. Dependencies
首先,我們需要將一些依賴項添加到我們的 pom.xml 文件中:
<dependency>
    <groupId>org.springframework.boot</groupId>
    <artifactId>spring-boot-starter-web</artifactId>
    <version>3.2.2</version>
</dependency>
<dependency>
    <groupId>org.springframework.boot</groupId>
    <artifactId>spring-boot-starter-security</artifactId>
    <version>3.2.2</version>
</dependency>
<dependency>
    <groupId>org.springframework.boot</groupId>
    <artifactId>spring-boot-starter-oauth2-authorization-server</artifactId>
    <version>3.2.2</version>
</dependency>
2.2. Configuration
首先,我們將創建一個 application.yml 文件,以指定我們的身份驗證服務器將運行的端口,通過設置 server.port 屬性:
server:
  port: 9000
接下來,由於每個授權服務器都需要具有唯一的頒發者 URL,我們將設置我們的 URL 為本地主機別名 http://auth-server 在端口 9000 通過設置 spring.security.oauth2.authorizationserver.issuer 屬性:
spring:
  security:
    oauth2:
      authorizationserver:
        issuer: http://auth-server:9000
此外,我們將添加條目 “127.0.0.1 auth-server” 在我們的 /etc/hosts 文件中。這允許我們在本地機器上運行客户端和身份驗證服務器,並避免兩個服務器之間會話 Cookie 覆蓋的問題。
最後,我們將配置客户端服務倉庫。在我們的示例中,我們將有一個名為 articles-client 的單個客户端:
spring:
  security:
    oauth2:
      authorizationserver:
        client:
          articles-client:
            registration:
              client-id: articles-client
              client-secret: "{noop}secret"
              client-name: Articles Client
              client-authentication-methods:
                - client_secret_basic
              authorization-grant-types:
                - authorization_code
                - refresh_token
              redirect-uris:
                - http://127.0.0.1:8080/login/oauth2/code/articles-client-oidc
                - http://127.0.0.1:8080/authorized
              scopes:
                - openid
                - articles.read
我們正在配置的屬性是:
- 客户端 ID – Spring 將使用它來標識嘗試訪問資源的客户端
- 客户端秘密代碼 – 客户端和服務器都瞭解的秘密,為兩者之間提供信任
- 身份驗證方法 – 在我們的案例中,我們將使用基本身份驗證,即用户名和密碼
- 授權 grant 類型 – 我們想允許客户端生成授權碼和刷新令牌
- 重定向 URI – 客户端將用於重定向流中的重定向 URI
- 範圍 – 此參數定義客户端可能擁有的授權。 在我們的案例中,我們將擁有所需的 OidcScopes.OPENID 和我們的自定義範圍,articles. read
然後我們可以移動到 Spring Beans 配置。 首先,我們將啓用 Spring Web 安全模塊,並通過帶有 @Configuration 和 @EnableWebSecurity 註釋的類來完成:
@Configuration
@EnableWebSecurity
public class DefaultSecurityConfig {
    // ...
}
接下來,我們將配置 Spring Security 過濾器鏈以應用默認 OAuth 安全並生成默認表單登錄頁面:
@Bean
@Order(1)
SecurityFilterChain authorizationServerSecurityFilterChain(HttpSecurity http) throws Exception {
    OAuth2AuthorizationServerConfiguration.applyDefaultSecurity(http);
    http.getConfigurer(OAuth2AuthorizationServerConfigurer.class)
      .oidc(withDefaults()); // Enable OpenID Connect 1.0
    return http.formLogin(withDefaults()).build();
}
然後我們將配置第二個 Spring Security 過濾器鏈用於身份驗證:
@Bean
@Order(2)
SecurityFilterChain defaultSecurityFilterChain(HttpSecurity http) throws Exception {
    http.authorizeHttpRequests(authorizeRequests -> authorizeRequests.anyRequest()
          .authenticated())
      .formLogin(withDefaults());
    return http.build();
}
在這裏,我們調用 authorizeRequests.anyRequest().authenticated() 來為所有請求強制身份驗證。 我們還通過調用 formLogin(defaults()) 方法提供表單身份驗證。
最後,我們將定義一組我們將用於測試的示例用户:
@Bean
UserDetailsService users() {
    PasswordEncoder encoder = PasswordEncoderFactories.createDelegatingPasswordEncoder();
    UserDetails user = User.builder()
      .username("admin")
      .password("password")
      .passwordEncoder(encoder::encode)
      .roles("USER")
      .build();
    return new InMemoryUserDetailsManager(user);
}
3. 資源服務器
現在我們將創建一個資源服務器,它將從 GET 端點返回文章列表。這些端點應僅允許與我們的 OAuth 服務器進行身份驗證的請求。
3.1. 依賴項
首先,我們將包含所需的依賴項:
<dependency>
    <groupId>org.springframework.boot</groupId>
    <artifactId>spring-boot-starter-web</artifactId>
    <version>3.2.2</version>
</dependency>
<dependency>
    <groupId>org.springframework.boot</groupId>
    <artifactId>spring-boot-starter-security</artifactId>
    <version>3.2.2</version>
</dependency>
<dependency>
    <groupId>org.springframework.boot</groupId>
    <artifactId>spring-boot-starter-oauth2-resource-server</artifactId>
    <version>3.2.2</version>
</dependency>
3.2. 配置
在開始實現代碼之前,我們應該在 application.yml 文件中配置一些屬性。第一個是服務器端口:
server:
  port: 8090
接下來,是安全配置的時間。我們需要為我們的身份驗證服務器設置正確的 URL,包括主機和我們之前在 ProviderSettings 豆中配置的端口:
spring:
  security:
    oauth2:
      resourceserver:
        jwt:
          issuer-uri: http://auth-server:9000
現在我們可以設置我們的 Web 安全配置。 再次,我們希望明確説明所有請求到文章資源的請求都應被授權並且具有正確的 articles.read 權限:
@Configuration
@EnableWebSecurity
public class ResourceServerConfig {

    @Bean
    SecurityFilterChain securityFilterChain(HttpSecurity http) throws Exception {
        http.securityMatcher("/articles/**")
          .authorizeHttpRequests(authorize -> authorize.anyRequest()
            .hasAuthority("SCOPE_articles.read"))
          .oauth2ResourceServer(oauth2 -> oauth2.jwt(Customizer.withDefaults()));
        return http.build();
    }
}
正如這裏所示,我們還調用了 oauth2ResourceServer() 方法,該方法將根據 application.yml 配置配置 OAuth 服務器連接。
3.3. 文章控制器
最後,我們將創建一個 REST 控制器,它將在 GET /articles 端點下返回文章列表:
@RestController
public class ArticlesController {

    @GetMapping("/articles")
    public String[] getArticles() {
        return new String[] { "Article 1", "Article 2", "Article 3" };
    }
}
4. API Client
對於最後一部分,我們將創建一個 REST API 客户端,該客户端將從資源服務器獲取文章列表。
4.1. 依賴項
首先,我們將包含必要的依賴項:
<dependency>
    <groupId>org.springframework.boot</groupId>
    <artifactId>spring-boot-starter-web</artifactId>
    <version>3.2.2</version>
</dependency>
<dependency>
    <groupId>org.springframework.boot</groupId>
    <artifactId>spring-boot-starter-security</artifactId>
    <version>3.2.2</version>
</dependency>
<dependency>
    <groupId>org.springframework.boot</groupId>
    <artifactId>spring-boot-starter-oauth2-client</artifactId>
    <version>3.2.2</version>
</dependency>
<dependency>
    <groupId>org.springframework</groupId>
    <artifactId>spring-webflux</artifactId>
    <version>6.1.3</version>
</dependency>
<dependency>
    <groupId>io.projectreactor.netty</groupId>
    <artifactId>reactor-netty</artifactId>
    <version>1.1.15</version>
</dependency>
4.2. 配置
正如之前一樣,我們將定義一些身份驗證目的的配置屬性:
server:
  port: 8080

spring:
  security:
    oauth2:
      client:
        registration:
          articles-client-oidc:
            provider: spring
            client-id: articles-client
            client-secret: secret
            authorization-grant-type: authorization_code
            redirect-uri: "http://127.0.0.1:8080/login/oauth2/code/{registrationId}"
            scope: openid
            client-name: articles-client-oidc
          articles-client-authorization-code:
            provider: spring
            client-id: articles-client
            client-secret: secret
            authorization-grant-type: authorization_code
            redirect-uri: "http://127.0.0.1:8080/authorized"
            scope: articles.read
            client-name: articles-client-authorization-code
        provider:
          spring:
            issuer-uri: http://auth-server:9000
現在我們將創建一個 WebClient 實例,用於向我們的資源服務器執行 HTTP 請求。 我們將使用標準實現,只添加了 OAuth 授權過濾器:
@Bean
WebClient webClient(OAuth2AuthorizedClientManager authorizedClientManager) {
    ServletOAuth2AuthorizedClientExchangeFilterFunction oauth2Client =
      new ServletOAuth2AuthorizedClientExchangeFilterFunction(authorizedClientManager);
    return WebClient.builder()
      .apply(oauth2Client.oauth2Configuration())
      .build();
}
WebClient 需要一個 OAuth2AuthorizedClientManager 作為依賴項。 讓我們創建一個默認實現:
@Bean
OAuth2AuthorizedClientManager authorizedClientManager(
        ClientRegistrationRepository clientRegistrationRepository,
        OAuth2AuthorizedClientRepository authorizedClientRepository) {

    OAuth2AuthorizedClientProvider authorizedClientProvider =
      OAuth2AuthorizedClientProviderBuilder.builder()
        .authorizationCode()
        .refreshToken()
        .build();
    DefaultOAuth2AuthorizedClientManager authorizedClientManager = new DefaultOAuth2AuthorizedClientManager(
      clientRegistrationRepository, authorizedClientRepository);
    authorizedClientManager.setAuthorizedClientProvider(authorizedClientProvider);

    return authorizedClientManager;
}
最後,我們將配置 Web 安全性:
@Configuration
@EnableWebSecurity
public class SecurityConfig {

    @Bean
    SecurityFilterChain securityFilterChain(HttpSecurity http) throws Exception {
        http
          .authorizeHttpRequests(authorizeRequests ->
            authorizeRequests.anyRequest().authenticated()
          )
          .oauth2Login(oauth2Login ->
            oauth2Login.loginPage("/oauth2/authorization/articles-client-oidc"))
          .oauth2Client(withDefaults());
        return http.build();
    }
}
在這裏,以及在其他服務器上,我們都需要對每個請求進行身份驗證。 此外,我們需要配置登錄頁面 URL(定義在 .yml 配置中)和 OAuth 客户端。
此授權令牌將傳遞到 HTTP 請求。
4.3. 文章客户端控制器
最後,我們可以創建數據訪問控制器。 我們將使用之前配置的 WebClient 發送 HTTP 請求到我們的資源服務器:
@RestController
public class ArticlesController {

    private WebClient webClient;

    @GetMapping(value = "/articles")
    public String[] getArticles(
      @RegisteredOAuth2AuthorizedClient("articles-client-authorization-code") OAuth2AuthorizedClient authorizedClient
    ) {
        return this.webClient
          .get()
          .uri("http://127.0.0.1:8090/articles")
          .attributes(oauth2AuthorizedClient(authorizedClient))
          .retrieve()
          .bodyToMono(String[].class)
          .block();
    }
}
在上面的示例中,我們從請求中獲取 OAuth 授權令牌,以 OAuth2AuthorizedClient 類的形式。 它通過 Spring 的 @RegisteredOAuth2AuthorizedClient 註解自動綁定,並使用“articles-client-authorization-code”進行識別。 我們的令牌是從 article-client-authorizaiton-code 中提取的,該令牌之前在 .yml 文件中配置的。
此授權令牌將傳遞到 HTTP 請求。
4.4. 訪問文章列表
現在,當我們嘗試在瀏覽器中訪問 http://127.0.0.1:8080/articles 頁面時,我們將自動重定向到 OAuth 服務器登錄頁面,網址為 http://auth-server:9000/login:
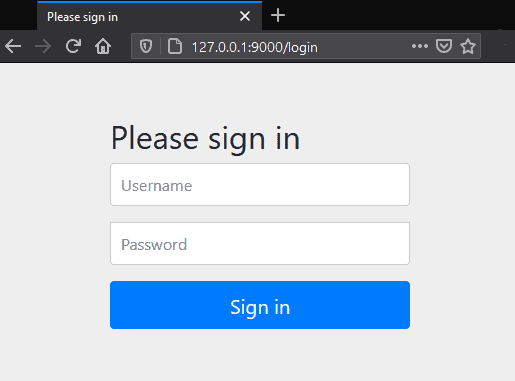
提供正確的用户名和密碼後,授權服務器會將我們重定向回請求的 URL,即文章列表。
對文章端點的進一步請求將不需要登錄,因為訪問令牌將存儲在 Cookie 中。
5. 結論
在本文中,我們學習瞭如何設置、配置和使用 Spring Security OAuth 授權服務器。
