1. 引言
Thymeleaf 是一款能夠直接與 Spring 協作的 Java 模板引擎。 想要了解 Thymeleaf 和 Spring 的基本知識,請參考這篇介紹。
除了這些基本功能之外,Thymeleaf 還提供了一組實用對象,可以幫助我們在應用程序中執行常見的任務。
在本教程中,我們將討論新舊 Java Date 類及其格式處理,以及 Thymeleaf 3.0 的一些特性。
2. Maven 依賴
首先,讓我們在我們的 pom.xml 中創建配置,以將 Thymeleaf 與 Spring 集成:
<dependency>
    <groupId>org.thymeleaf</groupId>
    <artifactId>thymeleaf</artifactId>
    <version>3.1.2.RELEASE</version>
</dependency>
<dependency>
    <groupId>org.thymeleaf</groupId>
    <artifactId>thymeleaf-spring5</artifactId>
    <version>3.1.2.RELEASE</version>
</dependency>
最新版本的 thymeleaf 和 thymeleaf-spring5 可在 Maven Central 上找到。請注意,對於 Spring 4 項目,應使用 thymeleaf-spring4 庫,而不是 thymeleaf-spring5。
此外,為了使用新的 Java 8 Date 類,我們需要在我們的 pom.xml 中添加另一個依賴項:
<dependency>
    <groupId>org.thymeleaf.extras</groupId>
    <artifactId>thymeleaf-extras-java8time</artifactId>
    <version>3.0.4.RELEASE</version>
</dependency>
Thymeleaf Extras for Spring 項目是可選模塊,由官方 Thymeleaf 團隊完全支持,旨在與 Java 8 Time API 保持兼容性。它會在表達式評估期間,將 #temporals 對象添加到 Context 中作為實用對象處理器。這意味着它可用於評估 Object-Graph Navigation Language (OGNL) 和 Spring Expression Language (SpringEL) 中的表達式。
3. 舊與新:java.util 和 java.time
Time 包是一個為 Java SE 平台的新日期、時間、日曆 API。與這個新 API 的主要區別在於,它區分了機器和人類對時間線的看法。機器視圖顯示了相對於 紀元 的整數序列,而人類視圖則顯示了一組字段(例如,年、月和日)。
要使用新的 Time 包,我們需要配置我們的模板引擎使用新的 Java8TimeDialect:
private ISpringTemplateEngine templateEngine(ITemplateResolver templateResolver) {
    SpringTemplateEngine engine = new SpringTemplateEngine();
    engine.addDialect(new Java8TimeDialect());
    engine.setTemplateResolver(templateResolver);
    return engine;
}
這將添加 #temporals 對象,類似於標準方言中的對象,允許從 Thymeleaf 模板中格式化和創建 Temporal 對象。
為了測試對新舊類處理,我們將創建以下變量並將它們作為模型對象添加到我們的控制器類中:
model.addAttribute("standardDate", new Date());
model.addAttribute("localDateTime", LocalDateTime.now());
model.addAttribute("localDate", LocalDate.now());
model.addAttribute("timestamp", Instant.now());
現在,我們準備好使用Thymeleaf的 Expression 和 Temporals 工具對象。
3.1. 格式化日期
我們要涵蓋的首個函數是格式化 Date 對象(該對象已添加到 Spring 模型參數中)。我們將使用 ISO8601 格式:
<h1>Format ISO</h1>
<p th:text="${#dates.formatISO(standardDate)}"></p>
<p th:text="${#temporals.formatISO(localDateTime)}"></p>
<p th:text="${#temporals.formatISO(localDate)}"></p>
<p th:text="${#temporals.formatISO(timestamp)}"></p>
無論我們在後端設置的 Date 如何,它都會根據所選的標準在 Thymeleaf 中顯示。 standardDate 將由 #dates 實用程序處理。 新的 LocalDateTime、LocalDate 和 Instant 類將由 #temporals 實用程序處理。
此外,如果我們想要手動設置格式,我們可以通過以下方式進行:
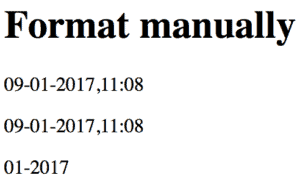
<h1>Format manually</h1>
<p th:text="${#dates.format(standardDate, 'dd-MM-yyyy HH:mm')}"></p>
<p th:text="${#temporals.format(localDateTime, 'dd-MM-yyyy HH:mm')}"></p>
<p th:text="${#temporals.format(localDate, 'MM-yyyy')}"></p>
如我們所見,我們無法使用 Instant 類與 #temporals.format(…) 一起使用,這會導致 UnsupportedTemporalTypeException。 此外,如果格式化 LocalDate,則只能指定特定的日期字段,並跳過時間字段。
下面是最終結果:
3.2. 獲取特定日期字段
為了獲取 java.util.Date 類中的特定字段,我們應該使用以下實用對象:
${#dates.day(date)}
${#dates.month(date)}
${#dates.monthName(date)}
${#dates.monthNameShort(date)}
${#dates.year(date)}
${#dates.dayOfWeek(date)}
${#dates.dayOfWeekName(date)}
${#dates.dayOfWeekNameShort(date)}
${#dates.hour(date)}
${#dates.minute(date)}
${#dates.second(date)}
${#dates.millisecond(date)}
對於新的 java.time 包,我們應該堅持使用 #temporals 工具集:
${#temporals.day(date)}
${#temporals.month(date)}
${#temporals.monthName(date)}
${#temporals.monthNameShort(date)}
${#temporals.year(date)}
${#temporals.dayOfWeek(date)}
${#temporals.dayOfWeekName(date)}
${#temporals.dayOfWeekNameShort(date)}
${#temporals.hour(date)}
${#temporals.minute(date)}
${#temporals.second(date)}
${#temporals.millisecond(date)}
讓我們來看幾個例子。首先,讓我們顯示今天的星期幾:
<h1>Show only which day of a week</h1>
<p th:text="${#dates.day(standardDate)}"></p>
<p th:text="${#temporals.day(localDateTime)}"></p>
<p th:text="${#temporals.day(localDate)}"></p>
接下來,我們展示周幾的名字:
<h1>Show the name of the week day</h1>
<p th:text="${#dates.dayOfWeekName(standardDate)}"></p>
<p th:text="${#temporals.dayOfWeekName(localDateTime)}"></p>
<p th:text="${#temporals.dayOfWeekName(localDate)}"></p>
最後,讓我們顯示當天此刻的時間:
<h1>Show the second of the day</h1>
<p th:text="${#dates.second(standardDate)}"></p>
<p th:text="${#temporals.second(localDateTime)}"></p>
請注意,為了處理時間部分,我們需要使用 LocalDateTime,因為 LocalDate 會拋出錯誤。
4. 如何在表單中使用日期選擇器
讓我們來看一下如何使用日期選擇器從 Thymeleaf 表單中提交 日期 值。
首先,讓我們創建一個 學生 類,其中包含 日期 屬性:
public class Student implements Serializable {
    @DateTimeFormat(pattern = "yyyy-MM-dd")
    private Date birthDate;
}
@DateTimeFormat 註解聲明 birthDate 字段應格式化為 Date。
接下來,我們將創建一個 Thymeleaf 表單以提交 Date 輸入:
<form th:action="@{/saveStudent}" method="post" th:object="${student}">
    <div>
        <label for="student-birth-date">Date of birth:</label>
        <input type="date" th:field="${student.birthDate}" id="student-birth-date"/>
    </div>
    <div>
        <button type="submit" class="button">Submit</button>
    </div>
</form>
提交表單時,一個控制器將攔截表單中通過 th:object 屬性映射的 Student 對象。同時,th:field 屬性會將輸入值綁定到 birthDate 字段。
現在,讓我們創建一個控制器來攔截 POST 請求:
@RequestMapping(value = "/saveStudent", method = RequestMethod.POST)
public String saveStudent(Model model, @ModelAttribute("student") Student student) {
    model.addAttribute("student", student);
    return "datePicker/displayDate.html";
}
提交表單後,我們將會在另一頁上以 dd/MM/yyyy 格式顯示 birthDate 值:
<h1>Student birth date</h1>
<p th:text="${#dates.format(student.birthDate, 'dd/MM/yyyy')}"></p>
結果顯示了我們帶有日曆選擇器的表單。
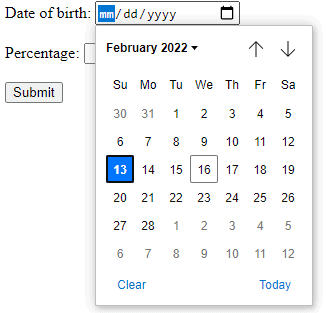
提交表單後,我們將看到所選日期。

5. 結論在本快速教程中,我們討論了在 Thymeleaf 框架 3.0 中實現的 Java Date 處理功能。
如何測試?
我們的建議是在瀏覽器中先嚐試代碼,然後檢查我們現有的 JUnit 測試。
請注意,我們的示例並不涵蓋 Thymeleaf 中所有可用的選項。如果您想了解所有類型的實用程序,請查看我們關於 Spring 和 Thymeleaf 表達式的文章。
