1. 引言
集成測試對於驗證應用程序是否正常工作至關重要。此外,我們應該正確測試身份驗證,因為它是一個敏感部分</。Testcontainers 允許我們在測試階段啓動 Docker 容器,以便我們能夠使用真實的的技術棧運行測試。
在本文中,我們將學習如何使用 Testcontainers 針對真實的 Keycloak 實例設置集成測試</。
2. 使用 Keycloak 設置 Spring Security
我們需要設置 Spring Security、Keycloak 配置,以及最終的 Testcontainers。
2.1. 設置 Spring Boot 和 Spring Security
讓我們首先通過 Spring Security 設置安全,Spring Security 提供了強大的功能。我們需要添加 spring-boot-starter-security 依賴。下面我們在 pom 中添加它:
<dependency>
    <groupId>org.springframework.boot</groupId>
    <artifactId>spring-boot-starter-security</artifactId>
</dependency>
我們將使用 spring-boot 父 POM。因此,我們無需指定其依賴管理中庫的版本。
接下來,讓我們創建一個簡單的控制器以返回一個 User:
@RestController
@RequestMapping("/users")
public class UserController {

    @GetMapping("me")
    public UserDto getMe() {
        return new UserDto(1L, "janedoe", "Doe", "Jane", "[email protected]");
    }
}此時,我們已經擁有一個安全的控制器,它響應對“/users/me”請求。
在啓動應用程序時,Spring Security 會為用户 ‘user’ 生成密碼,該密碼可見於應用程序日誌中。
2.2. 配置 Keycloak
使用 Docker 是啓動本地 Keycloak 最簡單的方法。因此,我們來運行一個帶有已配置管理員賬户的 Keycloak 容器:
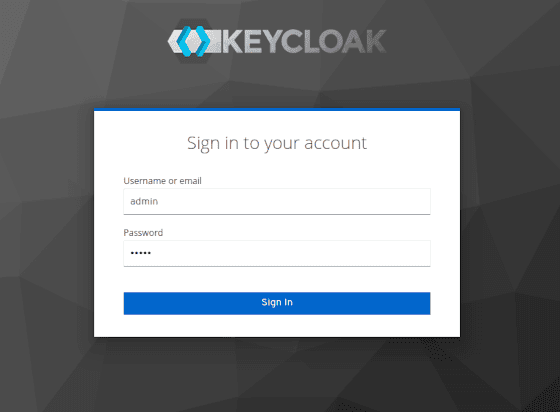
docker run -p 8081:8080 -e KEYCLOAK_ADMIN=admin -e KEYCLOAK_ADMIN_PASSWORD=admin quay.io/keycloak/keycloak:17.0.1 start-dev讓我們打開瀏覽器,訪問 http://localhost:8081,以訪問 Keycloak 控制枱:
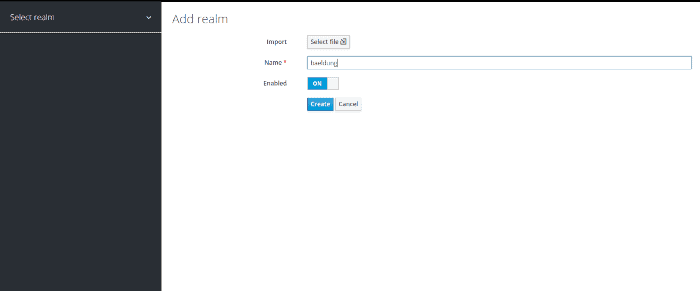
接下來,讓我們創建 Realm。我們將命名為 baeldung:
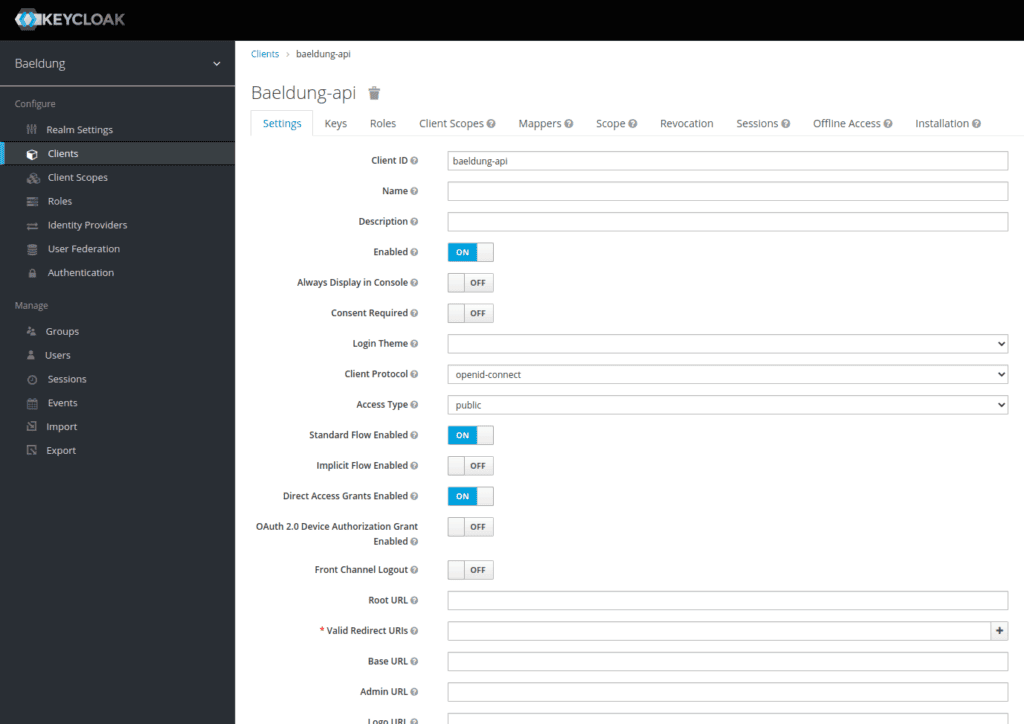
我們需要添加一個客户端,命名為 baeldung-api:
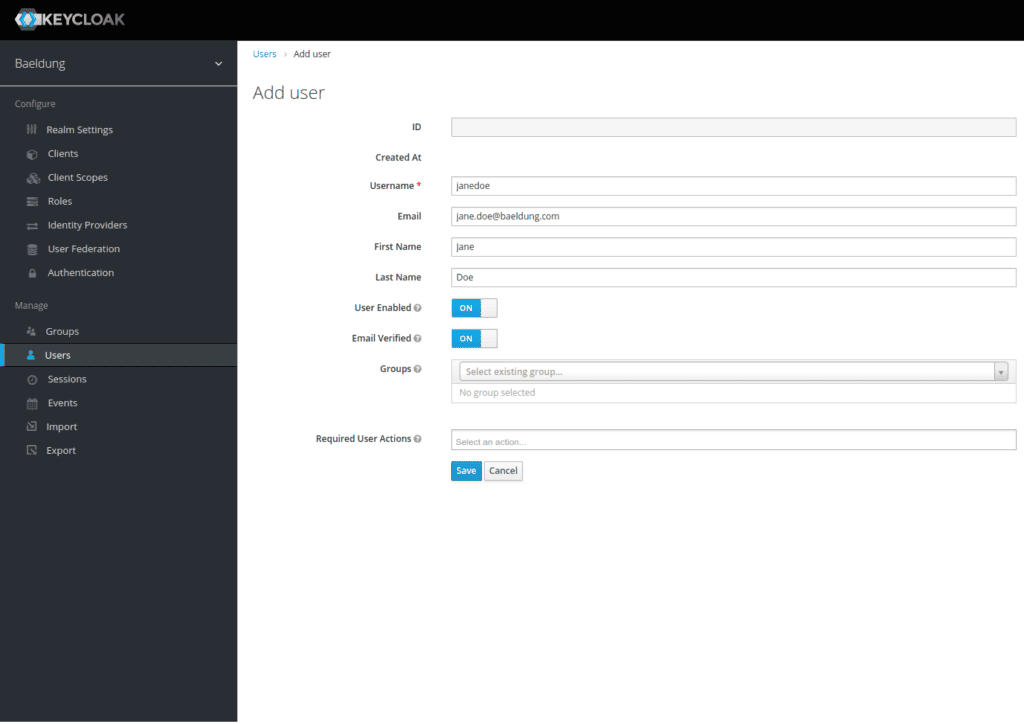
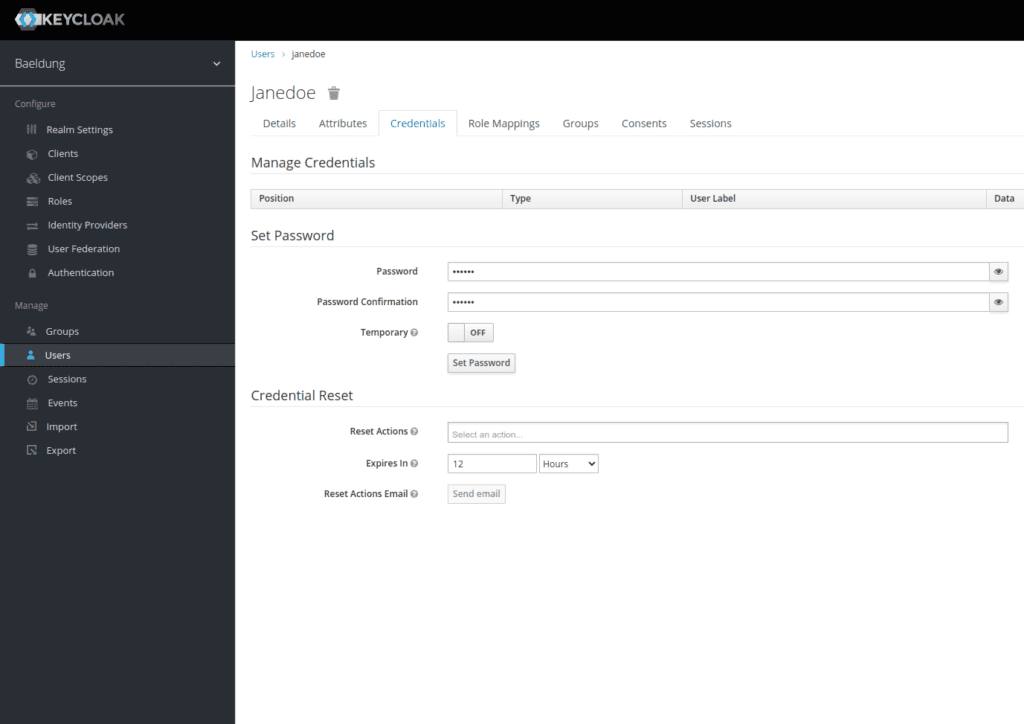
最後,讓我們使用“用户”菜單添加一個 Jane Doe 用户:
現在我們已經創建了用户,必須為其分配密碼。讓我們選擇 s3cr3t 並取消“臨時”按鈕:
我們現在已經配置了 Keycloak Realm,其中包括一個 baeldung-api 客户端和一個 Jane Doe 用户。
接下來,我們將配置 Spring 使用 Keycloak 作為身份提供者。
2.3. 整合使用
首先,我們將身份驗證控制委託給 Keycloak 服務器。為此,我們將使用 spring-boot-starter-oauth2-resource-server 庫。它將允許我們使用 JWT 令牌與 Keycloak 服務器進行驗證。因此,讓我們將其添加到我們的 pom 中:
<dependency>
    <groupId>org.springframework.boot</groupId>
    <artifactId>spring-boot-starter-oauth2-resource-server</artifactId>
</dependency>
讓我們繼續配置 Spring Security 以添加 OAuth 2 資源服務器支持:
@Configuration
@ConditionalOnProperty(name = "keycloak.enabled", havingValue = "true", matchIfMissing = true)
public class WebSecurityConfiguration {

    @Bean
    protected SessionAuthenticationStrategy sessionAuthenticationStrategy() {
        return new NullAuthenticatedSessionStrategy();
    }

    @Bean
    public SecurityFilterChain filterChain(HttpSecurity http) throws Exception {

        return http.csrf()
            .disable()
            .cors()
            .and()
            .authorizeHttpRequests(auth -> auth.anyRequest()
                .authenticated())
            .oauth2ResourceServer(OAuth2ResourceServerConfigurer::jwt)
            .build();
    }
}
我們正在設置一個新的過濾器鏈,該鏈將應用於所有傳入的請求。它將驗證綁定的 JWT 令牌與我們的 Keycloak 服務器。
由於我們正在構建一個無狀態應用程序,並僅使用 bearer 身份驗證,因此我們將使用 NullAuthenticatedSessionStrategy 作為會話策略。 此外,@ConditionalOnProperty 允許通過將 keycloak.enabled 屬性設置為 false 來禁用 Keycloak 配置。
最後,讓我們在 application.properties 文件中添加連接到我們 Keycloak 的配置所需的設置:
keycloak.enabled=true
spring.security.oauth2.resourceserver.jwt.issuer-uri=http://localhost:8180/auth/realms/baeldung-api
我們的應用程序現在已安全,在每個請求中查詢Keycloak以驗證身份驗證。
3. 設置 Testcontainers 用於 Keycloak
This guide will walk you through setting up Testcontainers with Keycloak, allowing you to run integration tests against a running Keycloak instance. This is particularly useful for developing and testing Keycloak extensions and integrations.
Prerequisites:
- Docker installed and running.
- Testcontainers installed:
pip install testcontainers
Steps:
-
Start a Keycloak Container:
First, you need to start a Keycloak container using Docker. This will create a running Keycloak instance that your tests can interact with.
docker run -d --name keycloak -p 8080:8080 quay.io/keycloak/keycloak:23.0.1-d: Runs the container in detached mode (background).--name keycloak: Assigns the name "keycloak" to the container.-p 8080:8080: Maps port 8080 on the host machine to port 8080 in the container.quay.io/keycloak/keycloak:23.0.1: Specifies the Keycloak Docker image to use. Make sure to use the latest version or a version compatible with your tests.
-
Import the Keycloak Testcontainers Provider:
Next, you need to import the Keycloak Testcontainers provider into your Python code. This provider will allow you to interact with the Keycloak container.
from testcontainers.keycloak import KeycloakContainer -
Create a Keycloak Container Instance:
Now, create an instance of the
KeycloakContainerclass. This will automatically start the container if it's not already running.keycloak = KeycloakContainer( image="quay.io/keycloak/keycloak:23.0.1", reuse_containers=True, wait_for_timeout=60, )image: Specifies the Keycloak Docker image to use.reuse_containers: If set toTrue, Testcontainers will reuse existing containers instead of creating new ones, which can significantly speed up test execution.wait_for_timeout: Specifies the timeout (in seconds) for Testcontainers to wait for the container to be ready.
-
Wait for the Container to Start:
Testcontainers will automatically wait for the Keycloak container to start before proceeding. This is handled internally by the
KeycloakContainerclass. -
Interact with Keycloak:
Once the container is running, you can use the
keycloakobject to interact with Keycloak. This might involve creating realms, users, and roles, or performing other Keycloak operations. (Details on interacting with Keycloak are beyond the scope of this guide.) -
Cleanup (Important):
When your tests are finished, it's crucial to stop and remove the Keycloak container to avoid resource leaks and ensure a clean test environment.
keycloak.stop()
keycloak.close()
This will gracefully stop the container and release its resources.
3.1. 導出 Realm 配置
容器在沒有任何配置的情況下啓動。因此,我們需要在容器啓動時將其導入作為 JSON 文件。 讓我們從當前正在運行的實例中導出該文件:
不幸的是,Keycloak 不通過管理界面導出用户。我們可以登錄容器並使用 kc.sh export 命令。對於我們的示例,手動編輯生成的 realm-export.json 文件並添加 Jane Doe 更加方便。 讓我們在最終大括號之前添加此配置:
"users": [
  {
    "username": "janedoe",
    "email": "[email protected]",
    "firstName": "Jane",
    "lastName": "Doe",
    "enabled": true,
    "credentials": [
      {
        "type": "password",
        "value": "s3cr3t"
      }
    ],
    "clientRoles": {
      "account": [
        "view-profile",
        "manage-account"
      ]
    }
  }
]
讓我們將 realm-export.json 文件包含到我們的項目中的 src/test/resources/keycloak 文件夾中。 我們將在啓動 Keycloak 容器期間使用它。
3.2. 設置 Testcontainers
讓我們添加 testcontainers 依賴項以及 testcontainers-keycloak 依賴項,後者允許我們啓動 Keycloak 容器:
testcontainers testcontainers-keycloak
<dependency>
    <groupId>com.github.dasniko</groupId>
    <artifactId>testcontainers-keycloak</artifactId>
    <version>2.1.2</version>
    <scope>test</scope>
</dependency>
<dependency>
    <groupId>org.testcontainers</groupId>
    <artifactId>testcontainers</artifactId>
    <version>1.16.3</version>
</dependency>
接下來,我們創建一個類,該類將作為所有測試用例的基類。我們使用它來配置 Keycloak 容器,該容器由 Testcontainers 啓動:
@SpringBootTest(webEnvironment = WebEnvironment.RANDOM_PORT)
public abstract class KeycloakTestContainers {

    static {
        keycloak = new KeycloakContainer().withRealmImportFile("keycloak/realm-export.json");
        keycloak.start();
    }
}聲明並啓動我們的容器為靜態狀態,將確保它只會在所有測試用例中實例化和啓動一次。我們使用 <em withRealmImportFile 方法從 <em KeycloakContainer 對象中導入 Realm 的配置,以確保其在啓動時正確配置。
3.3. Spring Boot 測試配置
Keycloak 容器使用隨機端口。因此,啓動後我們需要覆蓋 spring.security.oauth2.resourceserver.jwt.issuer-uri 配置,該配置位於我們的 application.properties 中。為此,我們將使用方便的 @DynamicPropertySource 註解:
@DynamicPropertySource
static void registerResourceServerIssuerProperty(DynamicPropertyRegistry registry) {
    registry.add("spring.security.oauth2.resourceserver.jwt.issuer-uri", () -> keycloak.getAuthServerUrl() + "/realms/baeldung");
}
4. 創建集成測試
現在我們已經有了負責啓動 Keycloak 容器和配置 Spring 屬性的主要測試類,讓我們創建一個集成測試,調用我們定義的 User 控制器。
4.1. 獲取訪問令牌
首先,讓我們為我們的抽象類 IntegrationTest 添加一個方法,用於使用 Jane Doe 的憑據請求令牌:
URI authorizationURI = new URIBuilder(keycloak.getAuthServerUrl() + "/realms/baeldung/protocol/openid-connect/token").build();
WebClient webclient = WebClient.builder().build();
MultiValueMap<String, String> formData = new LinkedMultiValueMap<>();
formData.put("grant_type", Collections.singletonList("password"));
formData.put("client_id", Collections.singletonList("baeldung-api"));
formData.put("username", Collections.singletonList("[email protected]"));
formData.put("password", Collections.singletonList("s3cr3t"));

String result = webclient.post()
  .uri(authorizationURI)
  .contentType(MediaType.APPLICATION_FORM_URLENCODED)
  .body(BodyInserters.fromFormData(formData))
  .retrieve()
  .bodyToMono(String.class)
  .block();
在這裏,我們使用 Webflux 的 WebClient 向一個包含獲取訪問令牌所需不同參數的表單進行 POST 請求。
最後,我們將 解析 Keycloak 服務器響應以從中提取令牌。
具體來説,我們生成一個包含 Bearer 關鍵字的經典身份驗證字符串,後跟令牌內容,以便將其用於標頭中:
JacksonJsonParser jsonParser = new JacksonJsonParser();
return "Bearer " + jsonParser.parseMap(result)
  .get("access_token")
  .toString();
4.2. 創建集成測試
讓我們快速設置針對我們配置的 Keycloak 容器的集成測試。我們將使用 RestAssured 和 Hamcrest 進行測試。 讓我們添加 rest-assured 依賴項:
<dependency>
    <groupId>io.rest-assured</groupId>
    <artifactId>rest-assured</artifactId>
    <scope>test</scope>
</dependency>
我們現在可以使用我們的抽象 IntegrationTest 類來創建我們的測試:
@Test
void givenAuthenticatedUser_whenGetMe_shouldReturnMyInfo() {

    given().header("Authorization", getJaneDoeBearer())
      .when()
      .get("/users/me")
      .then()
      .body("username", equalTo("janedoe"))
      .body("lastname", equalTo("Doe"))
      .body("firstname", equalTo("Jane"))
      .body("email", equalTo("[email protected]"));
}因此,我們從 Keycloak 獲取的訪問令牌,已添加到請求的 Authorization 標頭中。
5. 結論
在本文中,我們設置了針對一個實際由 Testcontainers 管理的 Keycloak 的集成測試。我們導入了一個 realm 配置,以便每次啓動測試階段時都能擁有預配置的環境。
