1. 概述
OpenAPI 是一種語言無關、平台無關的規範,用於標準化 REST API。OpenAPI 使用户能夠輕鬆理解 API,而無需深入研究代碼。 Swagger-UI 可以根據此 OpenAPI 規範生成可視化文檔,從而幫助可視化和測試 REST API。
在本教程中,讓我們學習如何生成 OpenAPI 文檔、測試 REST API,以及使用 JWT 身份驗證,並使用 Springdoc-OpenAPI 在 Spring Boot 應用程序中配置。
2. Swagger-UI
Swagger-UI, 一個基於 HTML、JavaScript 和 CSS 文件生成的用户界面集合。它根據 OpenAPI 規範生成用户界面。讓我們使用 Springdoc-OpenAPI 庫來自動生成 OpenAPI 文檔用於 REST API,並使用 Swagger-UI 可視化這些 API。
編寫 OpenAPI 文檔規範可能在應用程序的 API 數量不斷增加時具有挑戰性。Springdoc-OpenAPI 幫助我們自動生成 OpenAPI 文檔。此外,讓我們使用該庫並生成 OpenAPI 文檔。
2.1. Dependencies
首先,讓我們添加 Springdoc-OpenAPI 依賴項:
<dependency>
    <groupId>org.springdoc</groupId>
    <artifactId>springdoc-openapi-ui</artifactId>
    <version>1.7.0</version>
</dependency>
此依賴項還向我們的 Spring Boot 應用程序添加了 Swagger-UI web-jars。
2.2. Configuration
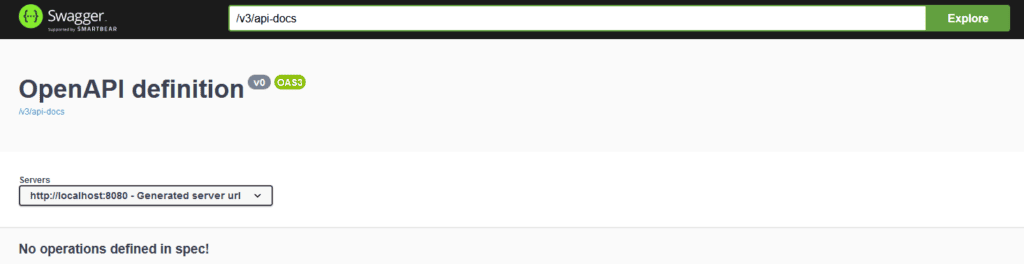
接下來,讓我們啓動應用程序並在瀏覽器中打開 URL http://localhost:8080/swagger-ui.html。
作為結果,我們獲得 Swagger-UI 頁面:
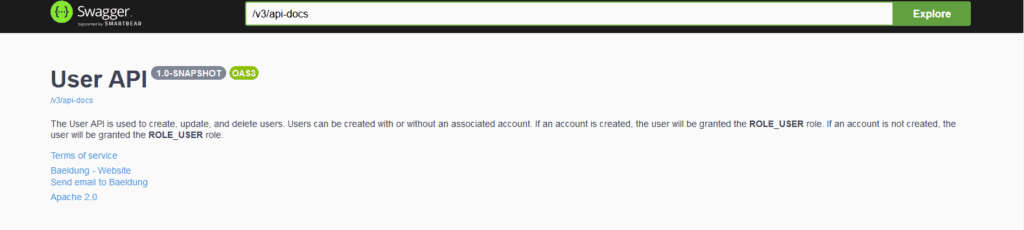
類似於 OpenAPI v3.0 文檔將在 http://localhost:8080/v3/api-docs 可用。
此外,讓我們為我們的 User API 添加描述、服務條款和其它元信息,使用 @OpenAPIDefinition:
@Configuration
@OpenAPIDefinition(
  info =@Info(
    title = "User API",
    version = "${api.version}",
    contact = @Contact(
      name = "Baeldung", email = "[email protected]", url = "https://www.baeldung.com"
    ),
    license = @License(
      name = "Apache 2.0", url = "https://www.apache.org/licenses/LICENSE.2.0"
    ),
    termsOfService = "${tos.uri}",
    description = "${api.description}"
  ),
  servers = @Server(
    url = "${api.server.url}",
    description = "Production"
  )
)
public class OpenAPISecurityConfiguration {}
此外,我們可以外部化配置和元信息。例如,定義 api.version、tos.uri 和 api.description 在 application.properties 或 application.yaml 文件中。
2.3. Test
最後,讓我們測試 Swagger-UI 並檢查 OpenAPI 文檔。
為此,啓動應用程序並打開 URL http://localhost:8080/swagger-ui/index.html 用於 Swagger-UI:
類似於 OpenAPI 文檔將在 http://localhost:8080/v3/api-docs 可用:
{
    "openapi": "3.0.1",
    "info": {
      "title": "User API",
      "termsOfService": "terms-of-service",
     ...
     ...
}
3. JWT Authentication
Springdoc-OpenAPI generates the documentation based on our application REST APIs. Additionally, this documentation can be customized using the Springdoc-OpenAPI annotations.
In this section, let’s learn to configure the JWT-based authentication for our OpenAPIs.
We can configure the JWT authentication for OpenAPI per operation, class, or global level.
3.1. Per-Operation Configuration
To begin with, let’s declare JWT authentication only for specific operations. Let’s define this configuration:
@Configuration
@SecurityScheme(
  name = "Bearer Authentication",
  type = SecuritySchemeType.HTTP,
  bearerFormat = "JWT",
  scheme = "bearer"
)
public class OpenAPI30Configuration {}
@SecurityScheme annotation adds the securitySchemes to the components section of the OneAPI Specification. @SecurityScheme defines a security mechanism that can be used by our APIs. The supported security schemes are APIKey, HTTP Authentication (Basic and Bearer), OAuth2, and OpenID Connect. In this case, let’s use HTTP Bearer Authentication as our security scheme.
For HTTP Bearer token-based authentication, we need to choose the security scheme as bearerAuth and bearer format as JWT.
Since we like to protect only a specific operation, we need to specify the operation that requires authentication. For operation-level authentication, we should use the @SecurityRequirement annotation on the operation:
@Operation(summary = "Delete user", description = "Delete user")
@SecurityRequirement(name = "Bearer Authentication")
@DeleteMapping
description = "A JWT token is required to access this API...",
public String deleteUser(Authentication authentication) {}
With these configurations in place, let’s redeploy the application and hit the URL http://localhost:8080/swagger-ui.html:
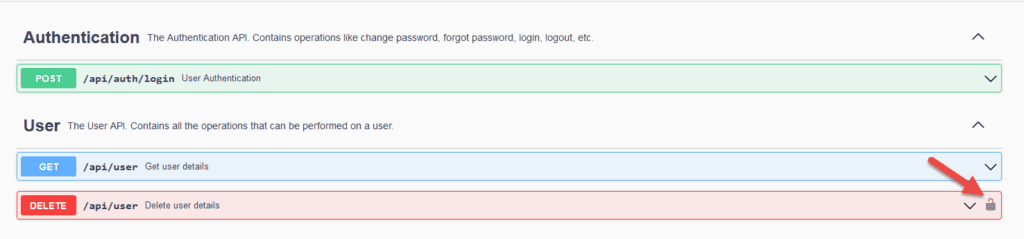
Clicking on the 
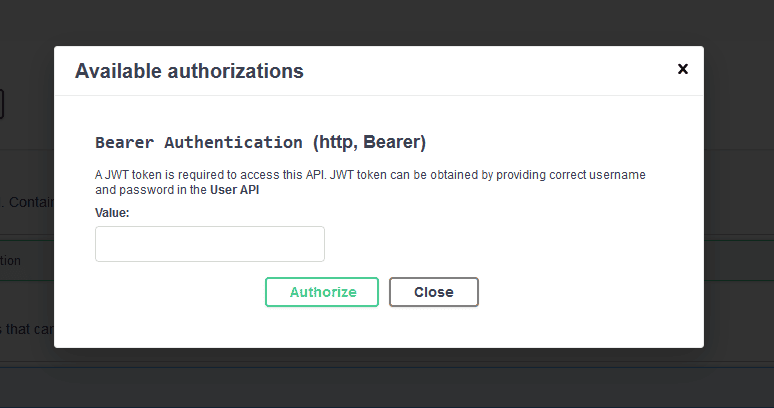
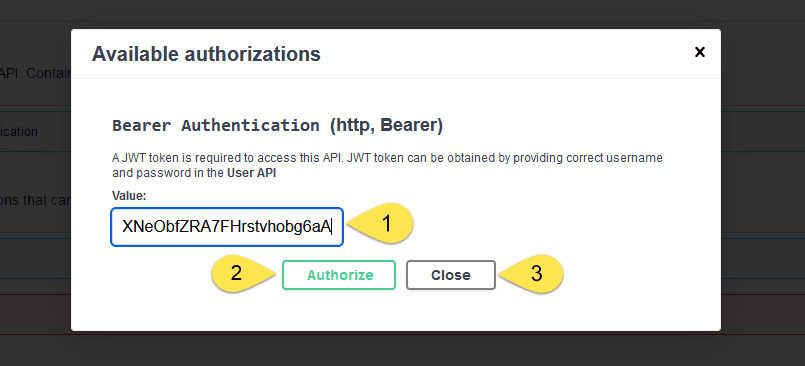
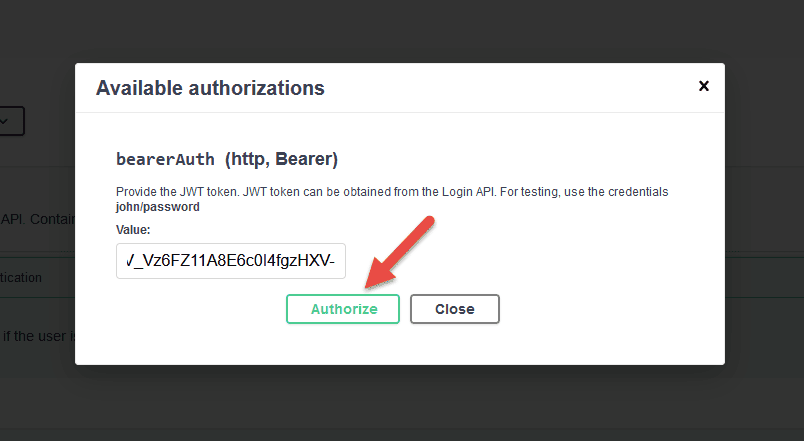
For this example, a JWT token can be obtained by providing john/password or jane/password to the authentication API. Once we get the JWT token, we can pass it in the value textbox and click on Authorize button and then the Close button:
With the JWT token in place, let’s invoke the deleteUser API:
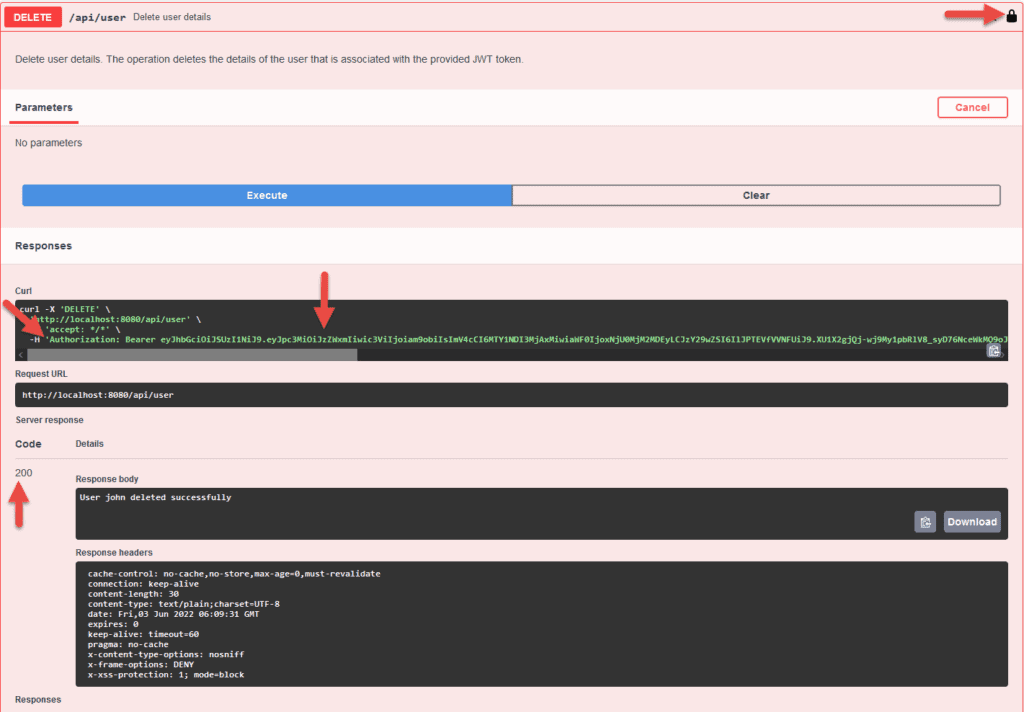
As a result, we see the operation will be provided with a JWT token as indicated by the 
So far, we have configured an operation-level security configuration. Likewise, let’s check the OpenAPI JWT security class and global configurations.
3.2. Class Level Configuration
Similarly, we can provide OpenAPI authentication to all the operations in a class. Declare the @SecurityRequirement annotation on the class that contains all APIs.
@RequestMapping("/api/user")
@RestController
@SecurityRequirement(name = "bearerAuth")
@Tag(name = "User", description = "The User API. Contains all the operations that can be performed on a user.")
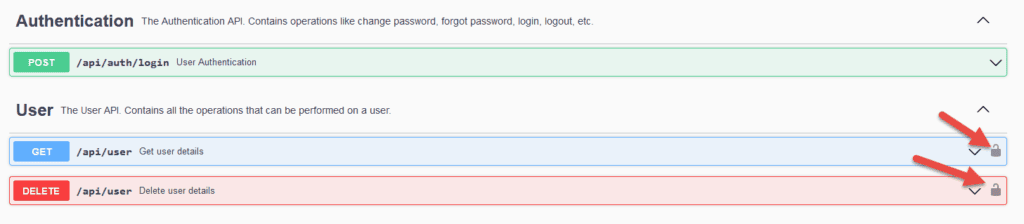
public class UserApi {}Consequently, this configuration enables the security of all the operations in the class UserApi. As a result, assuming that the class has two operations, the Swagger-UI looks like this:
3.3. Global Configuration
Typically, we prefer to keep the OpenAPI authentication to all the APIs in an application. For these situations, we can declare the security at a global level using Spring @Bean annotation.
@Configuration
public class OpenAPI30Configuration {
@Bean
public OpenAPI customizeOpenAPI() {
final String securitySchemeName = "bearerAuth";
return new OpenAPI()
.addSecurityItem(new SecurityRequirement()
.addList(securitySchemeName))
.components(new Components()
.addSecuritySchemes(securitySchemeName, new SecurityScheme()
.name(securitySchemeName)
.type(SecurityScheme.Type.HTTP)
.scheme("bearer")
.bearerFormat("JWT")));
}
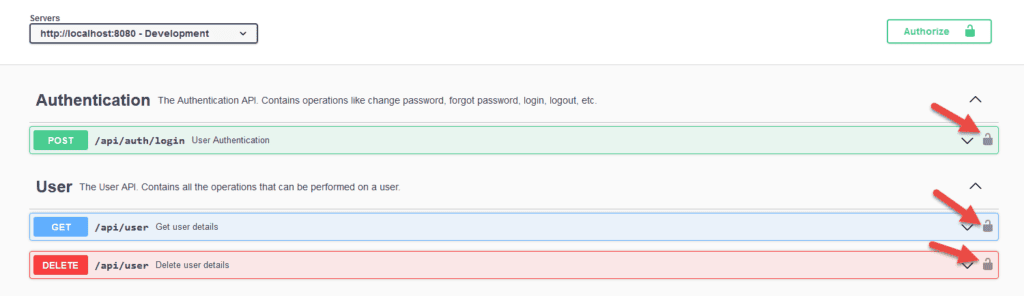
}With this global configuration, the Springdoc-OpenAPI configures JWT authentication to all the OpenAPIs in the application:
Let’s try to invoke the GET API:
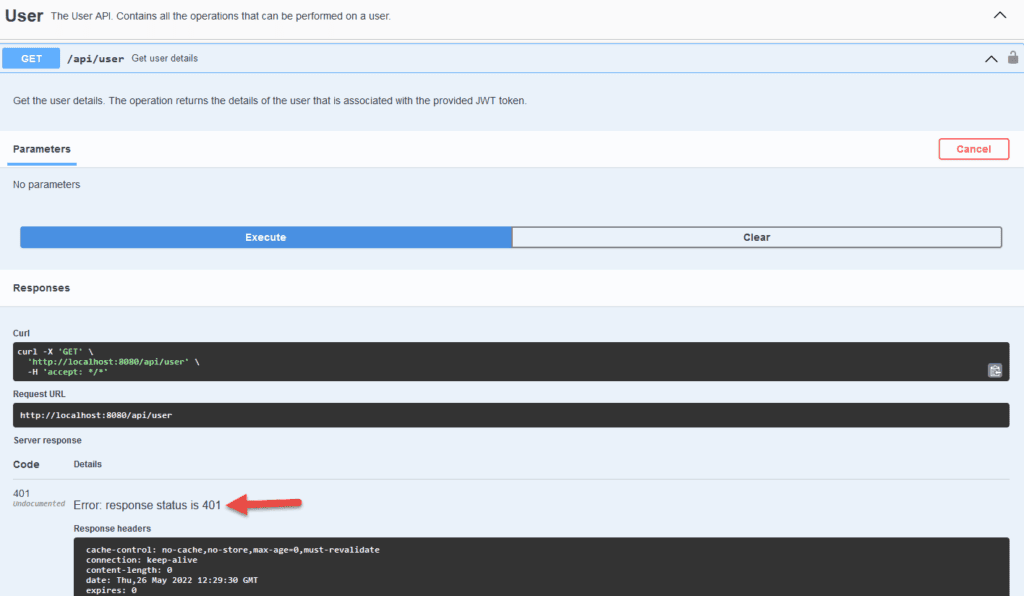
Eventually, we get HTTP 401 Unauthorized. The API is secured, and we haven’t provided the JWT token. Next, let’s provide the JWT token and check the behavior.
Click on Authorize button and provide the JWT token to invoke the operations. We can obtain the bearer token from the authentication API available in the swagger console:
Finally, with the JWT token configured, let’s invoke the API:

At this point, with the correct JWT token, we can successfully invoke our protected APIs.
4. 結論
在本教程中,我們學習瞭如何將 JWT 身份驗證配置到我們的 OpenAPIs 中。Swagger-UI 提供了一個工具,用於根據 OneAPI 規範文檔和測試 REST APIs。Swaggerdoc-OpenAPI 工具幫助我們根據 Spring Boot 應用程序中的 REST APIs 生成該規範。
