1. 概述
Spring REST Docs 生成準確且易讀的 RESTful 服務文檔。它將手寫文檔與使用 Spring 測試生成的自動生成文檔片段相結合。
2. 優點
該項目的核心理念之一是使用測試來生成文檔。這確保生成的文檔始終準確地與 API 的實際行為相匹配。此外,輸出可供 Asciidoctor 處理,這是一個圍繞 AsciiDoc 語法的發佈工具鏈。這是 Spring Framework 文檔使用的也是相同的工具。
這些方法減少了其他框架帶來的侷限性。Spring REST Docs 產生的是準確、簡潔、結構良好的文檔,從而使 Web 服務消費者能夠以最少的麻煩獲取所需的信息。
該工具還有其他優點,例如:
- 生成 curl 和 http 請求片段
- 易於將文檔打包到項目 jar 文件中
- 易於向片段添加額外信息
- 支持 JSON 和 XML
生成片段的測試可以使用 Spring MVC Test 支持、Spring Webflux 的 WebTestClient 或 REST-Assured。
在我們的示例中,我們將使用 Spring MVC 測試,但使用其他框架也非常相似。
3. 依賴項
使用 Spring REST Docs 在項目中使用時的理想方法是使用依賴管理系統。在這裏,我們使用 Maven 作為構建工具,因此可以將以下依賴項複製並粘貼到您的 POM 中:
<dependency>
    <groupId>org.springframework.restdocs</groupId>
    <artifactId>spring-restdocs-mockmvc</artifactId>
    <version>3.0.0</version>
</dependency>
您還可以從 Maven Central 查找依賴項的最新版本 這裏。
在我們的示例中,由於我們正在使用 Spring MVC 測試支持,因此需要 spring-restdocs-mockmvc 依賴項。
如果我們要使用 WebTestClient 或 REST Assured 編寫測試,則需要 spring-restdocs-webtestclient 和 spring-restdocs-restassured 依賴項。
4. 配置
如前所述,我們將使用 Spring MVC Test 框架來向 REST 服務發送請求,這些請求將被記錄。運行測試會產生請求和結果響應的文檔片段。我們可以使用該庫與 JUnit 4 和 JUnit 5 測試一起使用。讓我們看看每種配置所需的步驟。
4.1. JUnit 4 配置
生成 JUnit 4 測試的文檔片段的第一步是聲明一個公共的 JUnitRestDocumentation 字段,並將其註解為 JUnit 的 @Rule。JUnitRestDocumentation 規則配置為將生成的片段保存到輸出目錄。例如,該目錄可以是 Maven 的構建輸出目錄:
@Rule
public JUnitRestDocumentation restDocumentation = new JUnitRestDocumentation("target/generated-snippets");
接下來,我們將設置 MockMvc 上下文,以便配置它以產生文檔:
@Autowired
private WebApplicationContext context;

private MockMvc mockMvc;

@Before
public void setUp(){
    this.mockMvc = MockMvcBuilders.webAppContextSetup(this.context)
      .apply(documentationConfiguration(this.restDocumentation))
      .build();
}
MockMvc 對象使用 MockMvcRestDocumentationConfigurer 進行配置。該類的實例可以從靜態方法 documentationConfiguration() 中獲取,該方法位於 org.springframework.restdocs.mockmvc.MockMvcRestDocumentation 中。
4.2. JUnit 5 配置
要與 JUnit 5 測試一起工作,我們需要使用 RestDocumentationExtension 類擴展測試:@ExtendWith({RestDocumentationExtension.class, SpringExtension.class})
@SpringBootTest
public class ApiDocumentationJUnit5IntegrationTest { //... }此類在使用 Maven 時會自動配置一個 /target/generated-snippets 輸出目錄,或在 Gradle 中使用 /build/generate-snippets。
接下來,我們需要在 @BeforeEach 方法中設置 MockMvc 實例:
@BeforeEach
public void setUp(WebApplicationContext webApplicationContext,
  RestDocumentationContextProvider restDocumentation) {
    this.mockMvc = MockMvcBuilders.webAppContextSetup(webApplicationContext)
      .apply(documentationConfiguration(restDocumentation)).build();
}
如果未使用 JUnit 進行測試,則必須使用 ManualRestDocumentation 類。
5. RESTful 服務
讓我們創建一個 CRUD RESTful 服務以便進行文檔記錄:
@RestController
@RequestMapping("/crud")
public class CRUDController {

    @GetMapping
    public List<CrudInput> read(@RequestBody CrudInput crudInput) {
        List<CrudInput> returnList = new ArrayList<CrudInput>();
        returnList.add(crudInput);
        return returnList;
    }

    @ResponseStatus(HttpStatus.CREATED)
    @PostMapping
    public HttpHeaders save(@RequestBody CrudInput crudInput) {
        HttpHeaders httpHeaders = new HttpHeaders();
        httpHeaders.setLocation(
          linkTo(CRUDController.class).slash(crudInput.getTitle()).toUri());
        return httpHeaders;
    }

    @DeleteMapping("/{id}")
    public void delete(@PathVariable("id") long id) {
        // delete
    }
}
然後,我們還將添加一個 IndexController,它返回一個包含指向 CRUDController 基本端點的頁面的鏈接:
@RestController
@RequestMapping("/")
public class IndexController {

    static class CustomRepresentationModel extends RepresentationModel<CustomRepresentationModel> {
        public CustomRepresentationModel(Link initialLink) {
            super(initialLink);
        }
    }

    @GetMapping
    public CustomRepresentationModel index() {
        return new CustomRepresentationModel(linkTo(CRUDController.class).withRel("crud"));
    }
}
6. JUnit Tests
Back in the tests, we can use the MockMvc instance to call our services and document the request and response.
First, to make sure every MockMvc call is automatically documented without any further configuration we can use the alwaysDo() method:
this.mockMvc = MockMvcBuilders
  //...
  .alwaysDo(document("{method-name}",
    preprocessRequest(prettyPrint()), preprocessResponse(prettyPrint())))
  .build();
This set up ensures that every for every MockMvc call, the default snippets are created in a folder with the test method’s name. Also, applying the prettyPrint() pre-processor displays the snippets in a more easily-readable manner.
Let’s continue with customizing some of our calls.
To document our index page which contains a link, we can use the static links() method:
@Test
public void indexExample() throws Exception {
    this.mockMvc.perform(get("/")).andExpect(status().isOk())
      .andDo(document("index",
        links(linkWithRel("crud").description("The CRUD resource")),
        responseFields(subsectionWithPath("_links")
          .description("Links to other resources"))
        responseHeaders(headerWithName("Content-Type")
          .description("The Content-Type of the payload"))));
}
Here, we’re using the linkWithRel() method to document a link to
To add a Content-Type header to the response we’re documenting it using the headerWithName() method and adding it to the responseHeaders() method.
We’re also documenting the response payload using the responseFields() method.
@Test
public void crudCreateExample() throws Exception {
    Map<String, Object> crud = new HashMap<>();
    crud.put("title", "Sample Model");
    crud.put("body", "http://www.baeldung.com/");

    this.mockMvc.perform(post("/crud").contentType(MediaTypes.HAL_JSON)
      .content(this.objectMapper.writeValueAsString(crud)))
      .andExpect(status().isCreated())
      .andDo(document("create-crud-example",
        requestFields(fieldWithPath("id").description("The id of the input"),
          fieldWithPath("title").description("The title of the input"),
          fieldWithPath("body").description("The body of the input"),
        ))));
}
In this example, we’ve documented our POST request that receives a CrudInput model with title and body fields and sends a CREATED status. Each field is documented using the fieldWithPath() method.
To document request and path parameter, we can use the requestParameters() and pathParameters() methods.
@Test
public void crudDeleteExample() throws Exception {
    this.mockMvc.perform(delete("/crud/{id}", 10)).andExpect(status().isOk())
      .andDo(document("crud-delete-example",
      pathParameters(
        parameterWithName("id").description("The id of the input to delete")
      )));
}
Here, we’ve documented our delete endpoint which receives an id path parameter.
The Spring REST Docs project contains even more powerful documentation functionalities, such as field constraints and request parts that can be found in the documentation.
7. 輸出
構建成功後,REST 文檔片段將被生成並保存到 target/generated-snippets 文件夾中:

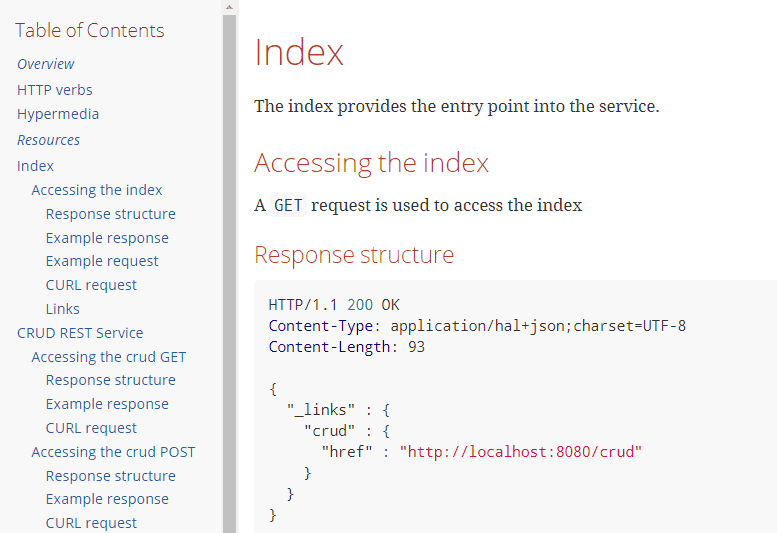
生成的輸出將包含有關服務的相關信息,包括如何調用 REST 服務(如 ‘curl’ 調用)、REST 服務請求和響應,以及指向服務的鏈接/端點:
<strong>CURL 命令</strong>
----
$ curl 'http://localhost:8080/' -i
----
<strong>HTTP – REST 響應</strong>
----
HTTP/1.1 200 OK
Content-Type: application/hal+json;charset=UTF-8
Content-Length: 93
{
"_links" : {
"crud" : {
"href" : "http://localhost:8080/crud"
}
}
}
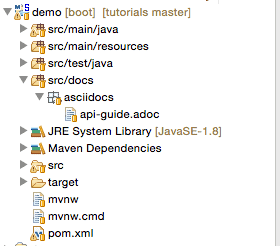
----8. 使用片段創建文檔要將片段用於更大的文檔中,可以使用 Asciidoc 的 includes 進行引用。 在我們的情況下,我們創建了一個名為 api-guide.adoc 的文檔,位於 src/docs:
在該文檔中,如果我們想引用“鏈接”片段,可以使用佔位符 {snippets},Maven在處理文檔時會將其替換為片段:
==== 鏈接

include::{snippets}/index-example/links.adoc[]
9. Asciidocs Maven 插件
為了將 API 指南從 Asciidoc 轉換為可讀格式,我們可以將 Maven 插件添加到構建生命週期中。以下是啓用此過程的步驟:
- 將 Asciidoctor 插件應用於 pom.xml
- 在 testCompile配置中添加對 spring-restdocs-mockmvc的依賴,如依賴部分所述
- 配置屬性以定義生成的片段的輸出位置
- 配置 test任務以將片段目錄作為輸出
- 配置 asciidoctor任務
- 定義一個名為 snippets的屬性,可用於在文檔中包含生成的片段
- 使任務依賴於 test任務,以便在創建文檔之前運行測試
- 配置 snippets目錄作為輸入。所有生成的片段將被創建在該目錄下
將片段目錄作為屬性在 pom.xml中,以便 Asciidoctor 插件可以使用此路徑在指定文件夾下生成片段:
<properties>
    <snippetsDirectory>${project.build.directory}/generated-snippets</snippetsDirectory>
</properties>
在 pom.xml中生成的 Asciidoc 片段的 Maven 插件配置如下:
<plugin>
    <groupId>org.asciidoctor</groupId>
    <artifactId>asciidoctor-maven-plugin</artifactId>
    <version>1.5.6</version>
    <executions>
        <execution>
            <id>generate-docs</id>
            <phase>package</phase>
            <goals>
                <goal>process-asciidoc</goal>
            </goals>
            <configuration>
                <backend>html</backend>
                <doctype>book</doctype>
                <attributes>
                    <snippets>${snippetsDirectory}</snippets>
                </attributes>
                <sourceDirectory>src/docs/asciidocs</sourceDirectory>
                <outputDirectory>target/generated-docs</outputDirectory>
             </configuration>
	 </execution>
    </executions>
</plugin>
10. API 文檔生成流程
當 Maven 構建運行並執行測試時,所有代碼片段將被生成在 target/generated-snippets目錄下的 snippets文件夾中。 一旦代碼片段生成完畢,構建過程會生成 HTML 輸出。
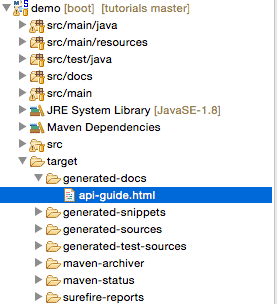
生成的 HTML 文件格式化良好,可讀性高,因此 REST 文檔已準備好使用。 每次 Maven 構建運行時,文檔也會隨最新更新生成。
11. 結論
沒有文檔比錯誤的文檔要好,但 Spring REST docs 將幫助生成準確的 RESTful 服務文檔。
作為官方 Spring 項目,它通過使用三個測試庫來實現其目標:Spring MVC Test、WebTestClient 和 REST Assured。這種生成文檔的方法可以幫助支持基於測試的 RESTful API 開發和文檔編寫方法。
